Building the Wilson Natural Home
Contents
November 25 2000 — Glulam Post and Beam Framing Ground Floor
April 14, 2001 — Straw Bale Happening: Like an Old Fashioned Barn Raising
August 16, 2008 — New Solar Panels: Summer Sun Flowers Brighten Organic Vegetable Garden
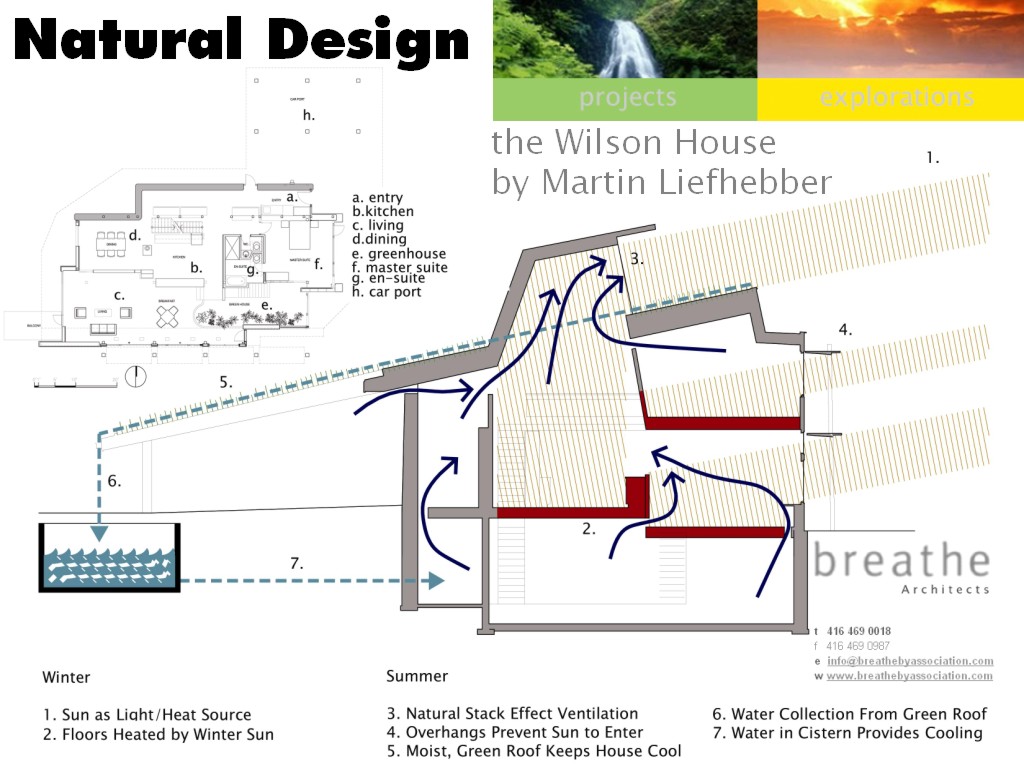
July 1999 — The Design
The design and build process for the Wilson Solar house. We spent several months reviewing ideas, our desires, theories on how to use the natural material present at the site, how to extend the seasons using shielding on the south side and much more.
July 1999 - Natural design techniques. Sensible for winter and summer. Design by Martin Liefhebber, architect - www.martinliefhebber.com . Winner! Sustainable Design Category The National Post Design Exchange Awards competition is Canada's only awards program to judge design by results; balancing function, aesthetics and economic success.

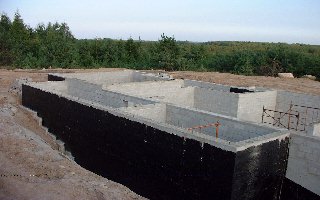
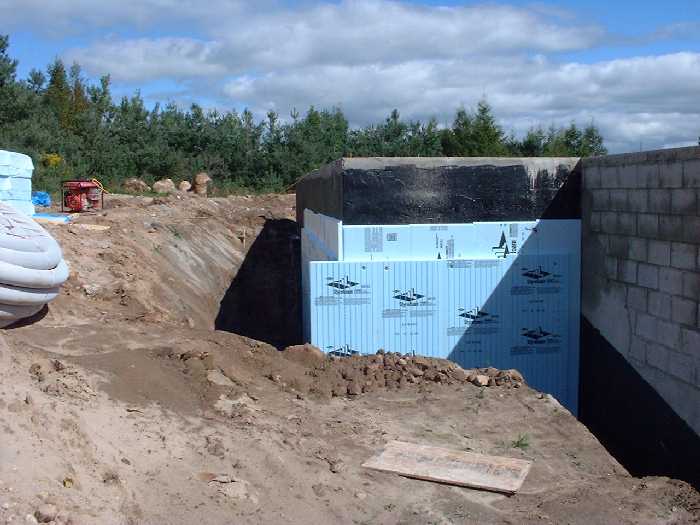
August 2000 — The Foundation
Once the foundation was completed the walls were insulated and then we put up the steel beams that will hold up the centre of the house. The foundation has been built with local concrete blocks. The black coating will provides water proofing.
August 31, 2000 - The foundation is in!
September 2000 - Exterior and some interior foundation walls get nearly four inches of foam insulation. Putting this on the outside removes the potential for condensation on the inside walls, not to mention improving the insulation levels substantially.
September 2000 - The steel beams hold up the heavy concrete floor as well as the vegetative roof that will eventually rest on these posts. Colin gets expert help from the Wilson family as the critical height for the ground floor is determined.
September 2000 - Colin has carefully prepared to get the beams perfectly level.
September 2000 - Using a transit we make sure that the beam is at the correct relative height.

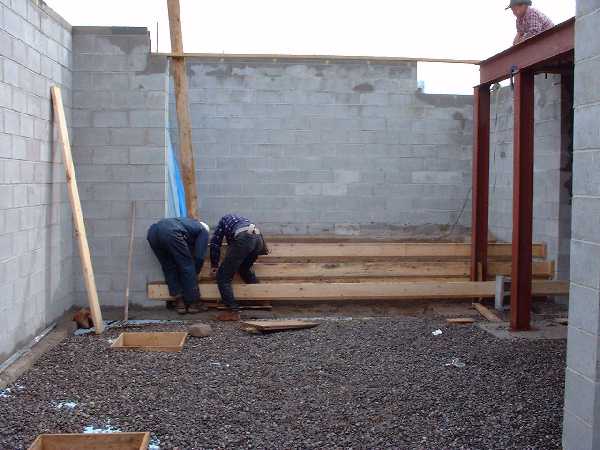
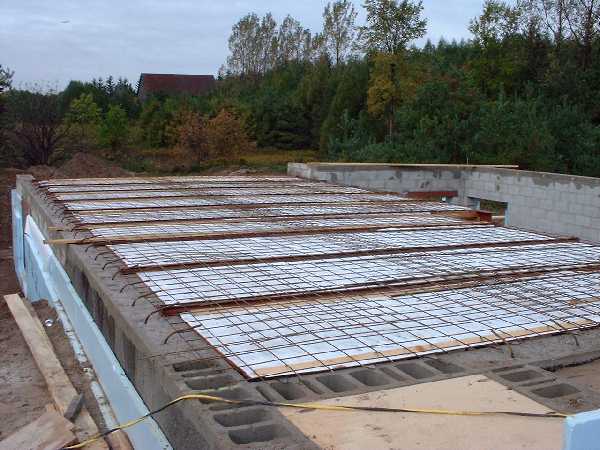
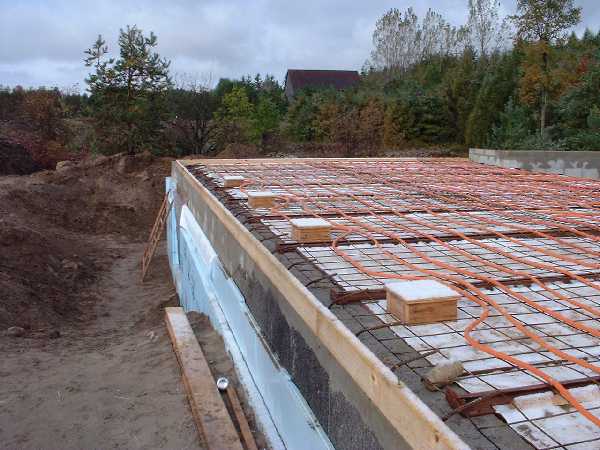
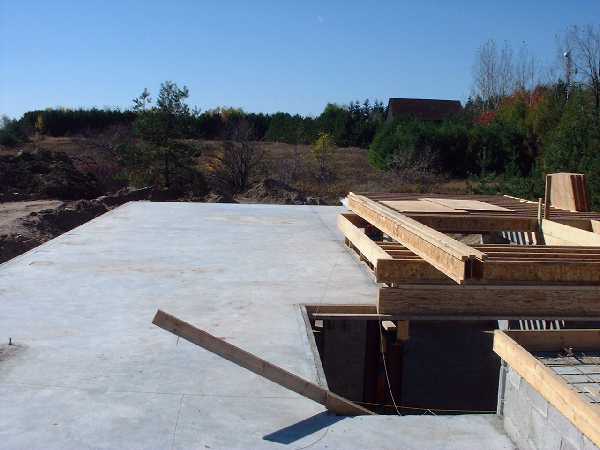
October 4 2000 — The Ground Floor
The foundation is done and we start the process of embedding the floors with mass to collect solar heat passively. After this stage water tubing will be tied into the floor just before the concrete is poured. This is the basis for the in-floor heating/cooling system used throughout the house.
October 4 2000 - The joists are ready in the basement. Tyvek was added after this picture was taken to create a smooth ceiling finish.
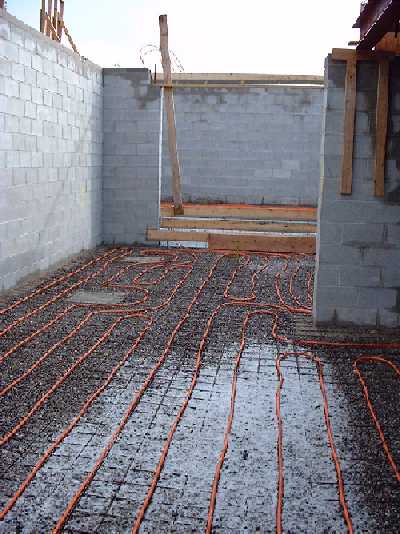
October 4 , 2000 - The basement floor is ready to have steel lattice and then the water pipes laid out for in floor heating. Steps are formed for easy access to the central composting toil system area.
October 4 2000 - The ground floor is ready for the in-floor heating/cooling system to be installed.
October 4, 2000 - Looking west down into basement. The doorway on the far right leads to the future "cold room" where we will store food that needs to be kept cold.

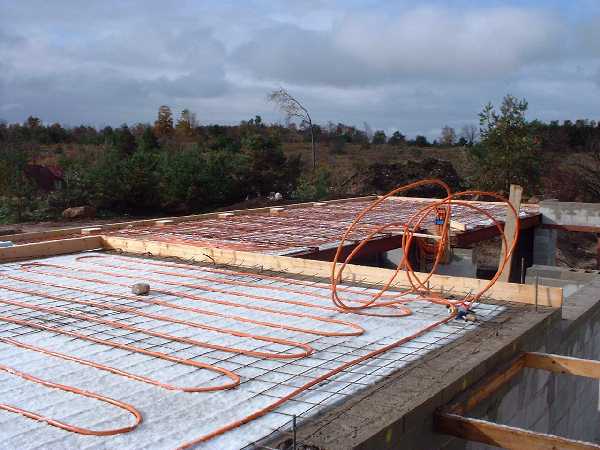
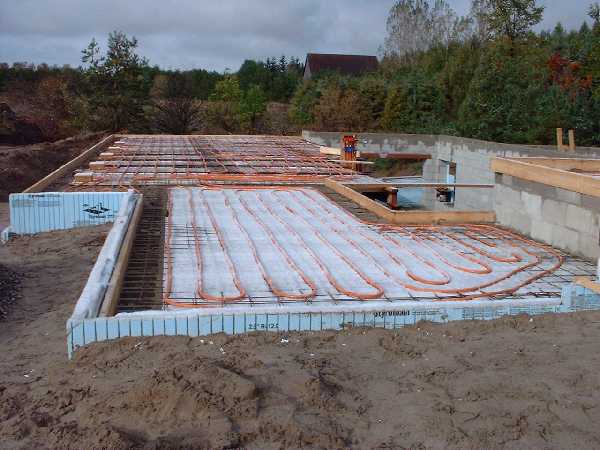
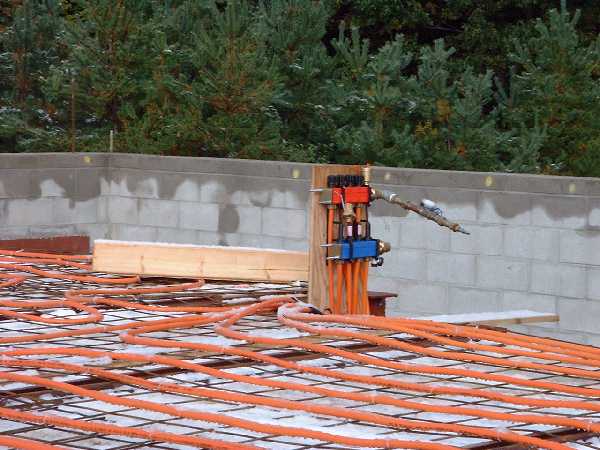
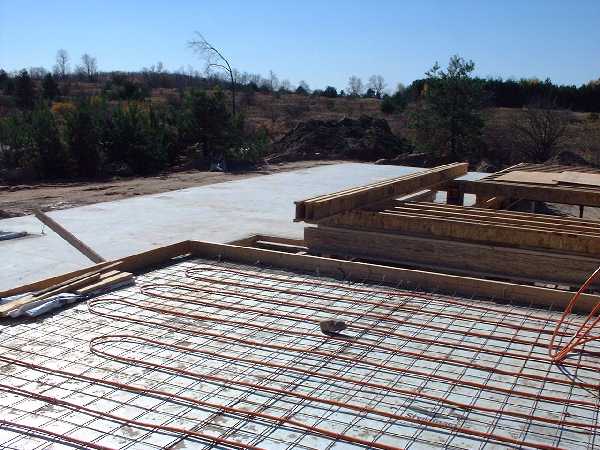
October 8 2000 — In Floor Heating
In-Floor Heating Extensive tubing is tied to the steel wire grid that reinforces the floor. This will provide both our heat collection and distribution. It can also provide cooling during the summer.
October 8 2000 - The master bedroom in the foreground with the living room in the background looking south west over the property.
October 8 , 2000 - The ground floor on the south side. A major collection area for passive solar heat.
October 8 2000 - The ground floor heating tubing comes together at a distribution point.
October 4, 2000 - Looking west down into basement. The square wooden boxes will provide the forming for the tempered glass windows which will be placed in the concrete floor. This brilliant design idea that Martin suggested will provide excellent lighting for the basement as well as adding interest to the ground floor living room.
October 8, 2000 - The basement gets extensive tubing for in floor heating.
October 8, 2000 - The water cistern which will hold our rain water collected from the vegetative roof.
October 16 2000 — Ground Floor Done
Ground Floor Extensive tubing is tied to the steel wire grid that reinforces the floor. This will provide both our heat collection and distribution. It can also provide cooling during the summer.
October 16 2000 - The master bedroom looking south west into the living room (left) and kitchen (right). Here the concrete has been poured in the living room to the south while the master bedroom in the foreground awaits completion.
October 16 , 2000 - The ground floor on the east side looking west. The in-floor heating system has been covered in concrete and smooth floor remains as the final surface.
October 16 2000 - The ground floor heating tubing comes together at a distribution point.
November 5 2000 — Walkout Basement
Walkout Basment The ground floor joists are in and the basement takes shape. Exentsive use of natural light is provided by windows and openings into the basement.
November 5, 2000 - The ground floor on the south side is in. Martin has suggested we leave the opening through to the basement so that we get lots of natural light. Looks good at this stage.
November 5, 2000 - Stairway down from the green house on the south side into the basement. Eventually this will be the way we empty the central composting toilet system that will sit here.
November 5, 2000 - Walk out on the west side with lots of windows to capture the setting sun.
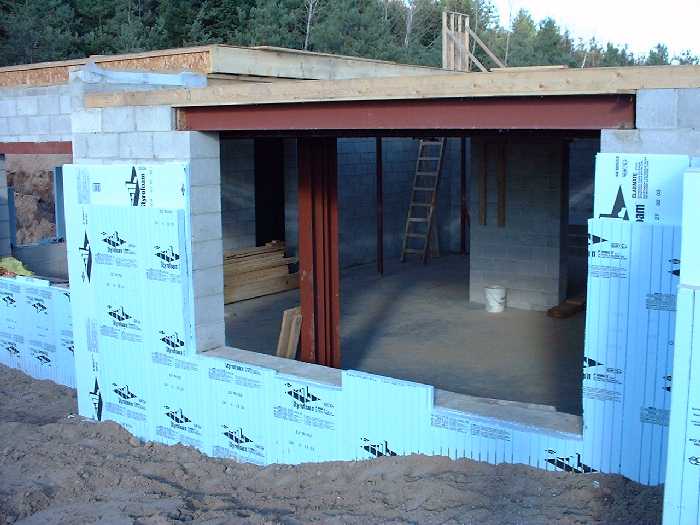
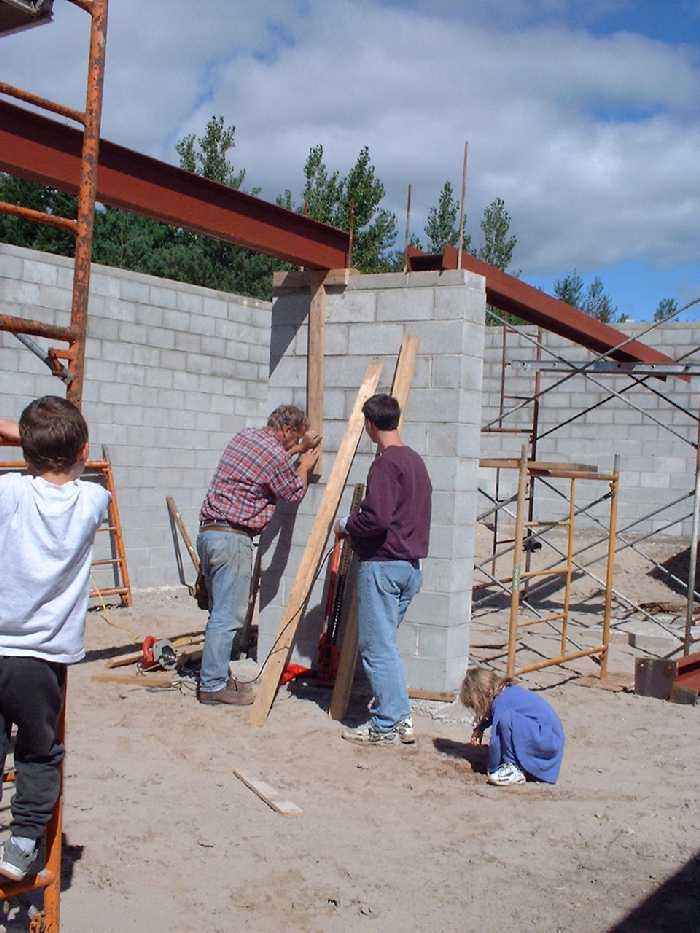
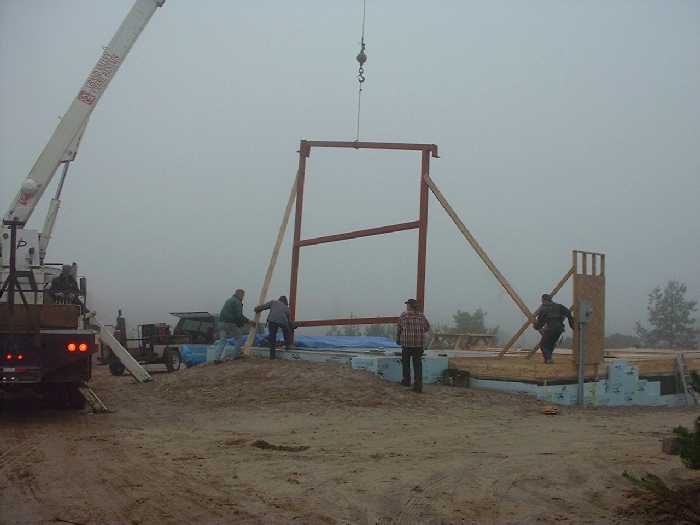
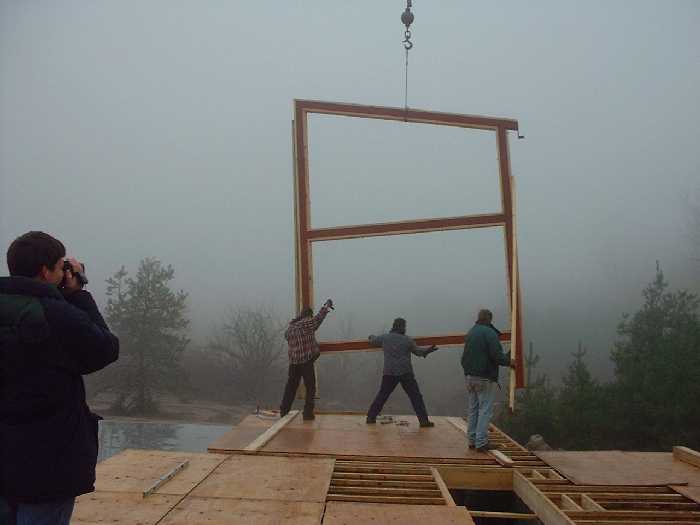
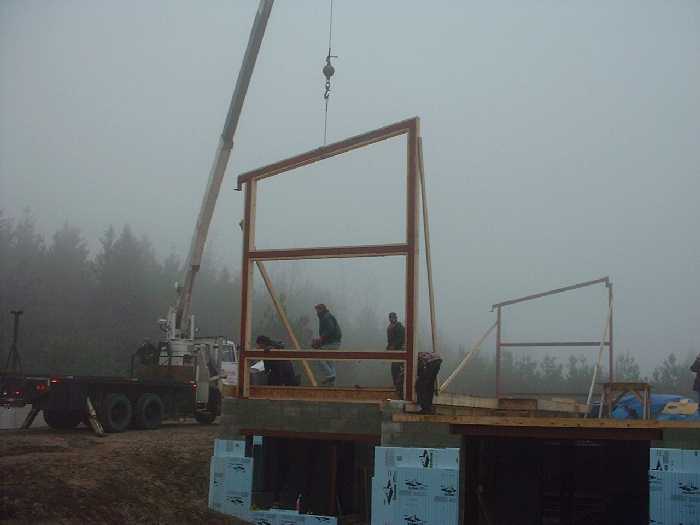
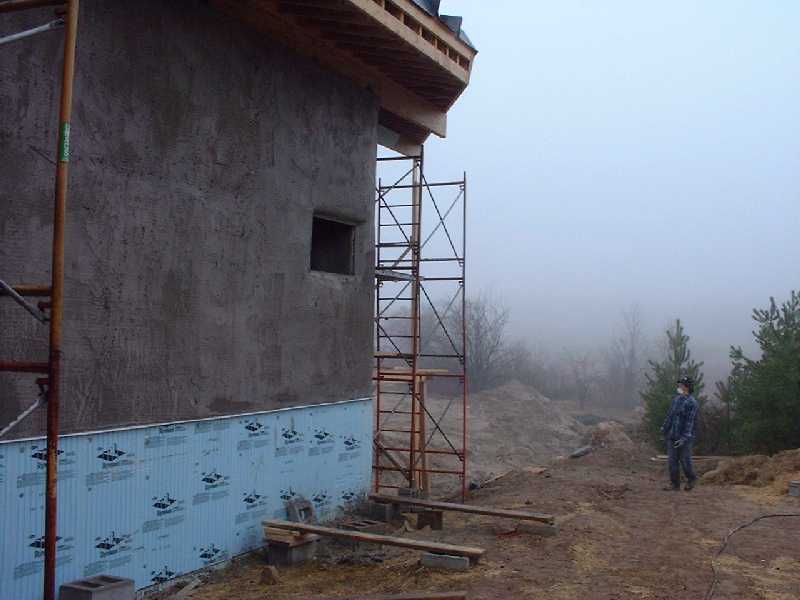
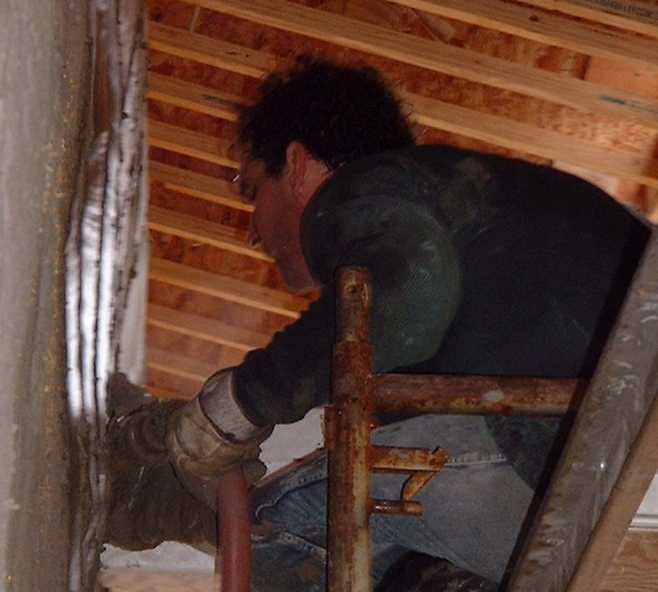
November 13 2000 — Steel Framing
Heavy duty steel is being used to brace the house for strong winds and a heavy vegetative roof. Straw bales will fill in the post and beam construction along the north portions of the house.
November 13, 2000 - Framing around the master bedroom on the east side with steel. This was a cold and foggy morning.
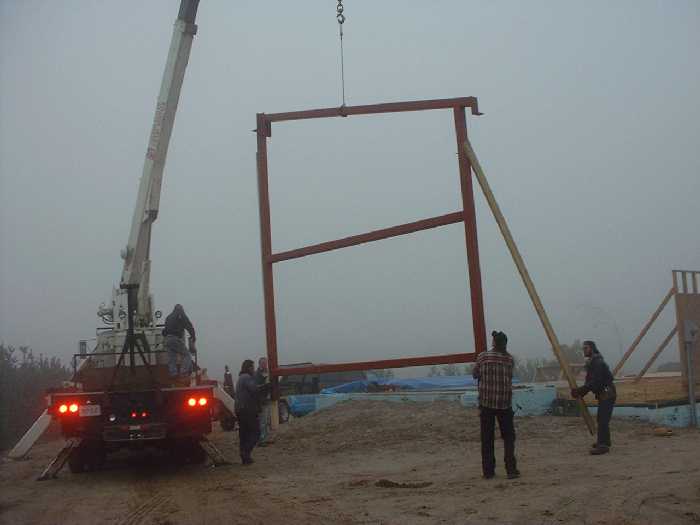
November 13 , 2000 - Positioning the frame and fastening to the foundation.
November 13, 2000 - Steel framing for the west side of the house.
November 13 , 2000 - Looking east as the west frame is positioned. The east frame is in position and ready for post and beam construction.
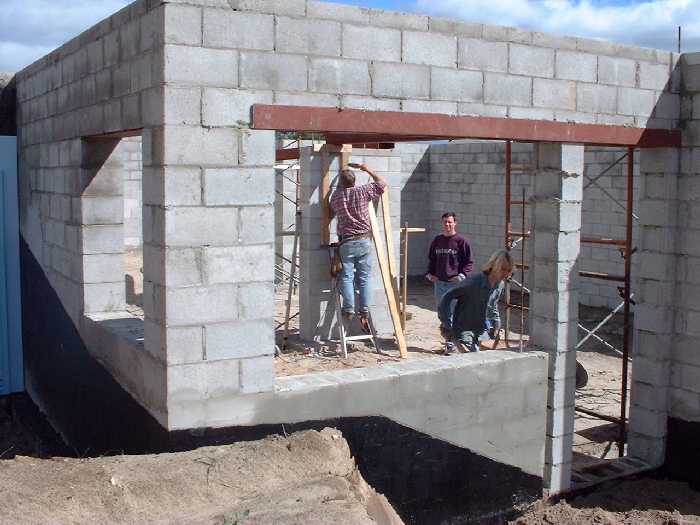
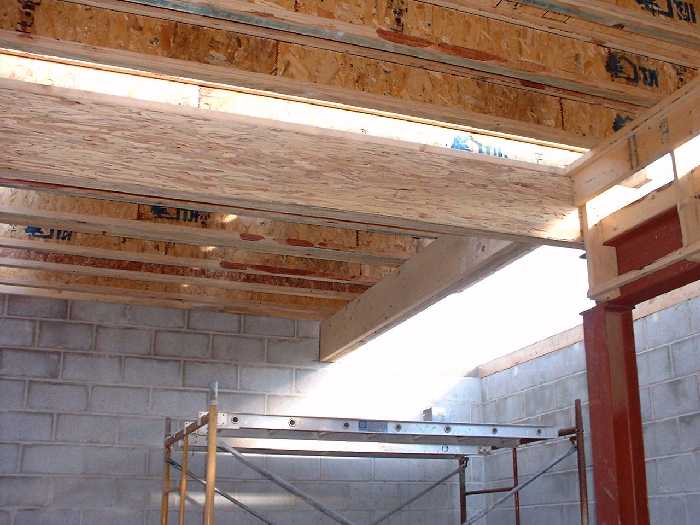
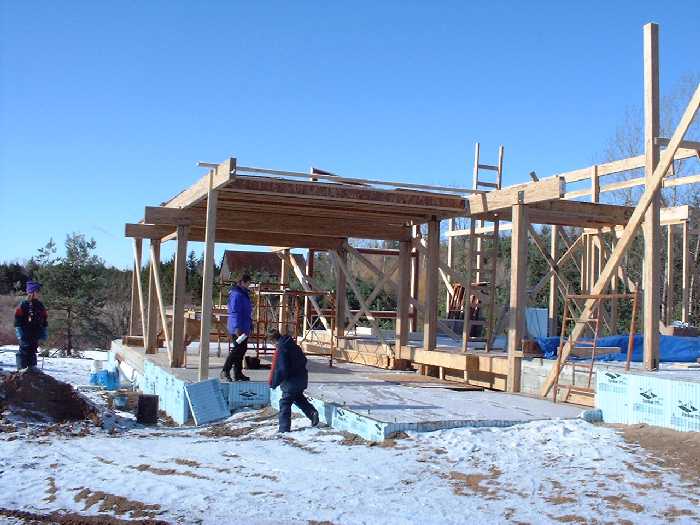
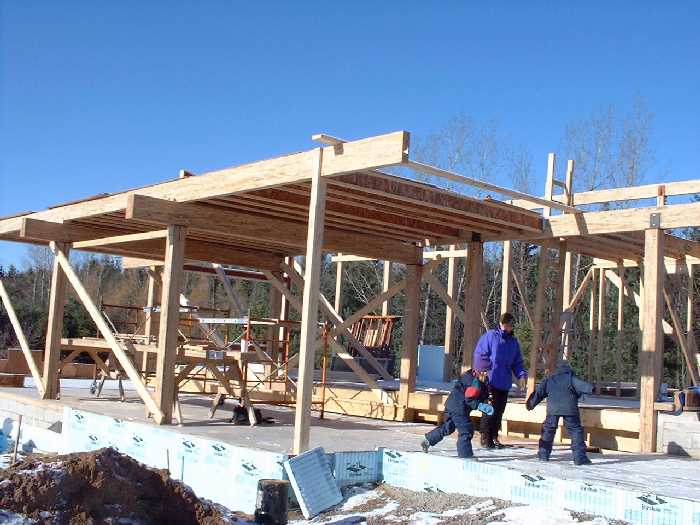
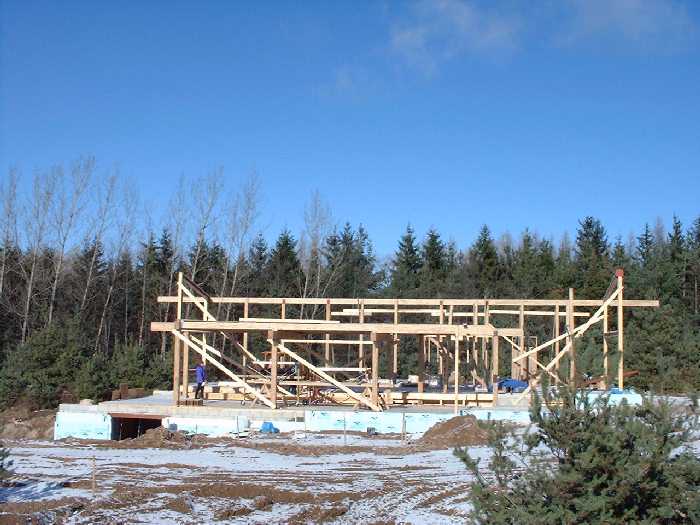
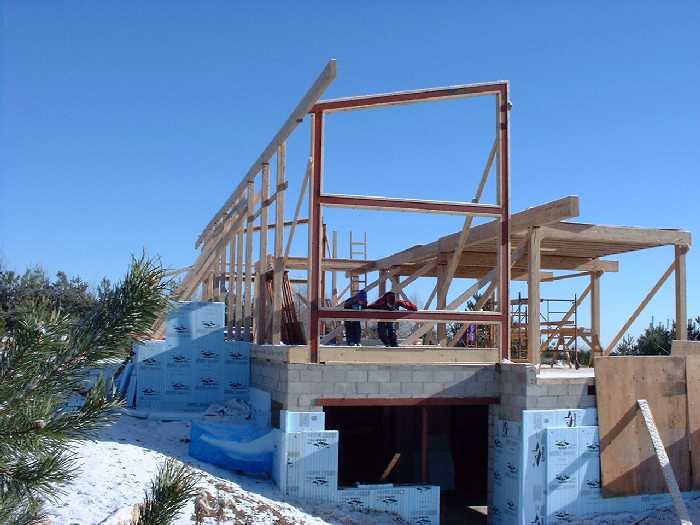
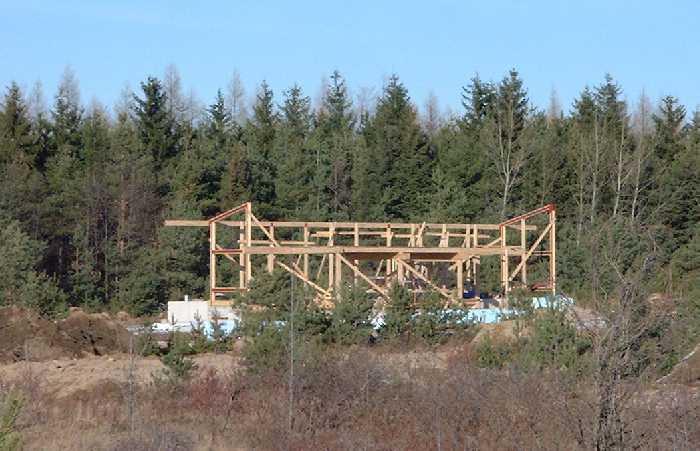
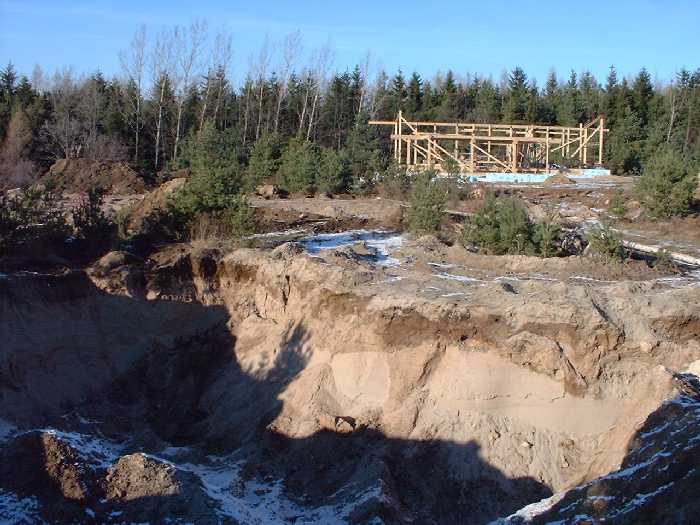
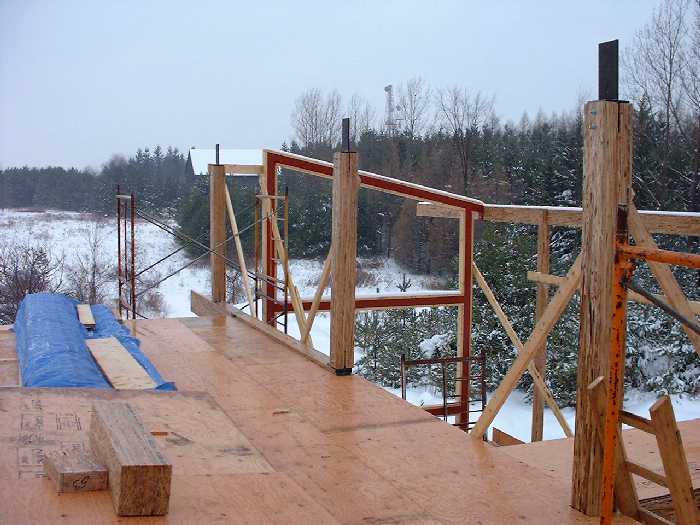
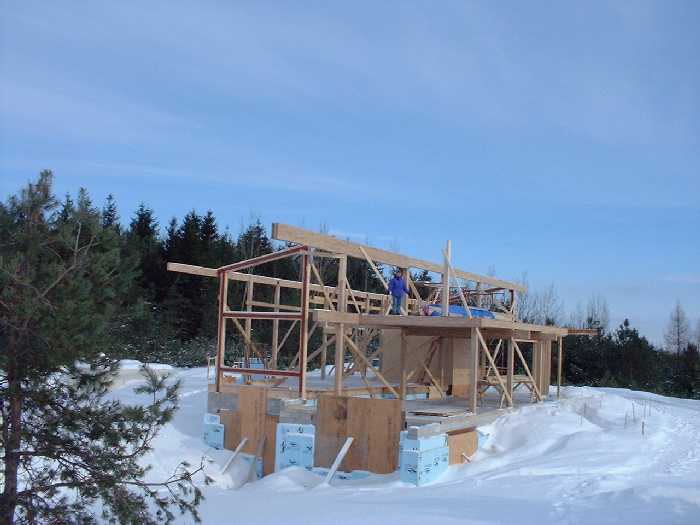
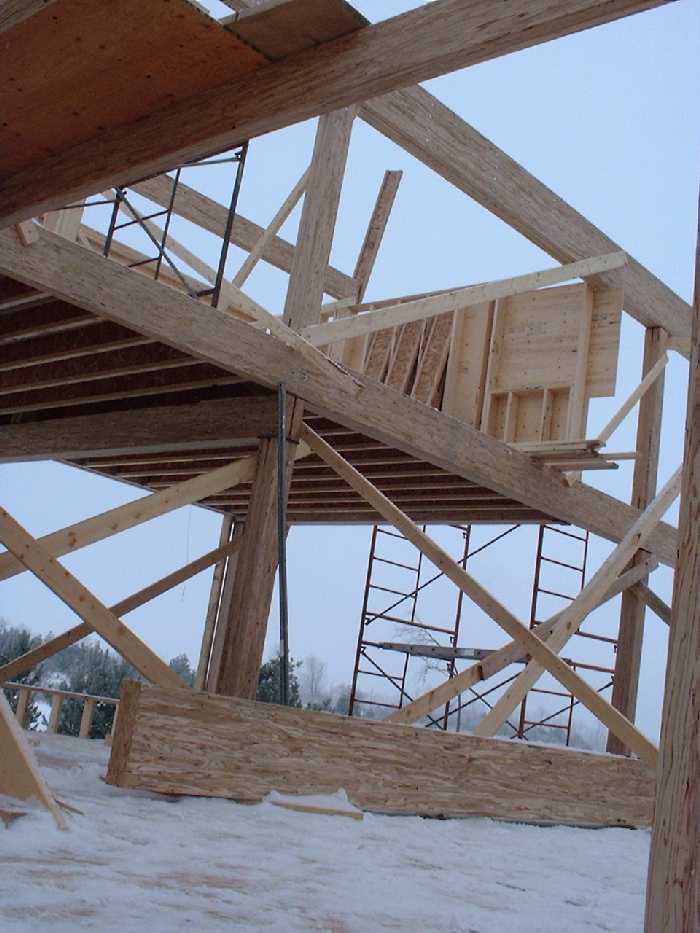
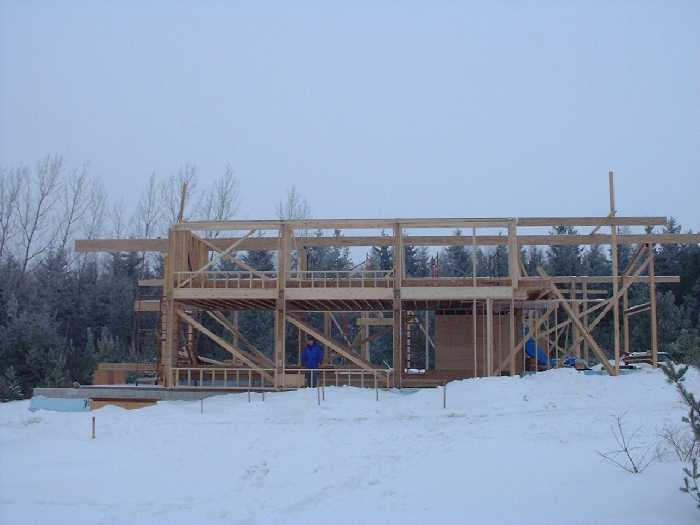
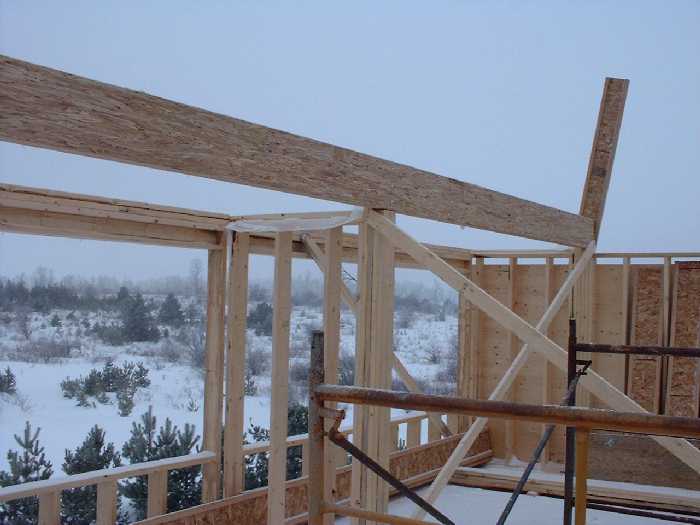
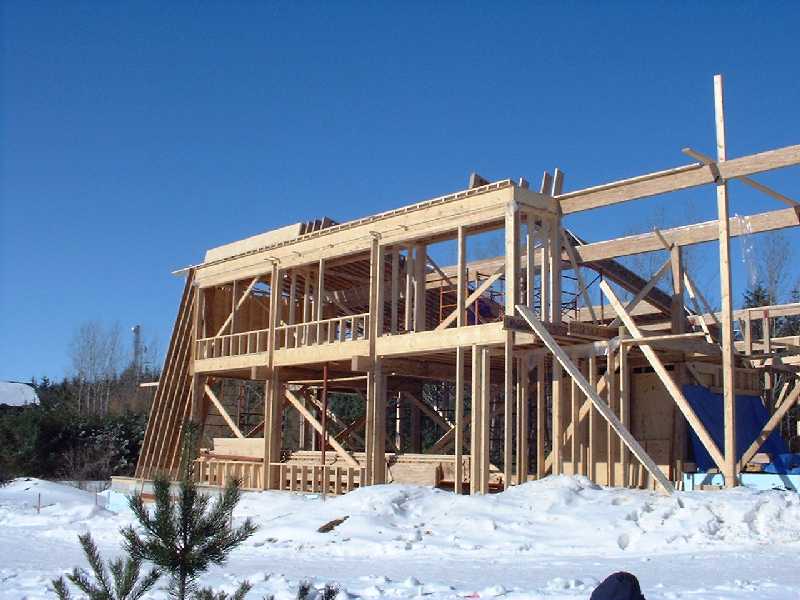
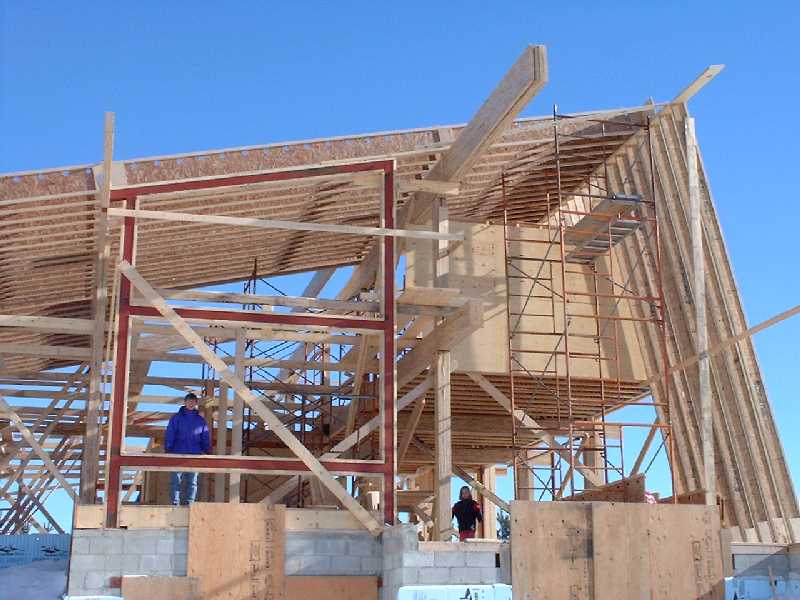
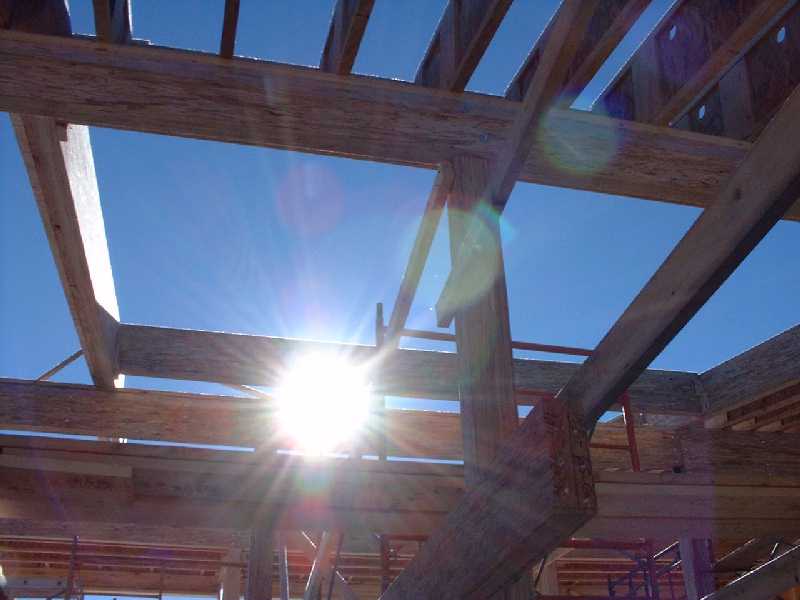
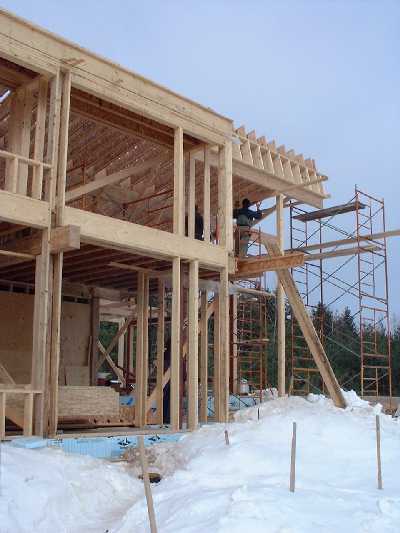
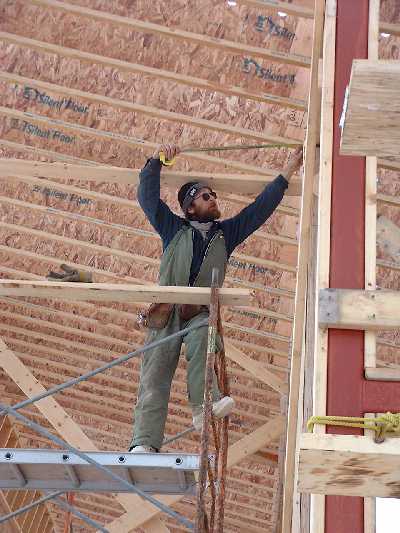
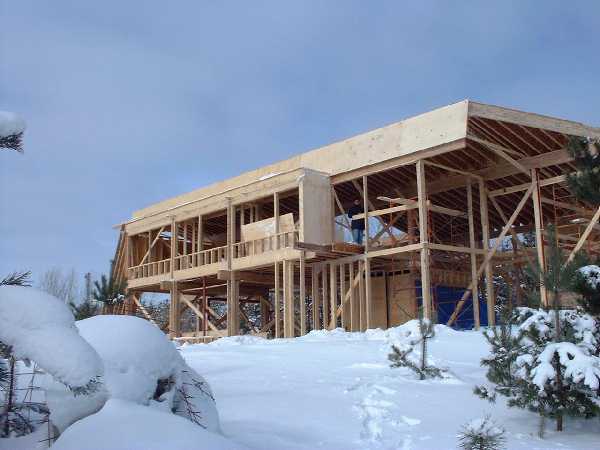
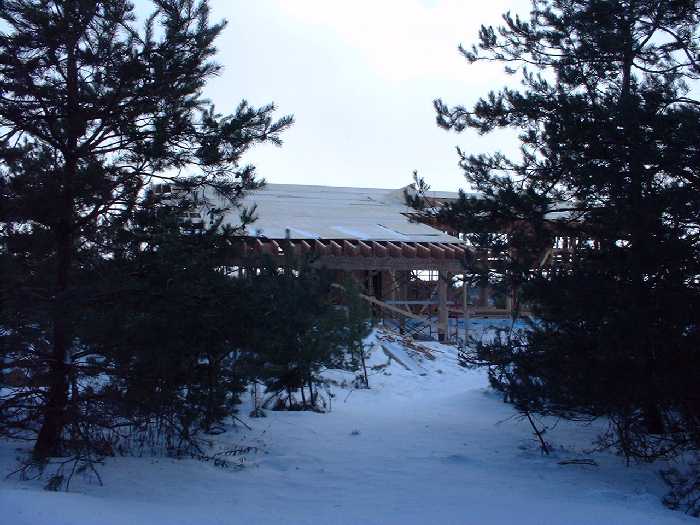
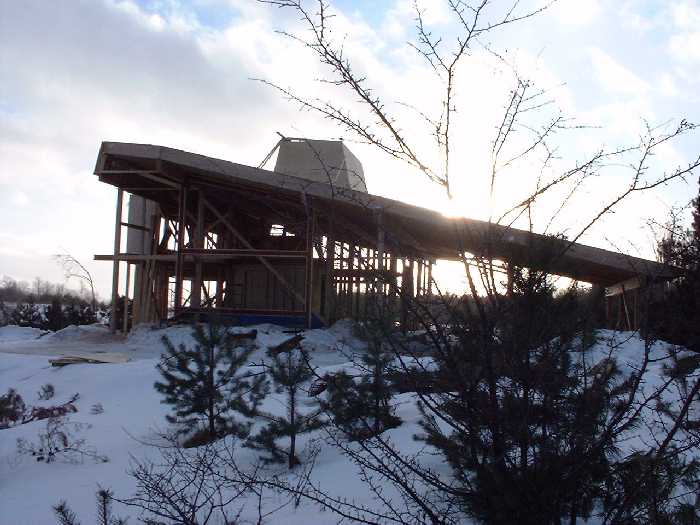
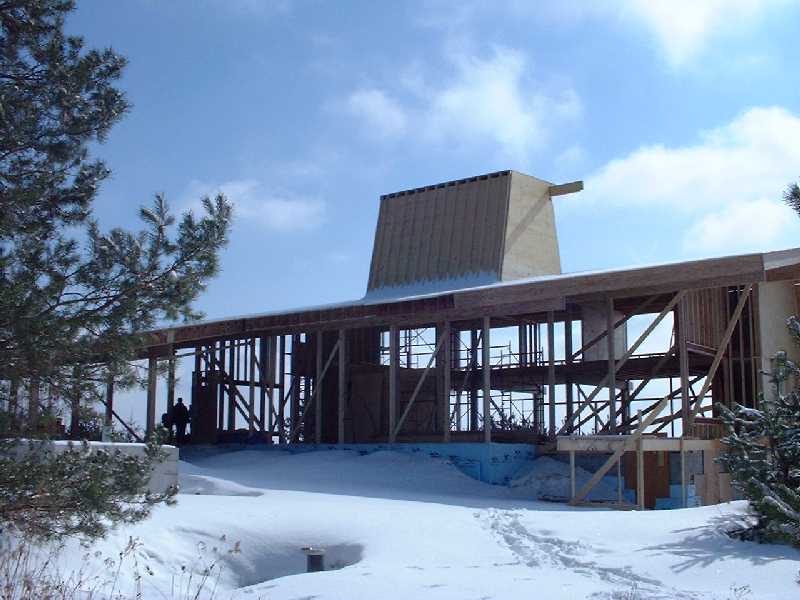
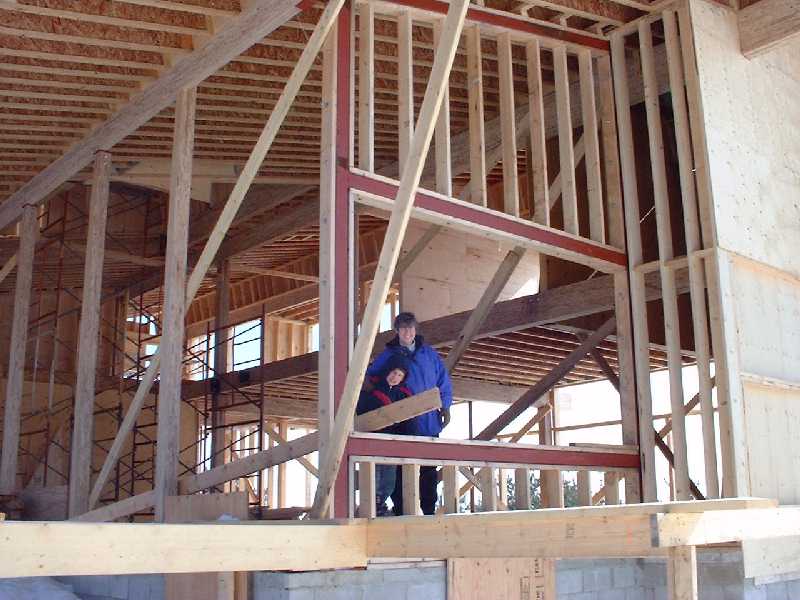
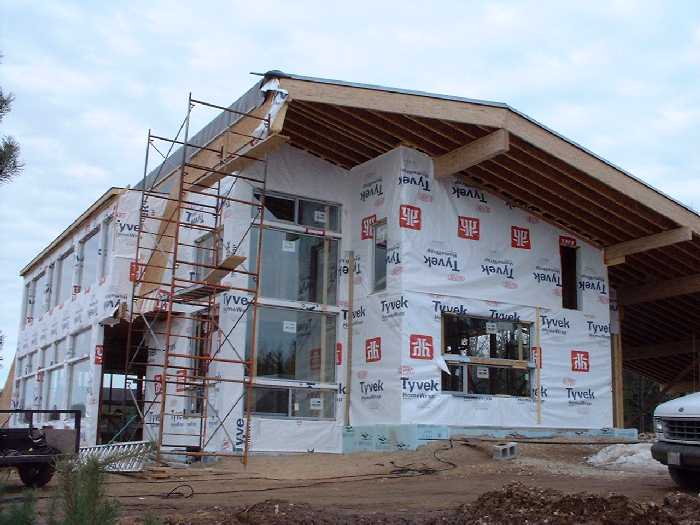
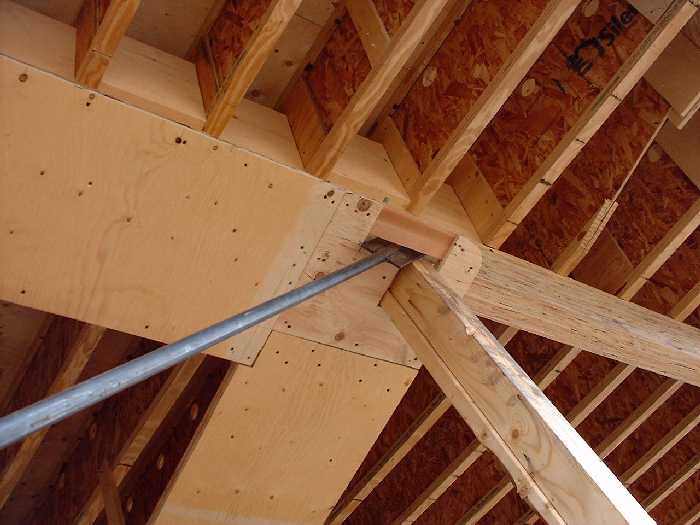
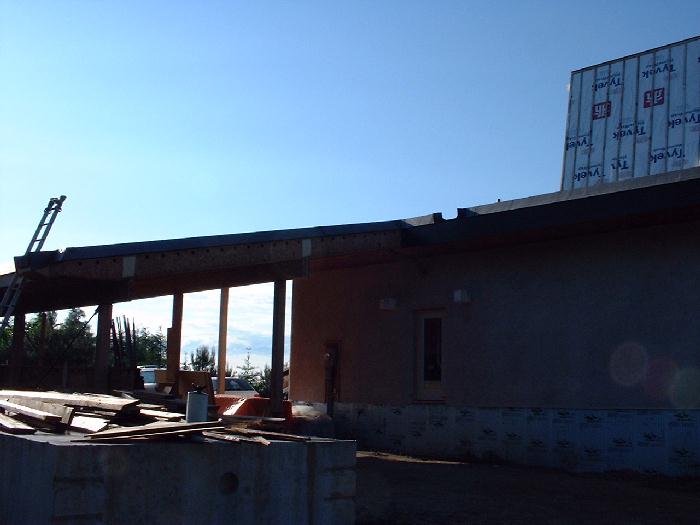
November 25 2000 — Glulam Post and Beam Framing Ground Floor
Heavy duty steel is being used to brace the house for strong winds and a heavy vegetative roof. Straw bales will fill in the post and beam construction along the north portions of the house as insulation with stucco finishing. Check out a brief note on progress to this point. Click Here
November 25, 2000 - Framing for the the living room on the ground floor.
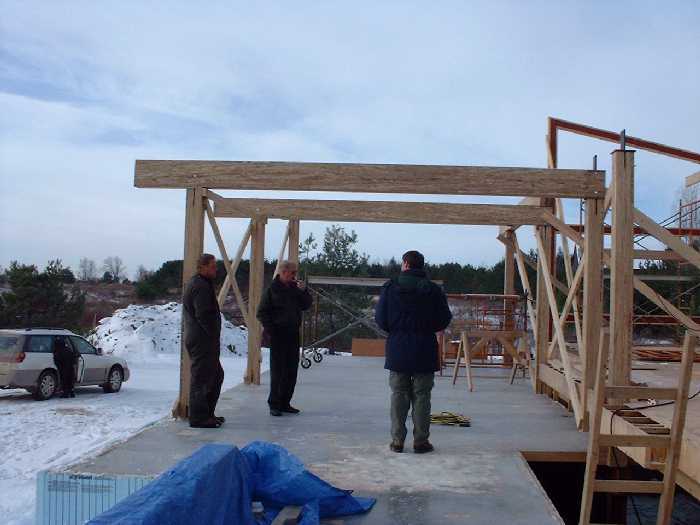
November 25, 2000 - Reviewing the construction. From left to right, Colin, Hal and John.
November 25, 2000 - A view of the framing looking north west.
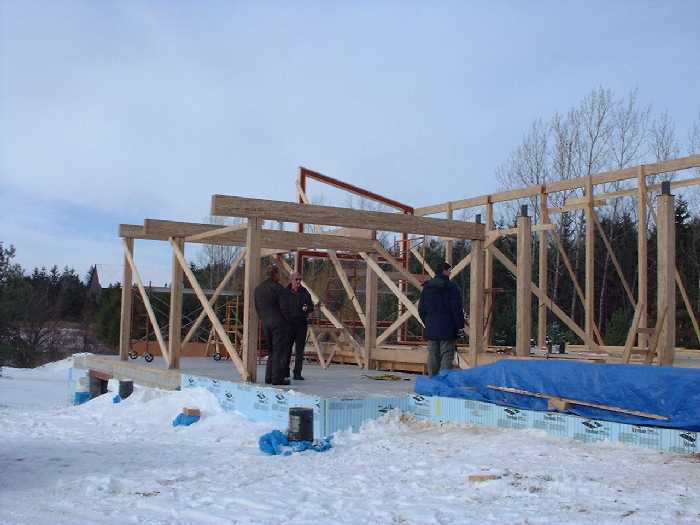
November 25, 2000 - Looking at the newly framed ground floor from the south west looking north east. The beams are mainly Glulam constructed beams made from fast growing trees.
November 25, 2000 - From a distance the framing takes shape.
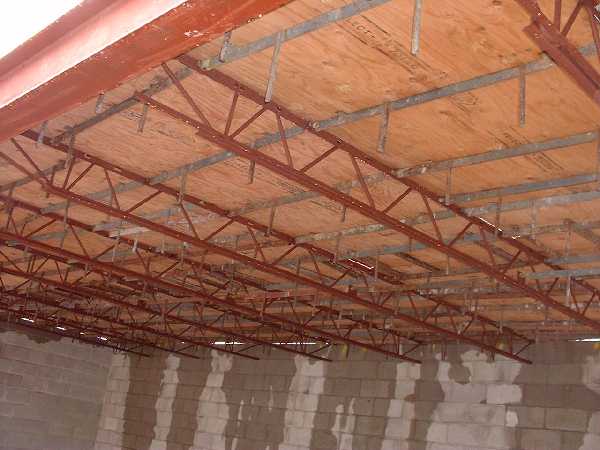
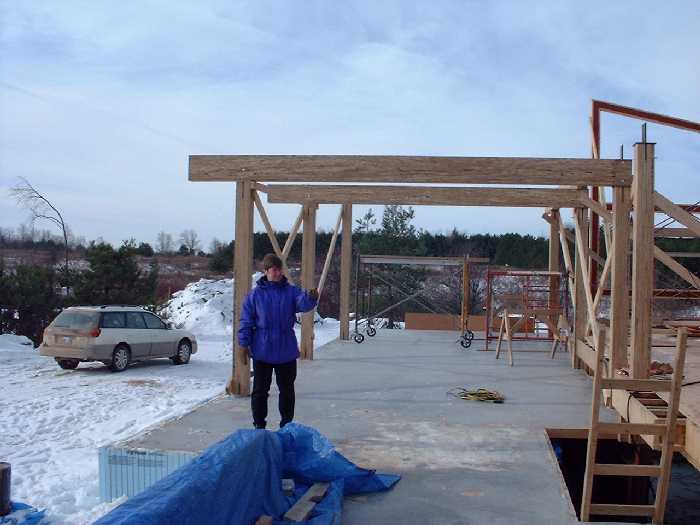
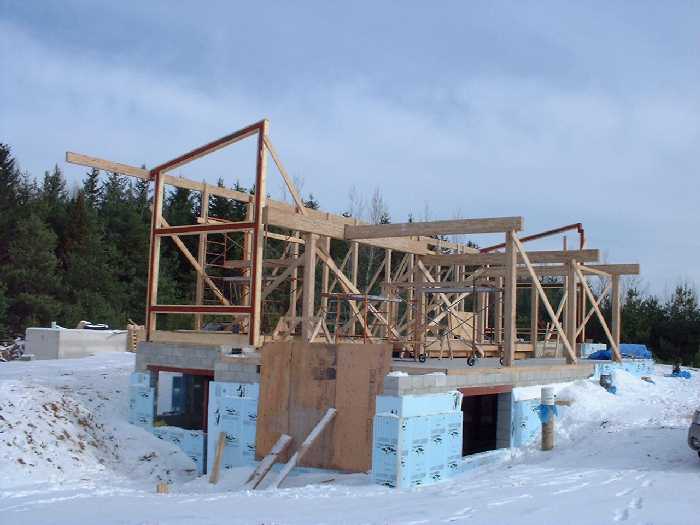
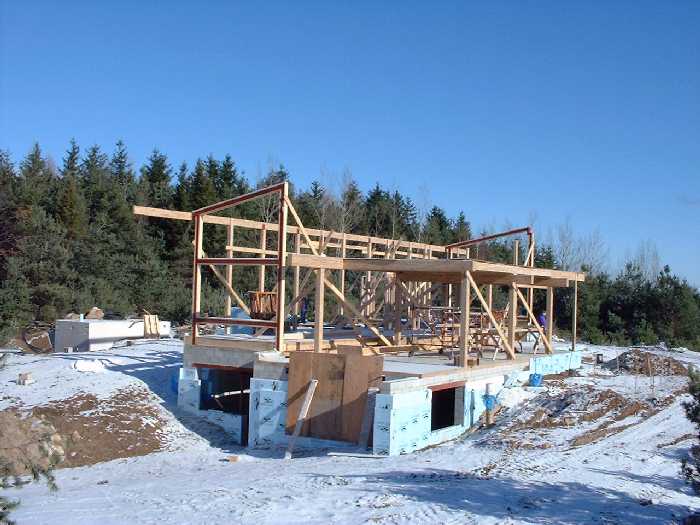
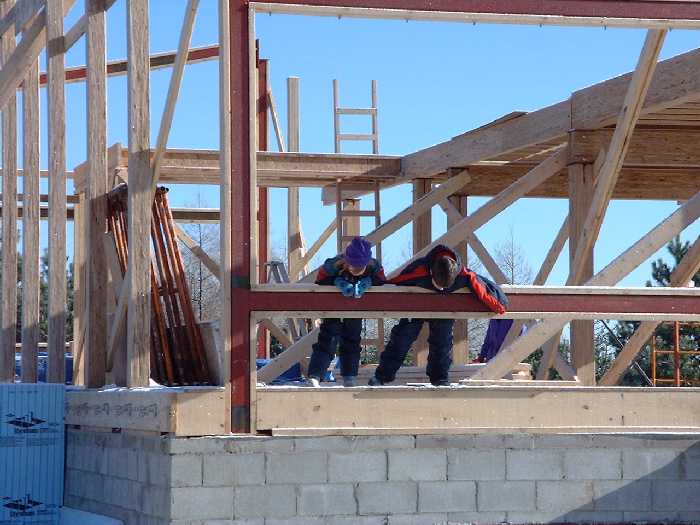
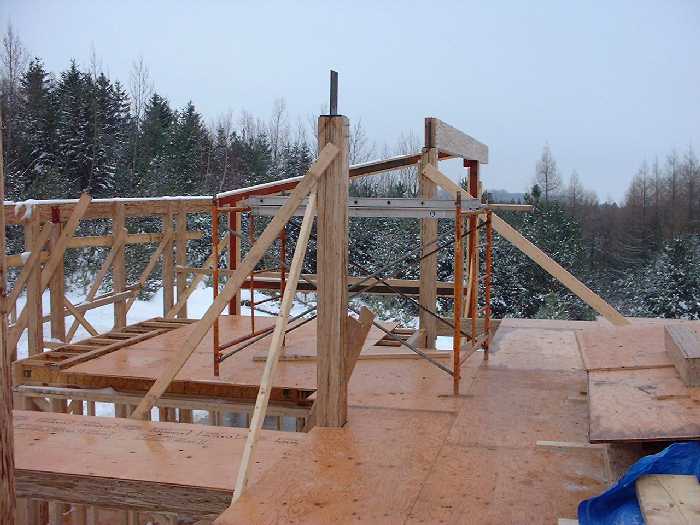
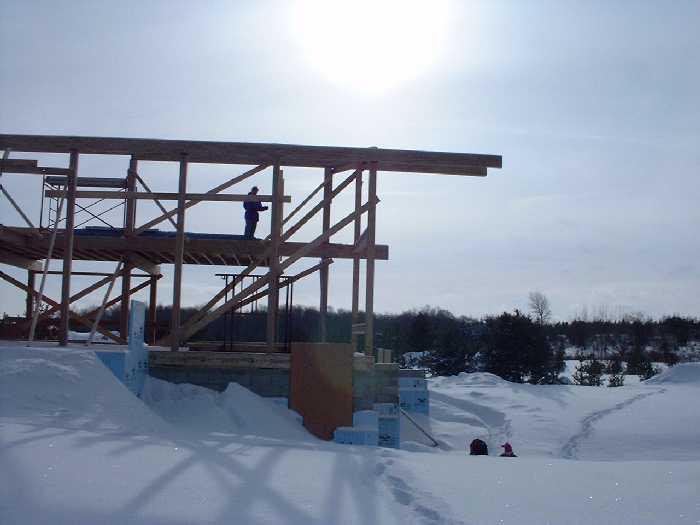
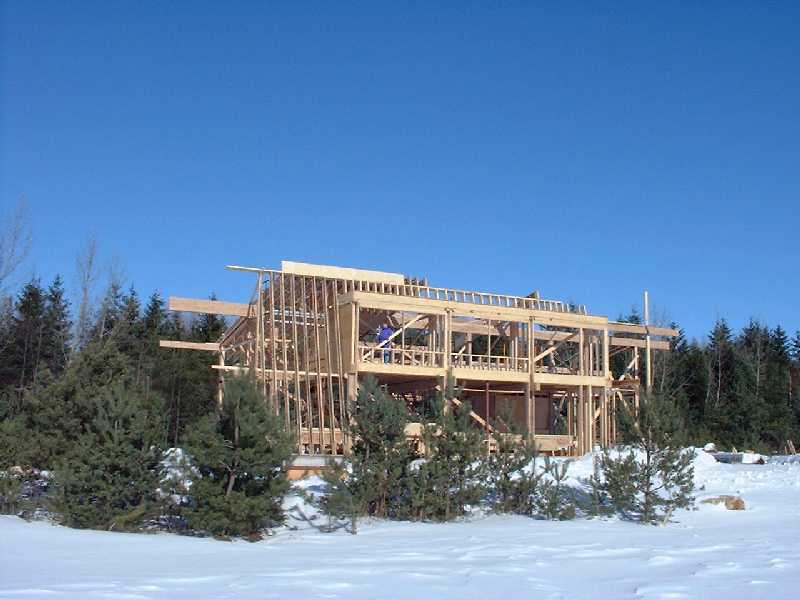
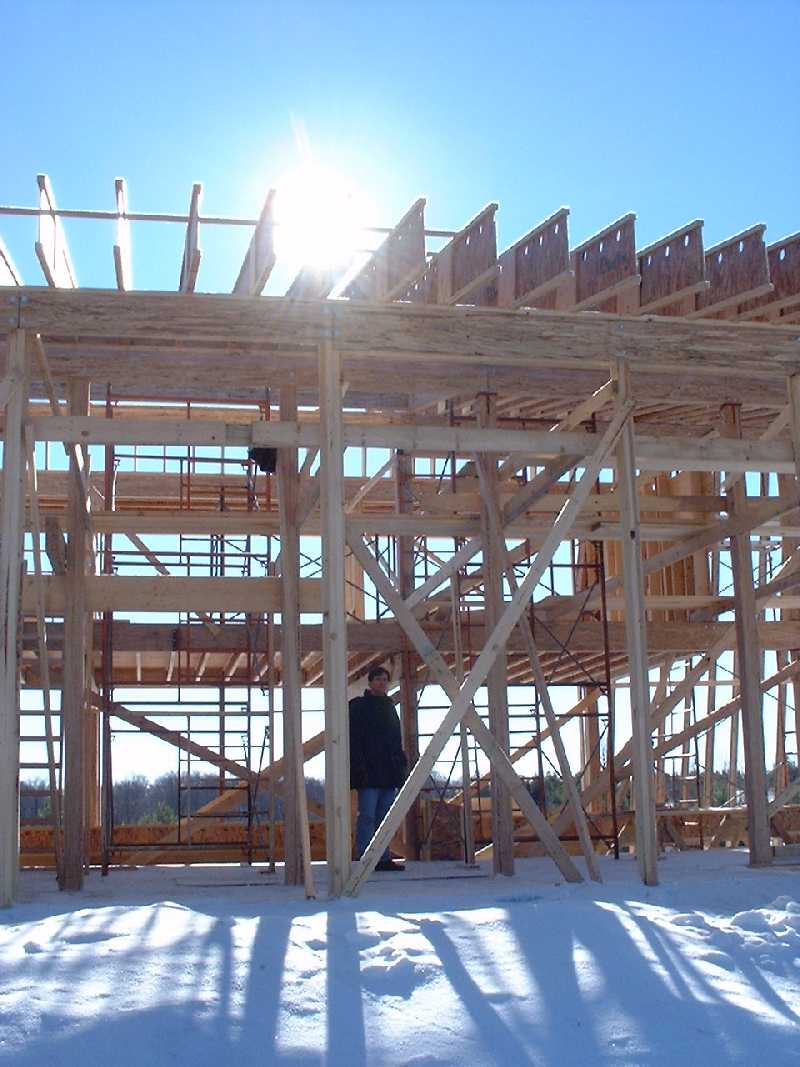
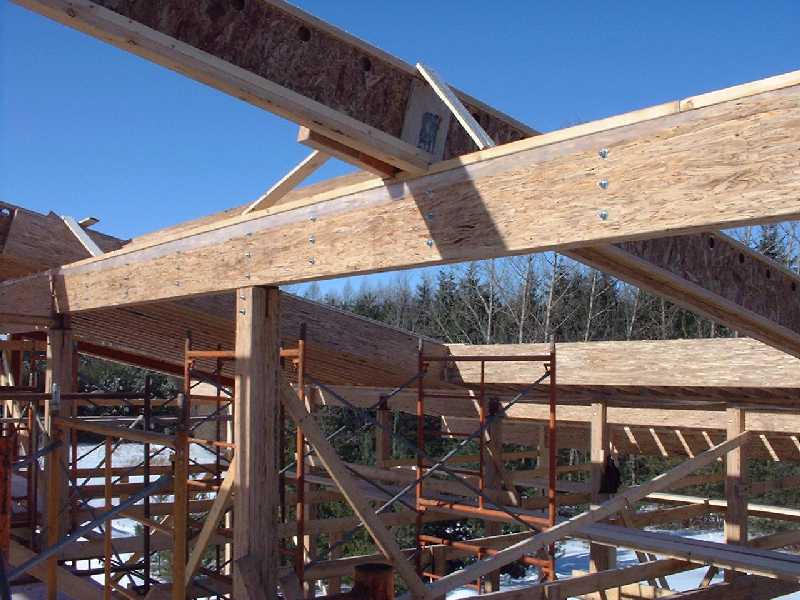
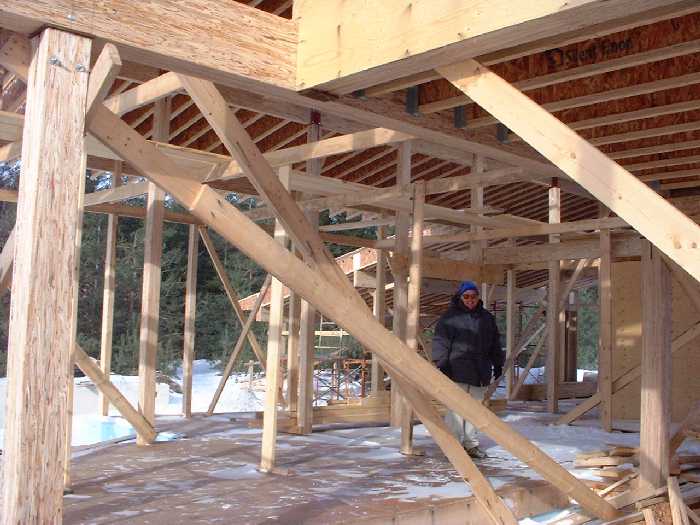
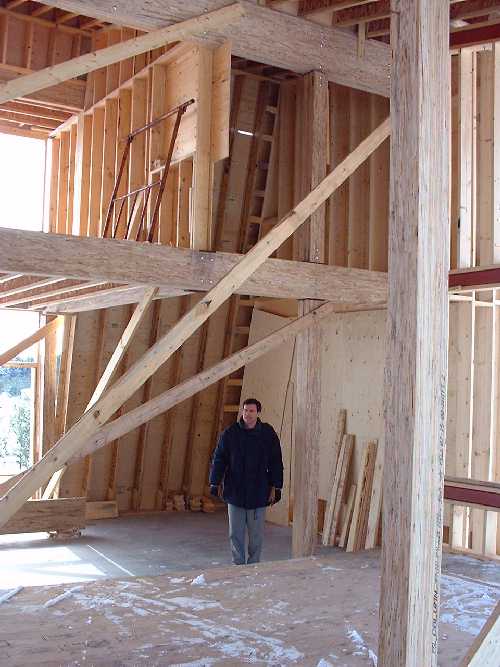
December 2 2000 — Second Floor Framing
During the week just past the second floor was started. Joists have been put up on the south side of the house.
December 2, 2000 - Looking from north to south west through the frame of the house. The second floor is starting to take shape in the middle.
December 2 , 2000 - The kids play around the newly installed septic system and we can see the joists for the second floor along the south side of the house. These will provide the floor for the three bedrooms upstairs. To the north on the second floor will be a bathroom.
December 2, 2000 - The joists are clearly visible looking up through the house from the south east side.
December 2, 2000 - Looking straight north at the frame of the house from deep south on the property. The second floor line is now visible.
December 2, 2000 - The second floor looking north east from the south east. The walkout from the basement is boarded up to try and keep some of the snow out of the basement.
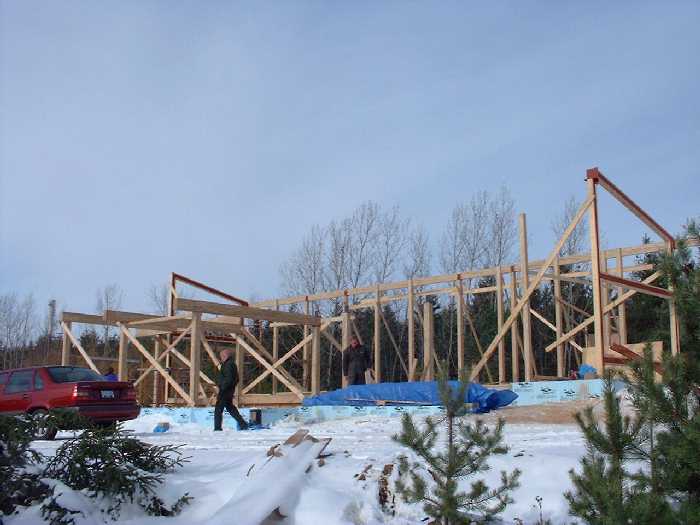
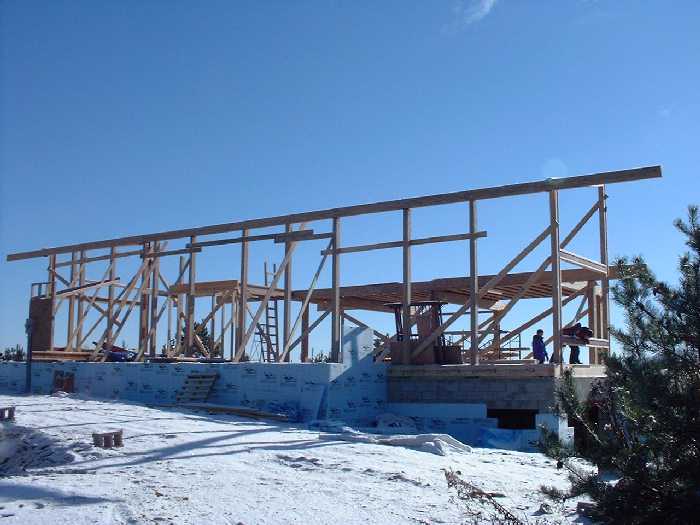
December 2 2000 — Ground Floor Framing
Taking a look at the framing from the west and north sides of the house.
December 2, 2000 - The kids drop their mittens and hats. Ian later cleared off all of the snow.
December 2, 2000 - Ian and Claire resting during a morning walk through the framing.
December 2, 2000 - Looking south east from the north east corner. The second floor is visible in the middle of the house. A ladder shows where the bathroom on the 2nd floor will be in future.
December 2 2000 — View from Second Floor
Our first glimpse of the view we can expect to get from the 2nd floor on a beautiful December morning. All directions are gorgeous as we carefully venture onto the 2nd floor while the ply wood is still loosely laid.
December 2, 2000 - Our first step onto the 2nd floor. The view to the south west.
December 2, 2000 - Looking at the view from the middle bedroom, south east into the property of our neighbours to the south.

December 2, 2000 - The sun shines brightly into the imaginary windows on the 2nd floor looking nearly due south. The snow sparkles where our future concrete floors will absorb solar energy.
December 3, 2000 — The House: A Solar Collector
Our first glimpse of the view we can expect to get from the 2nd floor on a beautiful December morning. All directions are gorgeous as we carefully venture onto the 2nd floor while the ply wood is still loosely laid.
December 3, 2000 - The sun shines down into the house which is nestled into the trees. The trees are on the north side providing a wind break from the constant northern cold breezes. The land slopes gently from the north down to the south provide a location designed to collect the maximum available solar energy from the sun.

December 3, 2000 - The roof lines from north to south vault up towards the sun.
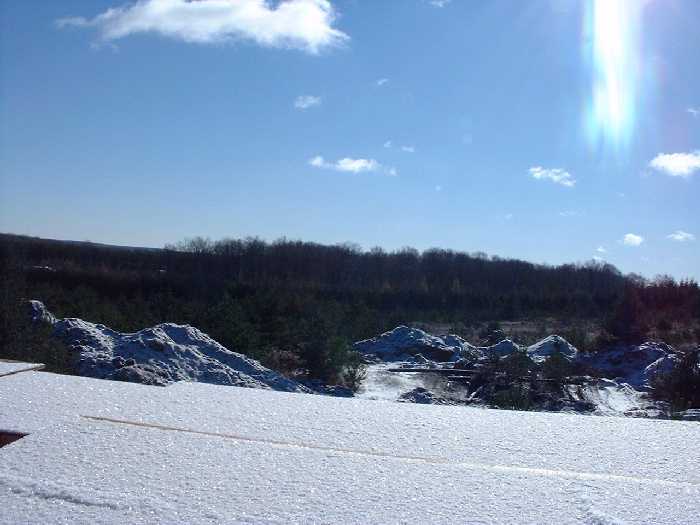
December 3, 2000 - The local soil provided most of the sand requirements during construction of the foundation. Local materials have been used where possible.
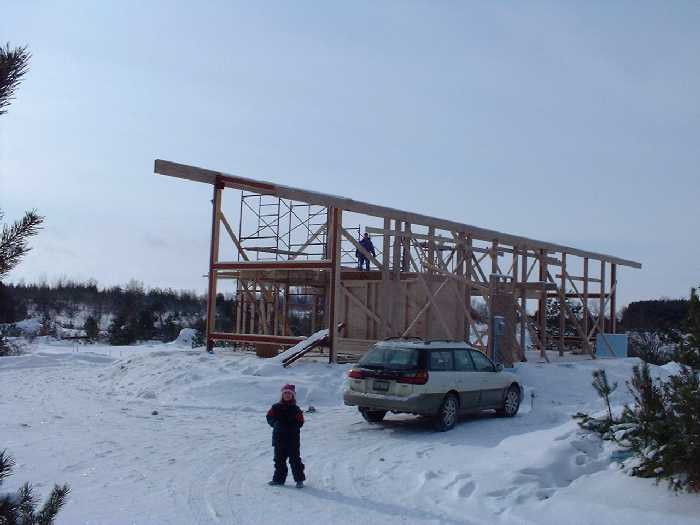
December 17, 2000 — The Second Floor Goes Up
Some posts have been set up on the second floor.
December 15 , 2000 - Looking up from the south to the north. Colin and the crew have worked through the snow storm by clearing the snow every day.
December 17, 2000 - Up on the second floor the new posts stand ready for a new beam that will eventually hold the joists for the roof. Snow and ice cover the structure as the weather gets warmer but still near freezing. On the left are two of the bedrooms that will exist on the second floor.
December 17, 2000 - The bathroom floor on the second floor takes shape. The first beam that will hold the roof has been secured to the steel frame and the first beam.
December 23, 2000 — The Second Floor Takes Shape
Most of the posts have been prepared and the main central beam is in place. This past week Colin and Leslie have had a baby daughter. Work will continue in the new year.
December 23 , 2000 - Claire in the foreground and Leigh up on the second floor. The car is parked where the car port will go eventually.
December 23, 2000 - The second floor central beam is in place. Leigh stands in what will be a bedroom on the second floor. The view to the south is gorgeous.
December 23, 2000 - Leigh stands in the spare bedroom on the far west side of the second floor. The first post on the south side of the second floor shows where the last row of posts will go.
December 23, 2000 - Leigh stands in the spare bedroom on the far west side of the second floor. The first post on the south side of the second floor shows where the last row of posts will go.

December 23, 2000 - Looking south through the post and beam construction. Leigh surveys the second floor while Ian and Claire play in the snow to the left. The sun shines down through the site.
December 23, 2000 - Looking up at the new second floor from deep south on the property.
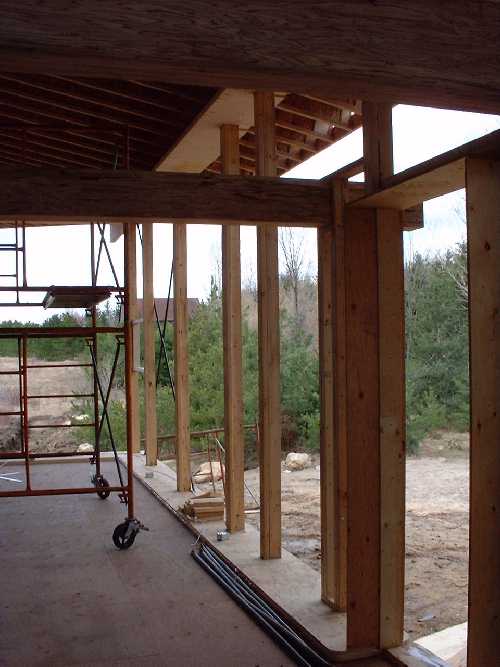
January 7, 2001 — The Kitchen Takes Shape
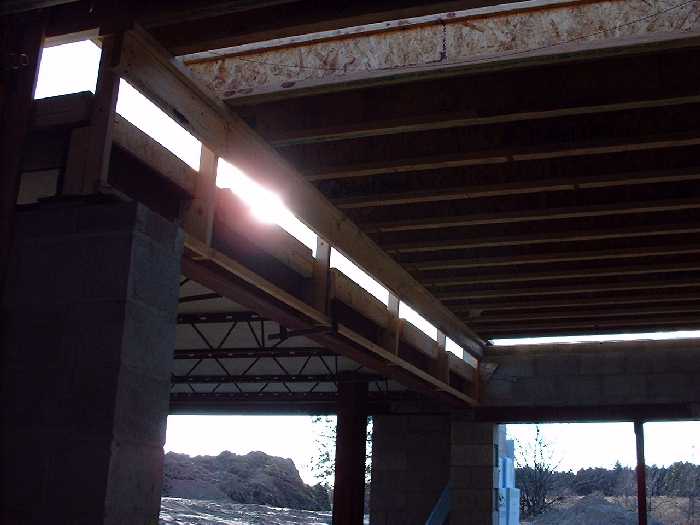
The bridge over the kitchen, a great view to the west from the kitchen..
January 7, 2001 - The kitchen gets a large window view through the west steel frame. The bridge on the second floor is open above the kitchen.
January 7, 2001 - Looking up at the second floor from the kitchen. A joist beam shows where the ceiling will eventually peak.
January 7, 2001 - Looking into the kitchen from the other side.

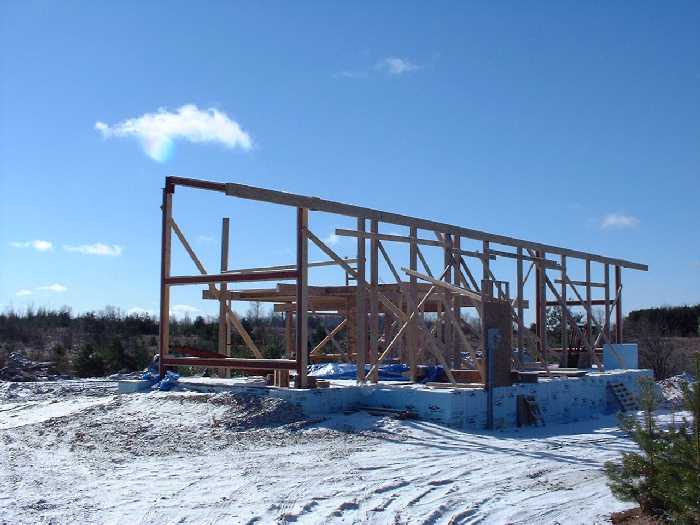
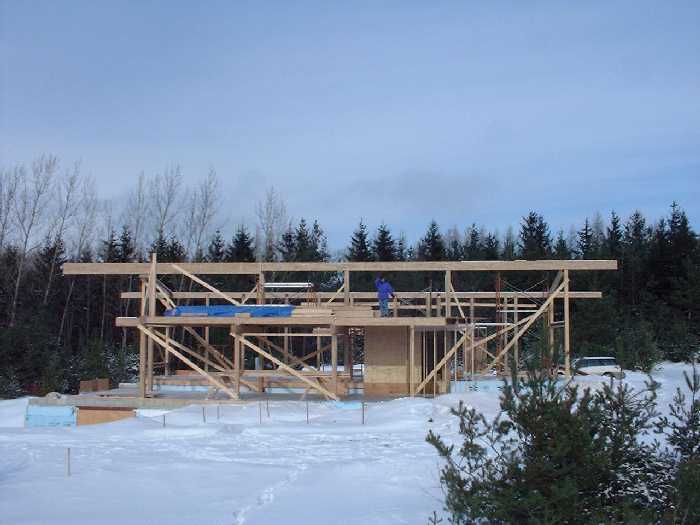
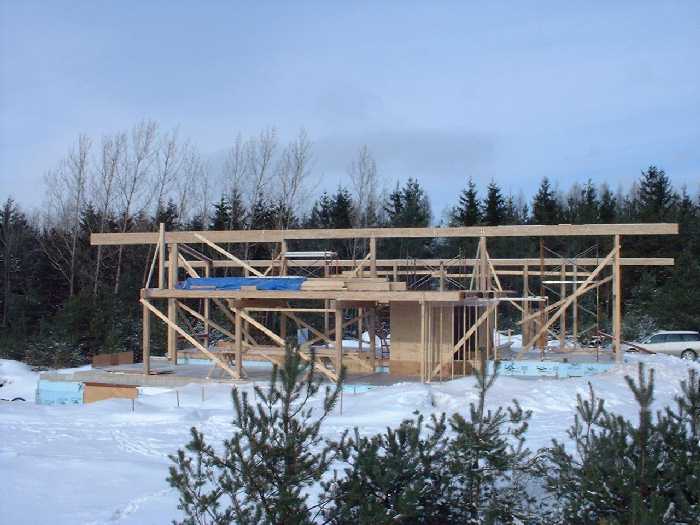
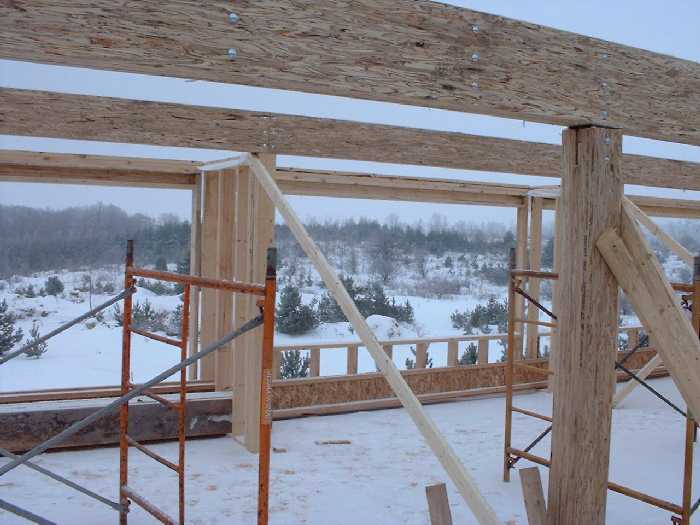
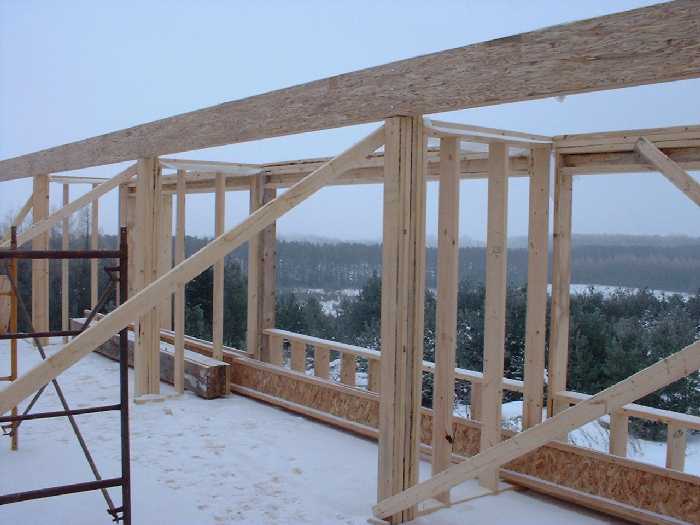
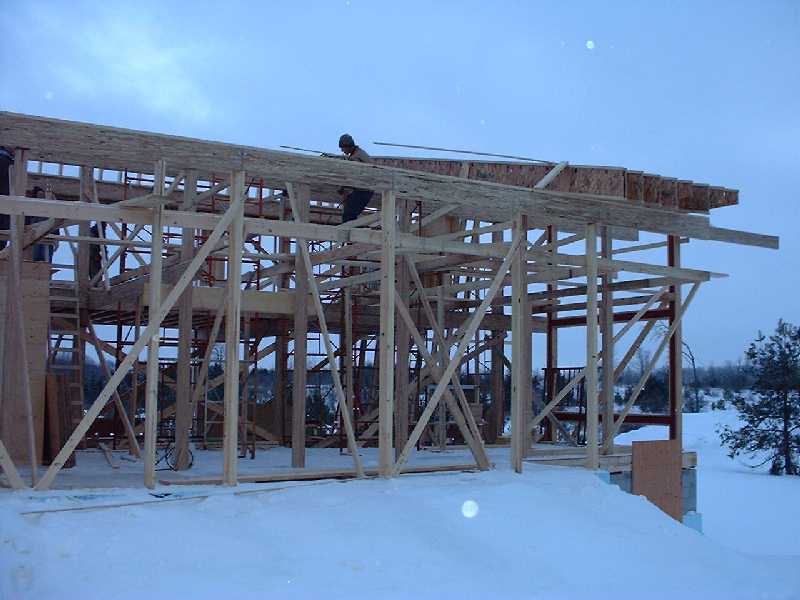
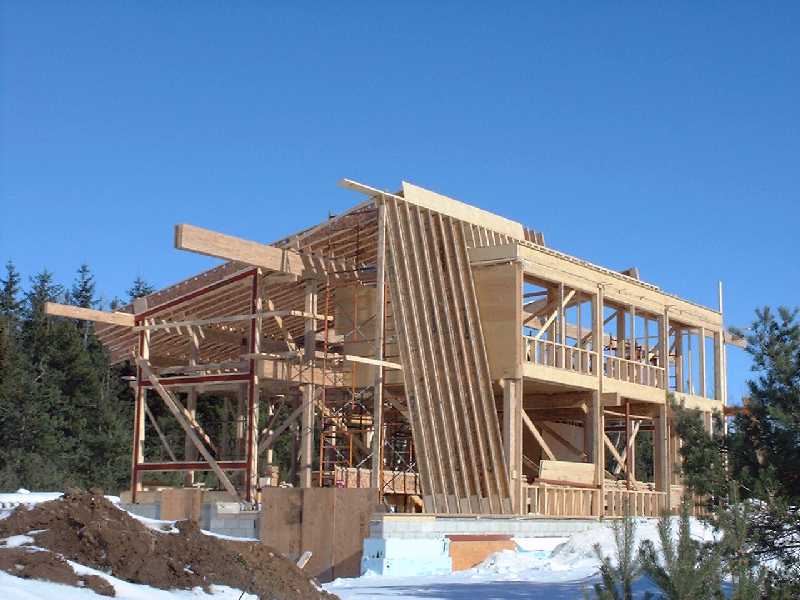
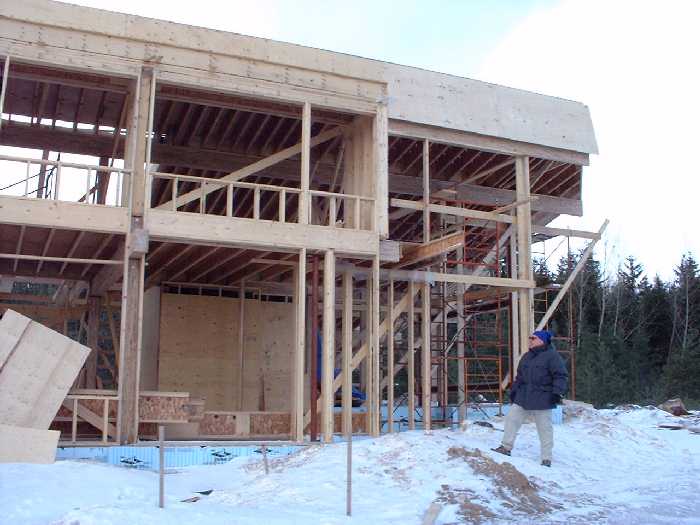
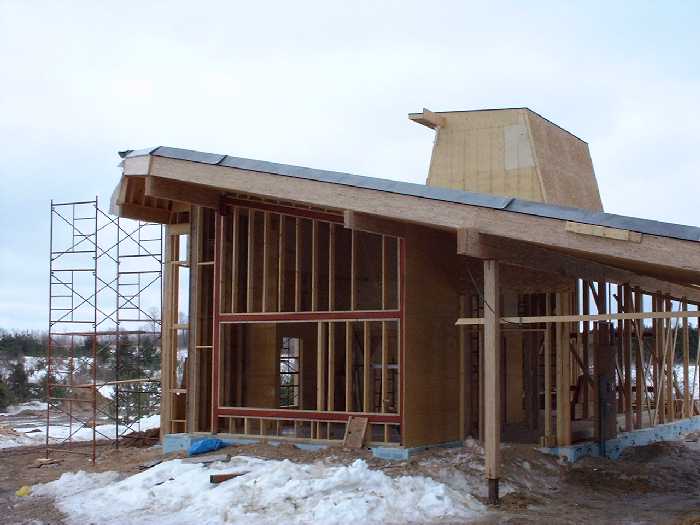
January 7, 2001 — The Second Floor Ready for a Roof
Despite bitterly cold weather Colin and the crew have managed to prepare the beams and post to start the roof next week.
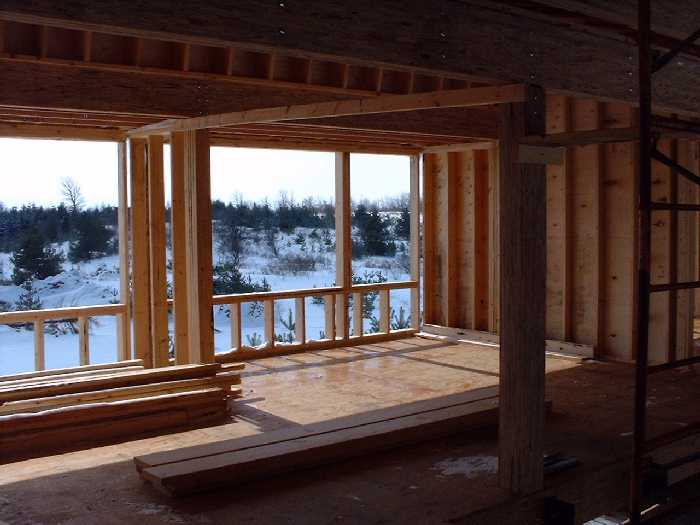
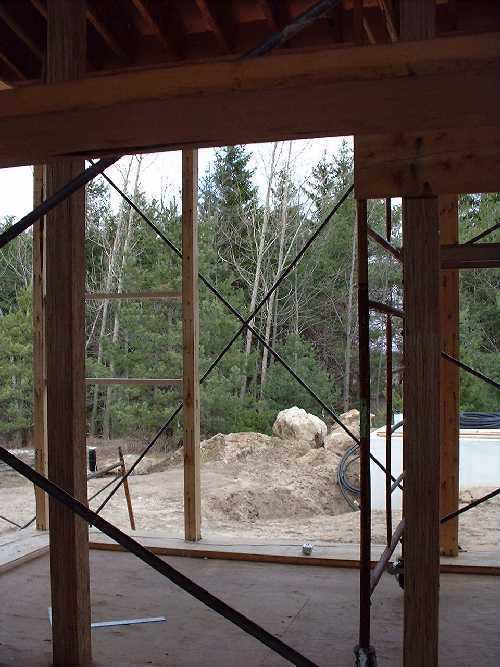
January 7, 2001 - Window frames are visible on both the ground and second floor. The main floor on the south side shapes up to be a large green house.
January 7, 2001 - The view through the new window frames on the second floor.
January 7, 2001 - Three bedrooms on the second floor have their window frames and the start of dividing walls.
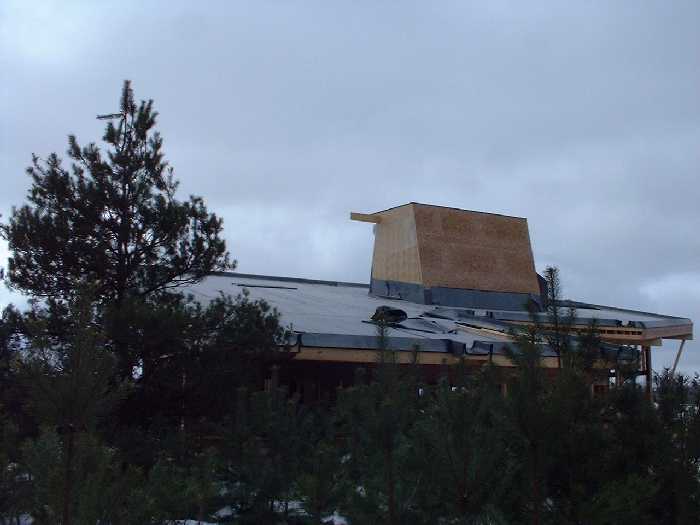
January 7, 2001 - The second floors angled wall and the highest point of the ceiling are visible in the upper right portion of this picture. The solar panels will site in this step in the roof. Small windows may provide extra light.
January 7, 2001 - The living room and green house space. The beam on the far right is the angled wall in the main living room area.
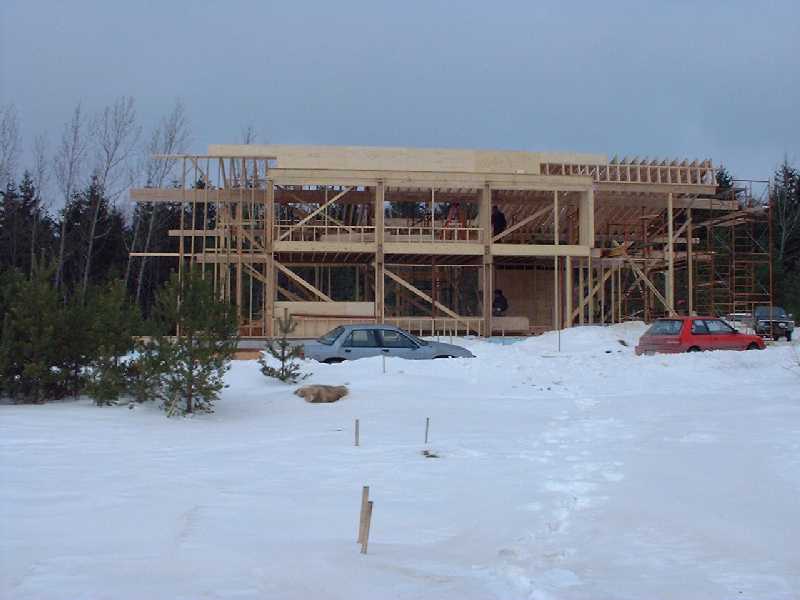
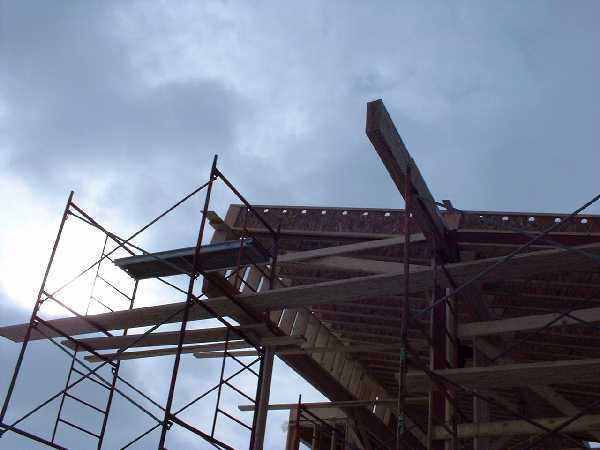
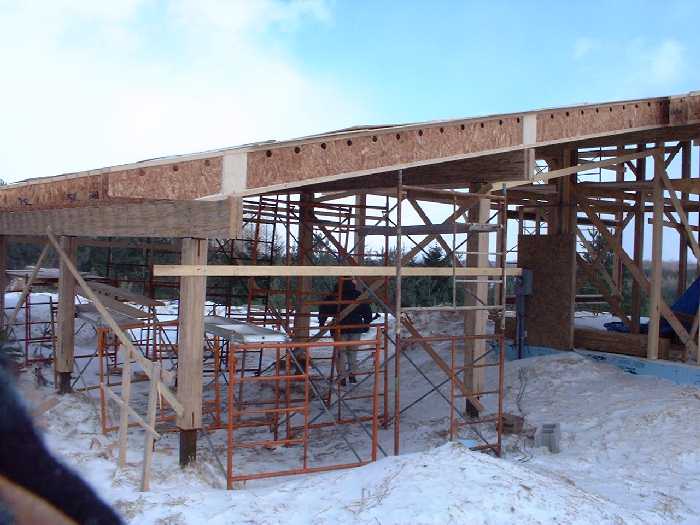
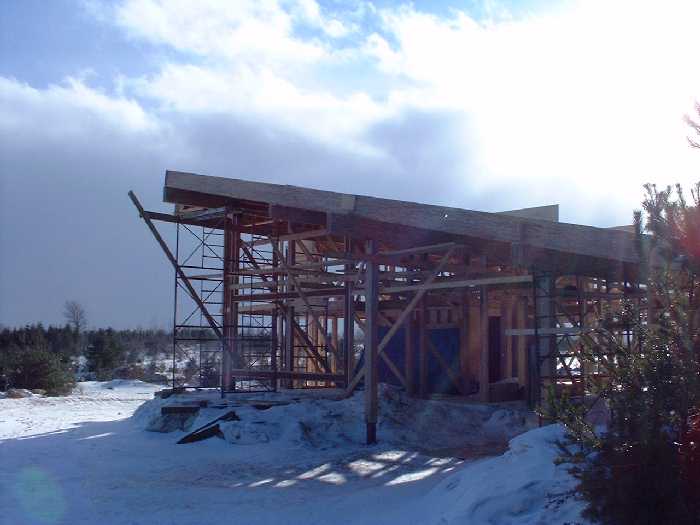
January 17, 2000 — Roofing
Working through severely cold weather the roof quickly takes shape.
January 17, 2001 - Doug connects the roof joists.
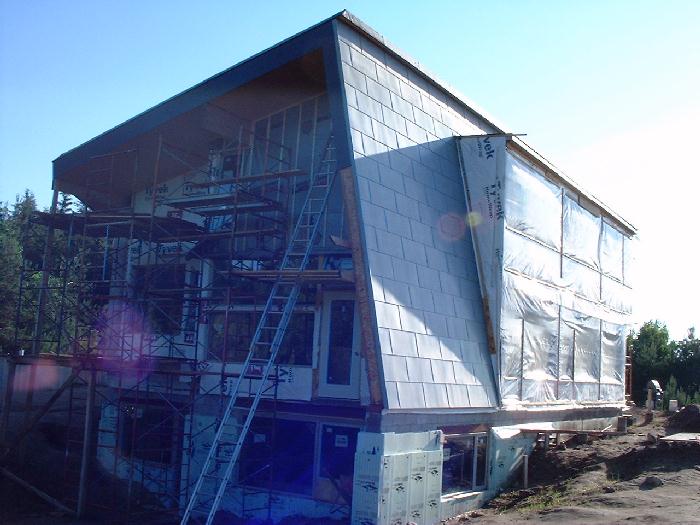
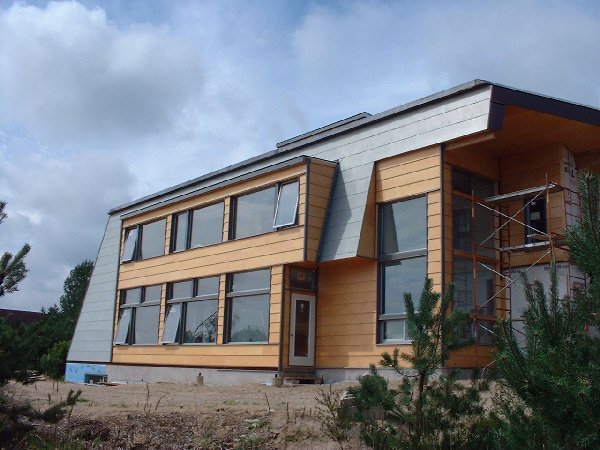
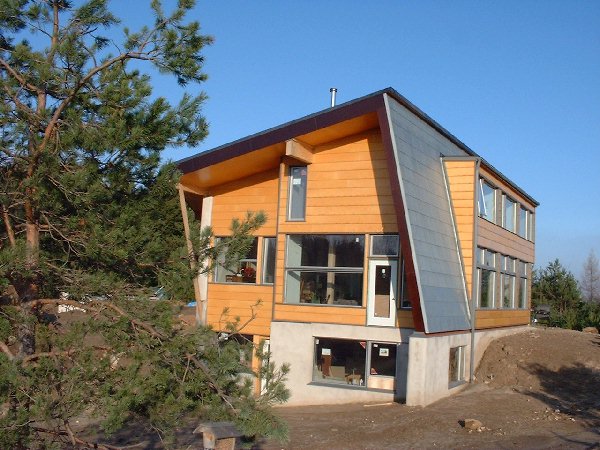
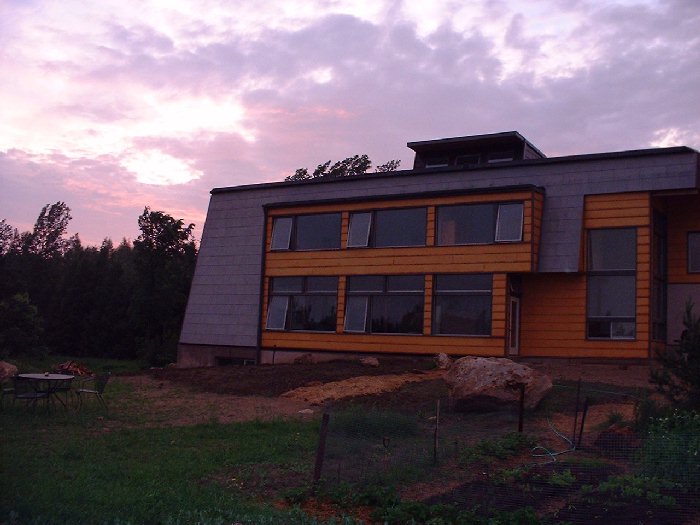
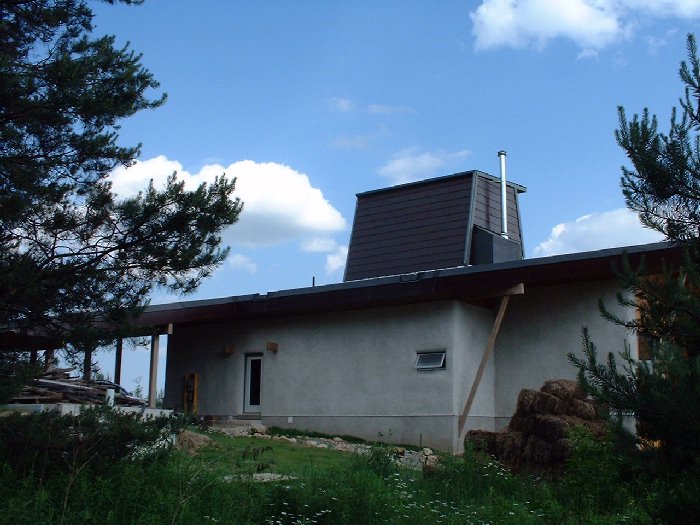
January 17, 2001 - The south face of the house takes shape. The angled wall will be covered in zinc metal siding which has a greenish silver colour. Very natural looking.
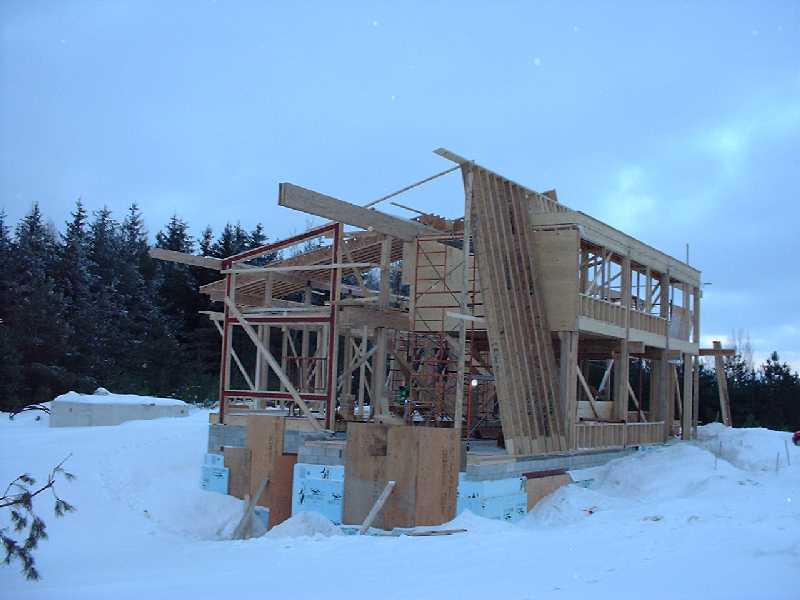
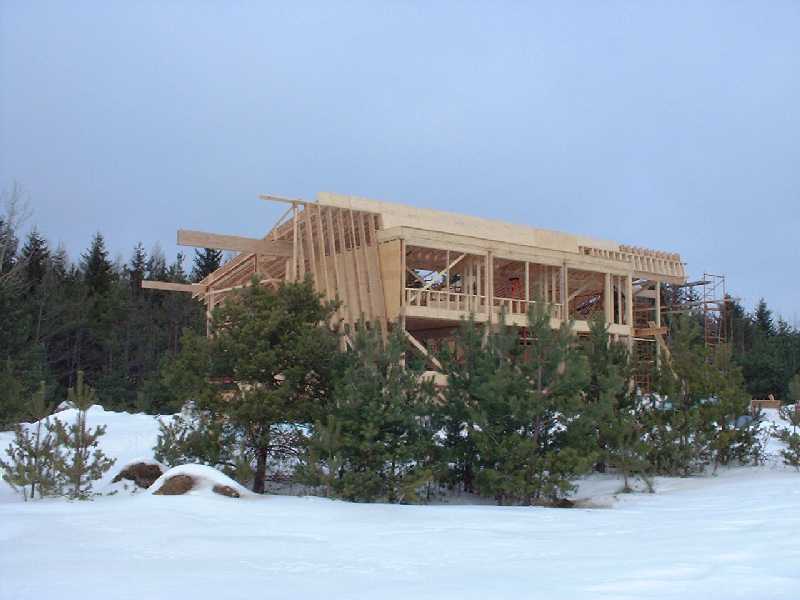
January 20, 2001 — Roofing Half Done
This past week the roofing moved along quickly. Half the roof joists are in place and the large clerestory is a visiable space in the middle of the roof. This feature will provide us with light during the day in the kitchen and throughout most of the house. It will also provide for ventilation during the summer for cooling and venting the kitchen.
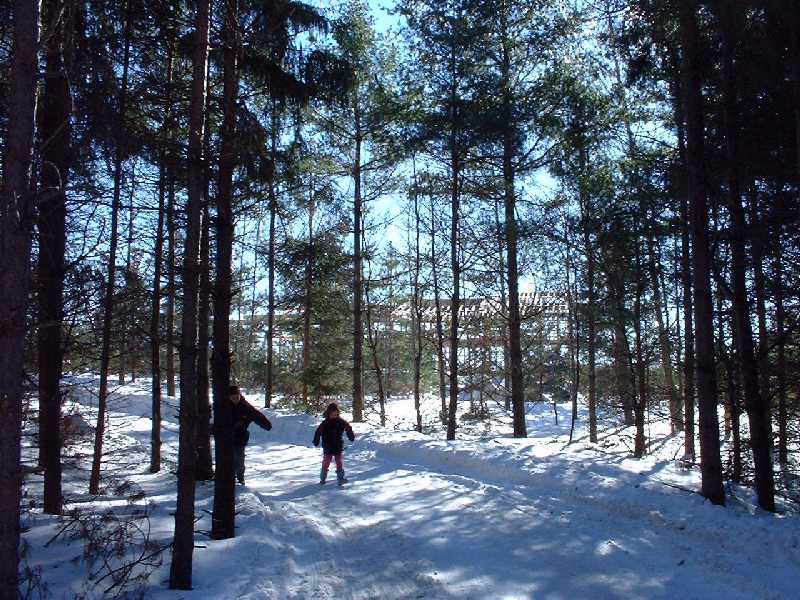
January 20, 2001 - Claire and Ian take a leisurly stroll down the winding driveway through the trees. The house is partially visible through the trees as the sun sparkles off of the new roof joists.
January 20, 2001 - The south face of the house clearly shows the many windows which will allow sun light to heat the interior concrete floors and warm the house on these cold (-10C) days.
January 20, 2001 - Leigh stands in the spare bedroom on the second floor. Above, on the angled roof will sit solar water heating panels and solar photo voltaic panels for water heating and electricity supply. With fossil fuel prices doubling recently and expected to double again next year making heating costs go from $1,400 a year to $2,400 a year we are feeling very good about our solar powered home design.
January 20, 2001 - The design of the house takes shape. Lately it has seemed to me that the design has taken inspiration, through nature, from the native american form of "long house". This simple design seems ideally suited to the Canadian climate, warm in winter, and naturally cool in the summer.
January 20, 2001 - The simple post and beam design, tuned perfectly to the angles of the sun, mimics natures best designs. Leigh and Claire look out to the west of the house through the entirely framed walls.
January 20, 2001 - The shape, outlined in perfect blue, inspires us as we imagine the future green roof growing in the summer.

January 20, 2001 — Rays of Light
Despite bitterly cold weather Colin and the crew have managed to prepare the beams and post to start the roof next week.
January 20, 2001 - Rays of sunlight, photons, warp the image as they pass through the super-structure of the house. Ian stands as a statued to the left, hands in his jacket to keep warm.
January 20, 2001 - Grass will soon grow from the roof and be clearly visible from this angle.
January 20, 2001 - Half of the roof joists are now in place, ready to hold the heavy loads of a green roof, 8 inches of soil with native grasses growing. No maintenance will be required.
January 20, 2001 - Light shines through the large clerostery in the middle of the roof.
January 20, 2001 - The joists visible frame the large clerostery that will stand up above the main roof line.
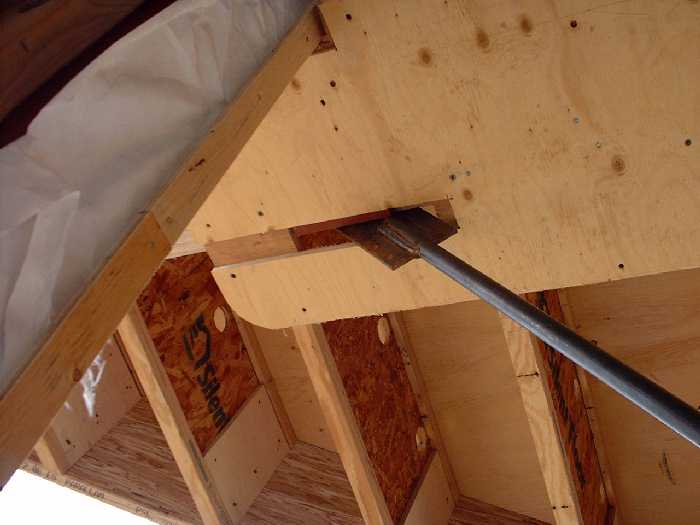
January 24, 2001 — Finishing the Roof
ing The main set of rafters are in place.
January 24, 2001 - Working on two levels.
January 24, 2001 - Shielded by trees on the north to protect from northerly winds.
January 24, 2001 - Working on the high scaffolding.
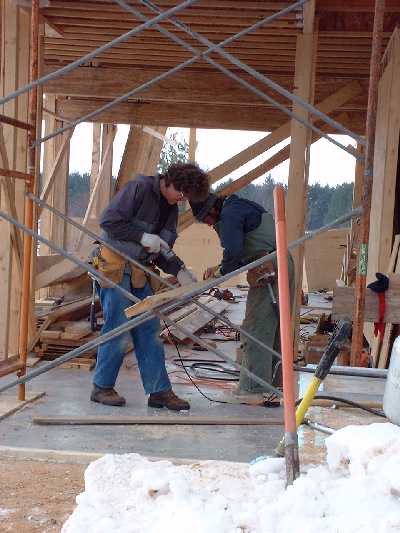
January 24, 2001 — Construction
Colin, Richard and Bernie work on the scaffolding for the roof. Find out more about our green roof, alpine roof or roof garden system - click here.
January 24, 2001 - Left - Colin works on the high scaffolding. Right- Richard secures the structure.

January 24, 2001 - Preparing to go up.
January 24, 2001 - The south east side of the roof.
January 20, 2001 - Measure twice, cut once.
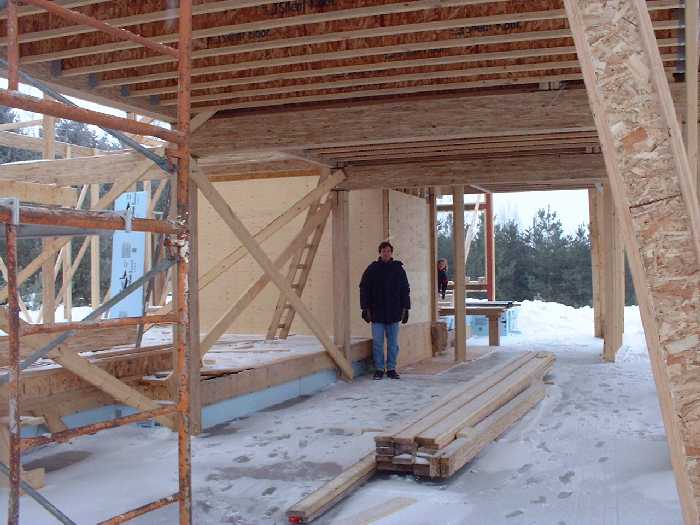
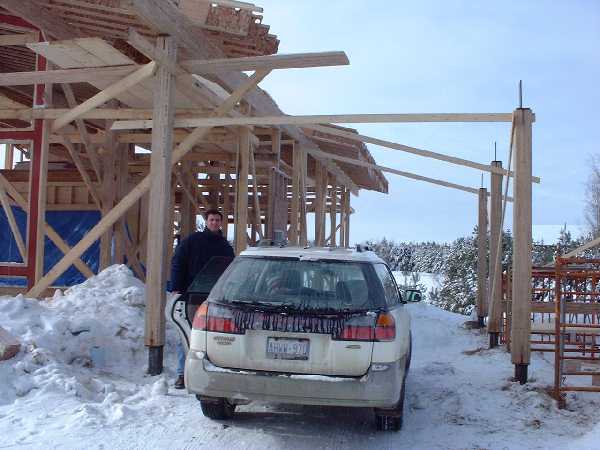
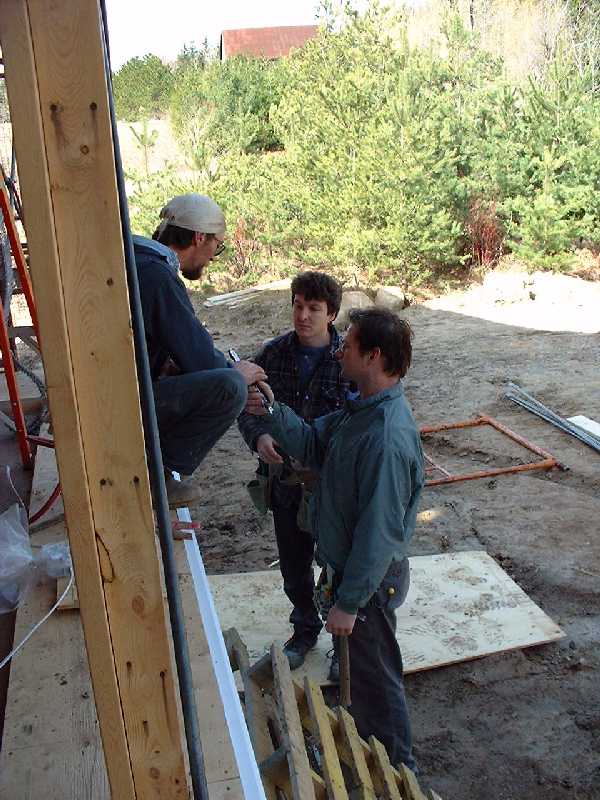
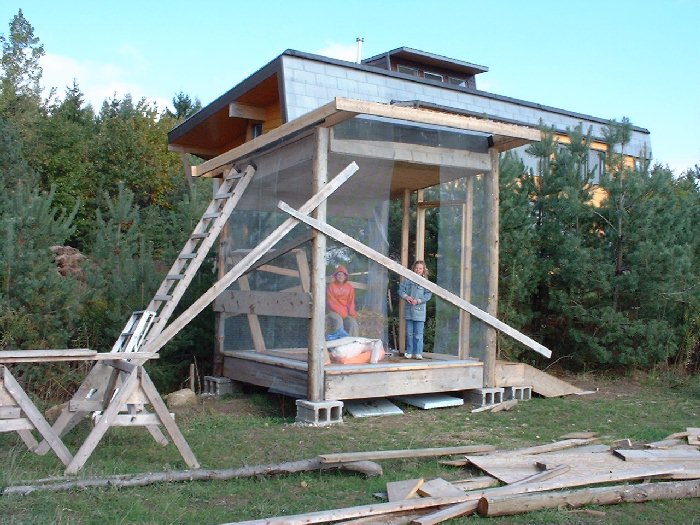
February 3, 2001 — Car Port Takes Shape
Car Port Starts to Take Shape The main set of rafters are in place. Find out more about our green roof, alpine roof or roof garden system - click here.
February 3, 2001 - Parked in the car port.
February 3, 2001 - The east side of the roof gets final pieces of plywood.
February 3, 2001 - Upstairs looking down at the greenhouse.
February 10, 2001 — Inspection
During a visit Ian Wilson inspects the site.
February 10, 2001 - Ian Wilson, soaks up some late day rays on a cold day.
February 3, 2001 - The civil engineer inspects the post.

February 3, 2001 - Dad inspecting the structure.
February 3, 2001 - Time to go. Dad hustles through the new car port.
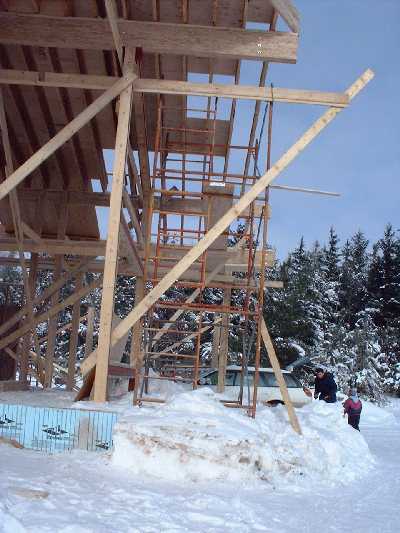
February 10, 2001 — Roof and Car Port
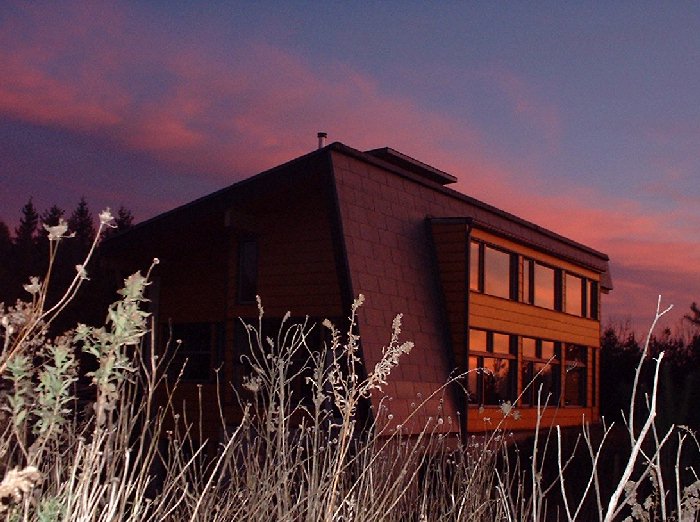
The new roof soars into the southern sky.
Febuary 10, 2001 - The east side of the roof line has now been completed.

February 10 , 2001 - The roof now includes the car port. Just imagine some grass growing on it.
February 10, 2001 - Reaching for the sun.
February 11, 2001 — Roof Lines
The new roof soars into the southern sky.
Febuary 11, 2001 - The east side of the roof line has now been completed.
February 11, 2001 - A lady in pink, my mother, explores. The south face of the structure is now mostly complete.
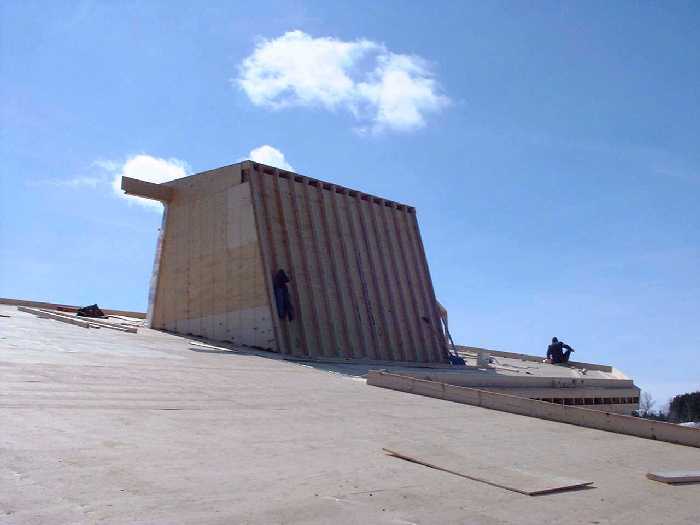
February 22, 2001 — Sky Light
The new roof soars into the southern sky.
Febuary 22, 2001 - The east side of the roof line has now been completed.
February 22, 2001 - The sky light peaks up over the roof line on the south.
February 22, 2001 - Angled perfectly for solar energy collection.
February 22, 2001 - Looking at the main sky light and ventilation shaft from the north.
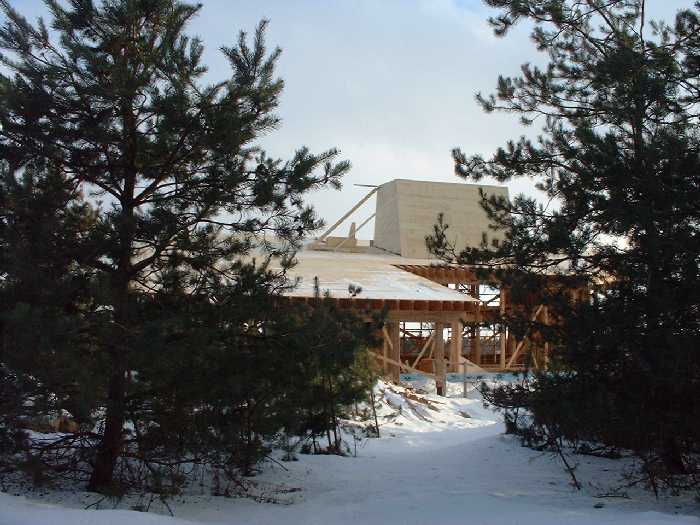
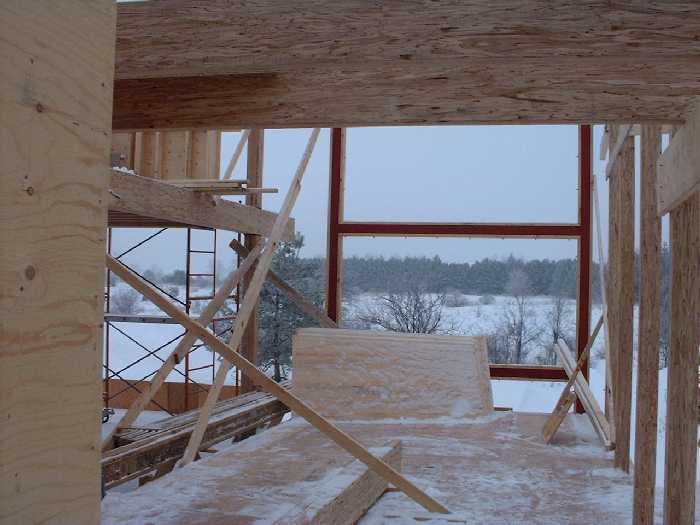
March 3, 2001 — Framed for Walls
A little snow still covers the roof as the internal walls start to go up.
March 3, 2001 - Looking south east through the house. The new sky light on the roof provides light and ventilation and air conditioning.
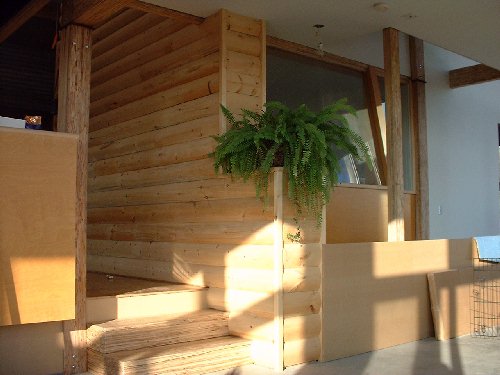
March 3, 2001 - Claire peeks through the future master bedroom window on the east side. To the left is a new doorway to the green house.
March 3, 2001 - John Wilson stands in the living room. The second floor bedrooms are visible and open above. The sloped wall on the south is now enclosed.
Mar 3, 2001 - The second floor bedrooms looing south through the window frames. A third bedroom now has a wall to the far right.
Mar 3, 2001 - The west wing. Ianito and Leigh peek through a future window.
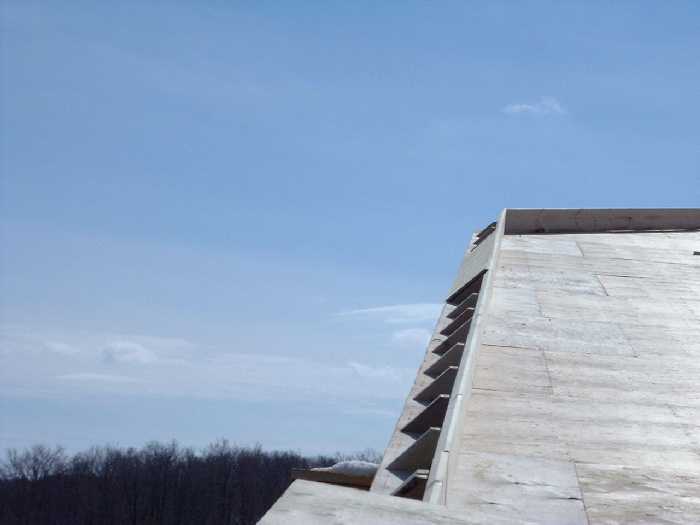
March 15, 2001 — Curbing for the Greenroof
Final touches on the roof before the EPDM membrane is applied to waterproof.
March 15, 2001 - Looking west on the roof. The three large windows will provide light and ventilation through the center of the house. On each side of the sky light solar hot water heaters will help store heated water on the second floor.
March 15, 2001 - Looking east on the roof. Solar hot water heaters will sit on each side of the sky light.
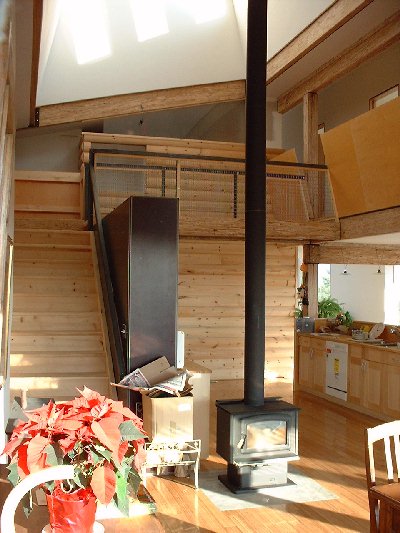
March 3, 2001 - Doug stands next to the wood burning stove chimney frame. EPA rated high efficiency, a sealed wood burning stove will be used for extra heating during long periods of cold and dull days. Wood from the property will sustain this heating system.
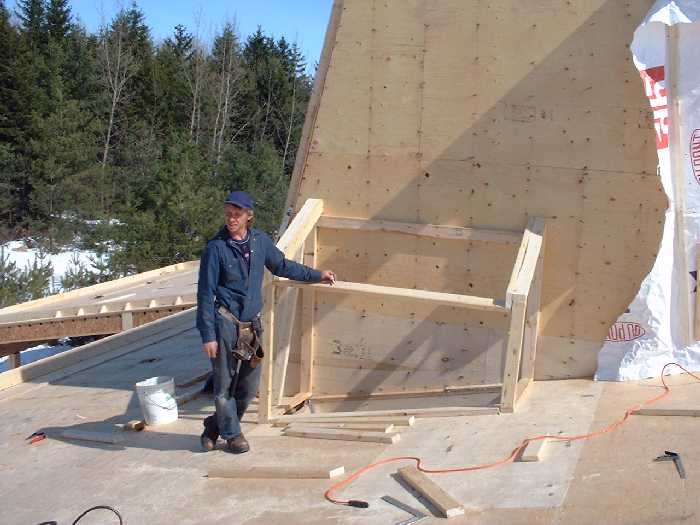
Mar 15, 2001 - The "dog house", the large sky light, provides extensive lighting and ventilation into the center of the house where the kitchen is located. This system will provide a non mechanical cooling system and natural light instead of electircal lighting throughout the day.
Mar 15, 2001 - Details of the curbing for the greenroof can be seen on the east side of the roof. This curb will hold in the soil for the greenroof. The surface of the roof and the curbing will be covered by an EPDM membrane (synthetic rubber).
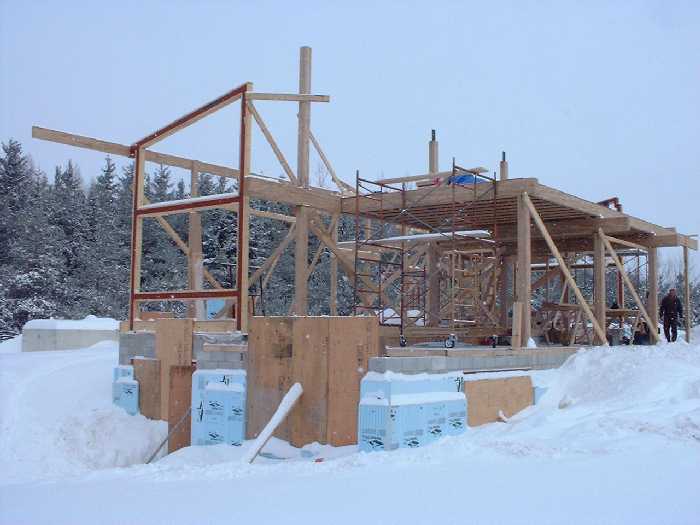
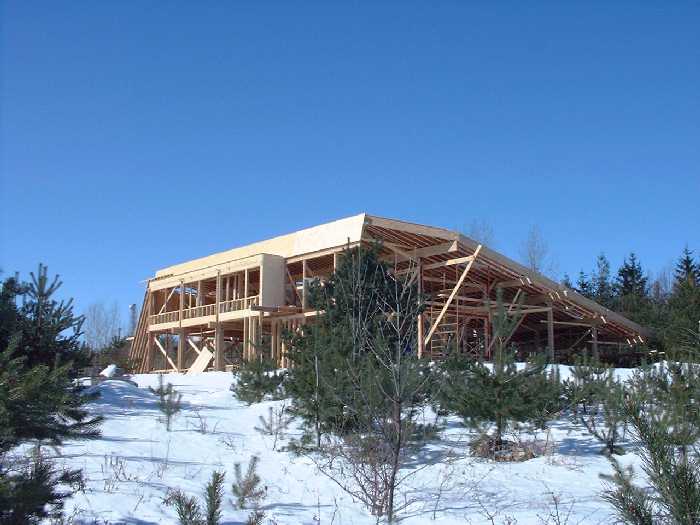
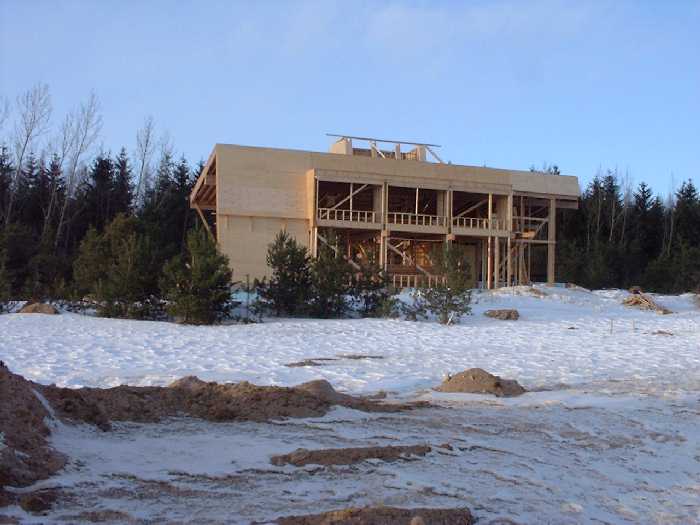
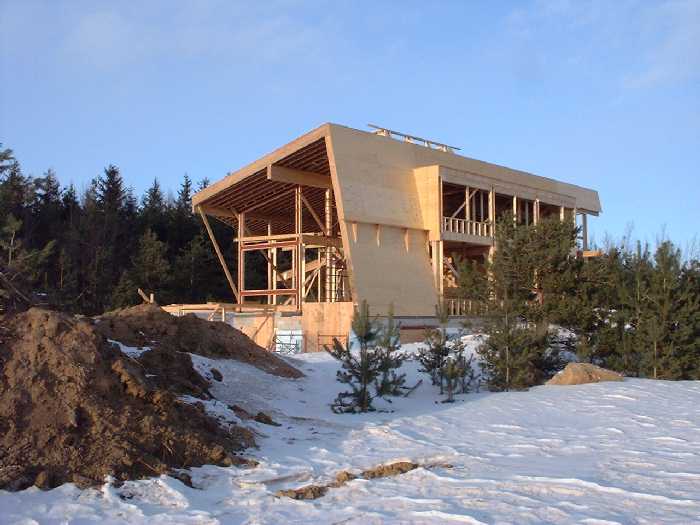
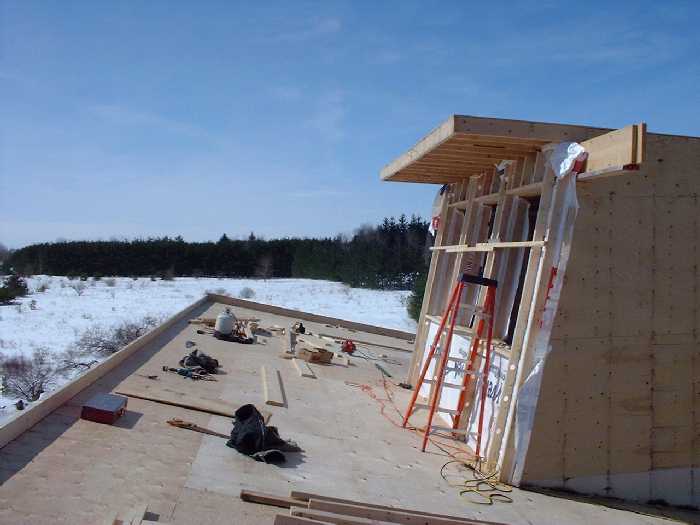
March 24, 2001 — Roof Done, Ready for Windows
The EPDM waterproof membrane is done, the roof is sealed and waterproof, and the window frames have been prepared for the Windows to arrive.
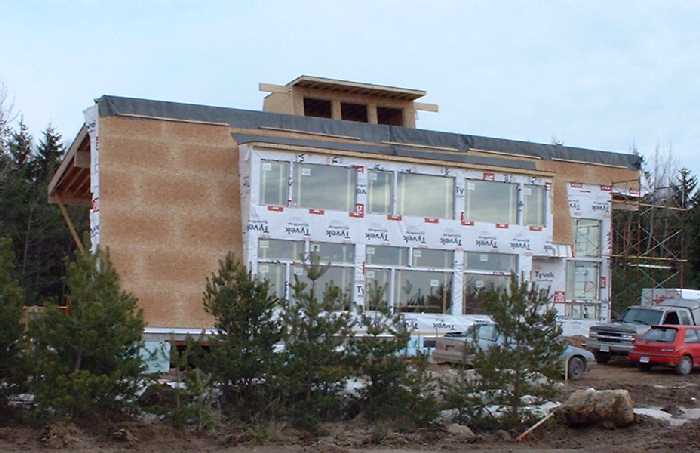
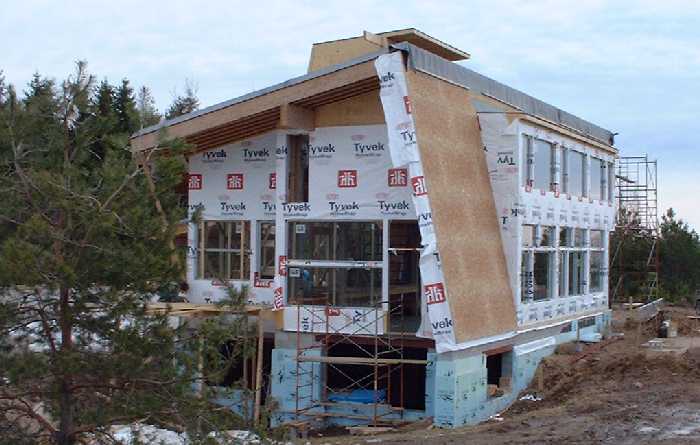
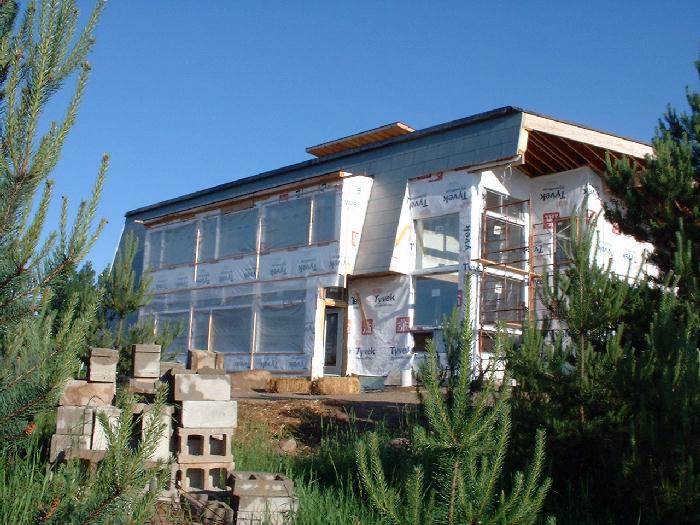
March 24, 2001 - The waterproof membrane now seals the entire roof. The additional membranes and soil will be applied later as the weather improves however the EPDM is sufficient to complete the roof. The window frames have been prepared for the InLine fiberglass windows to arrive on Monday. All windows should be installed by the end of next week.
March 24, 2001 - The master bedroom walls internally have been completed and the window frames are ready for installation.
March 3, 2001 - The entire roof now has the EPDM layer applied which completes the waterproofing for the roof. This industrial material is enough to complete the roof until we have time to apply the additional layers and soil.
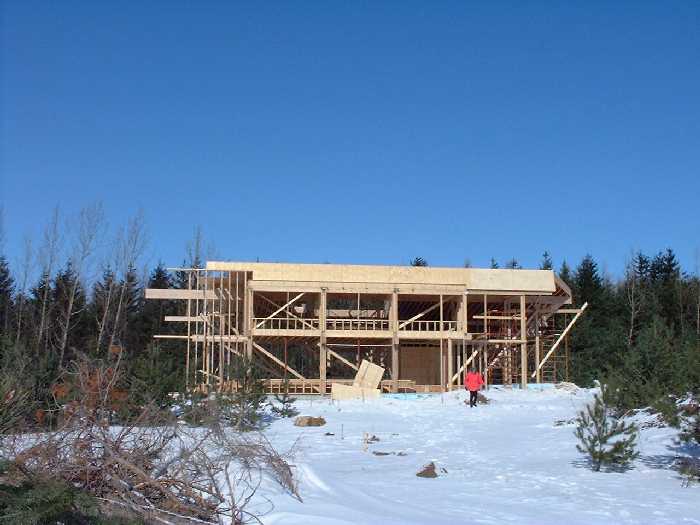
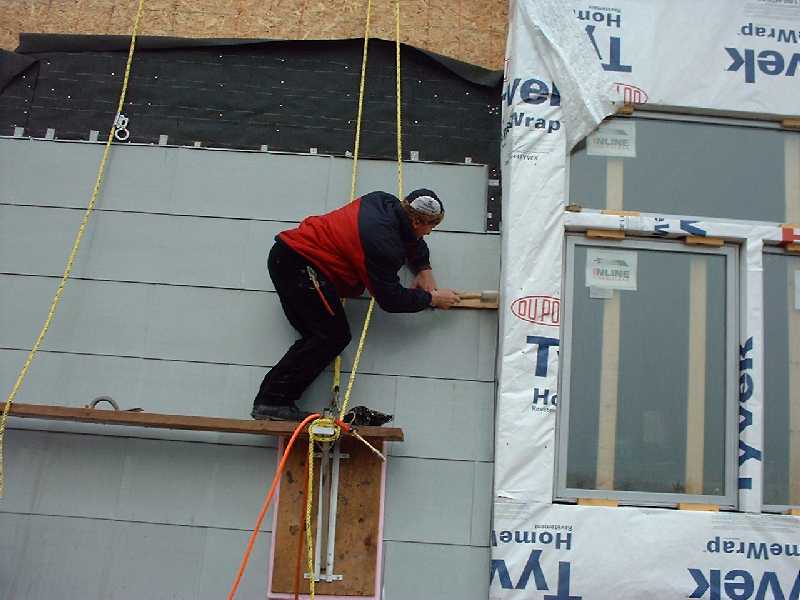
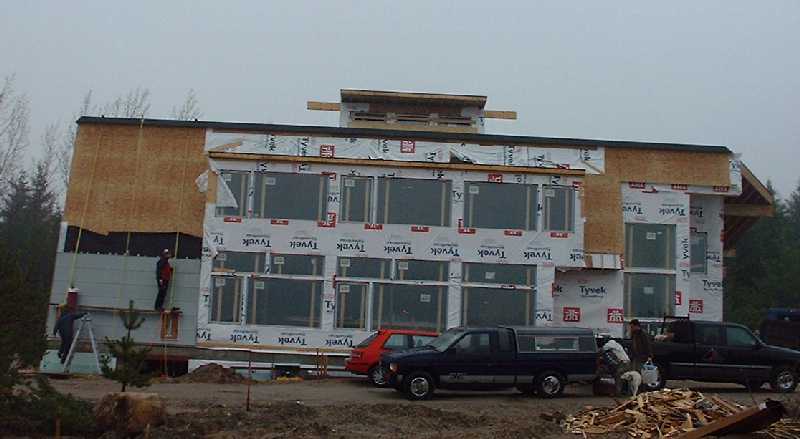
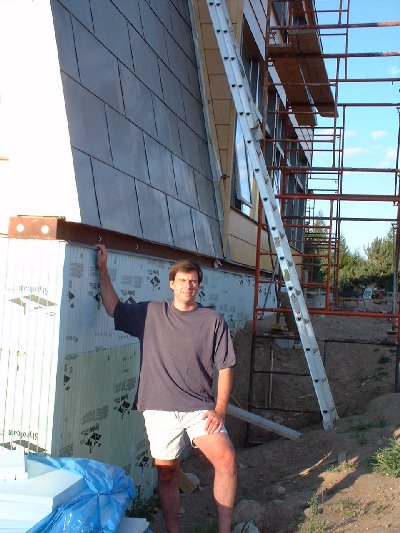
April 5, 2001 — Windows Installed
The double glazed, low E, Krypton gas filled, fibreglass windows with thermal edge spacer are now installed. These windows provide approximately R6 which is up to 3 times standard windows insulation values. The windows on the west side of the house also have a heat mirror 88 coating.
April 5, 2001 - The expanse of windows on the south side will bring in plenty of sunlight to provide light and passive solar heating. The heat of the sun will be absorbed by the concrete floors, which have water tubing running through them. As Martin says, the entire house is a greenhouse.
April 5, 2001 - The plumbers from Latters Plumbing (Shelburne) install the pump so that we'll have plenty of water for next weekend's straw bale work. Straw bale will be installed along the entire north side of the house, providing approximately R45 insulation. Straw bales will be covered with stucco. Richard and Bernie assist the welder with some steel bracing to reinforce the corners.
April 5, 2001 - South facing windows will be set off by zinc on the steeply sloped roof to either side. The zinc will be applied directly onto the plywood, which covers the EPDM waterproofing.
April 5, 2001 - On the east side of the house, you can see the "greenhouse" windows rising up 2 storeys. A walk-out to the south provides access to a protected area of the yard.
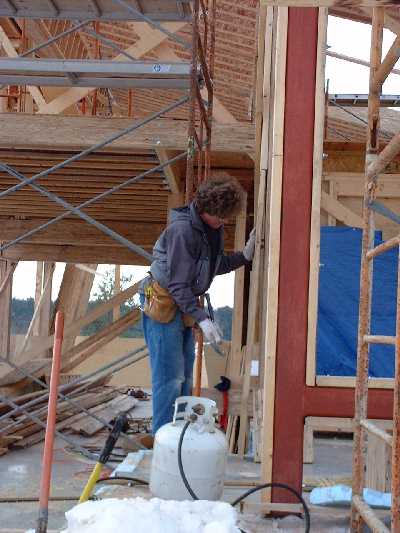
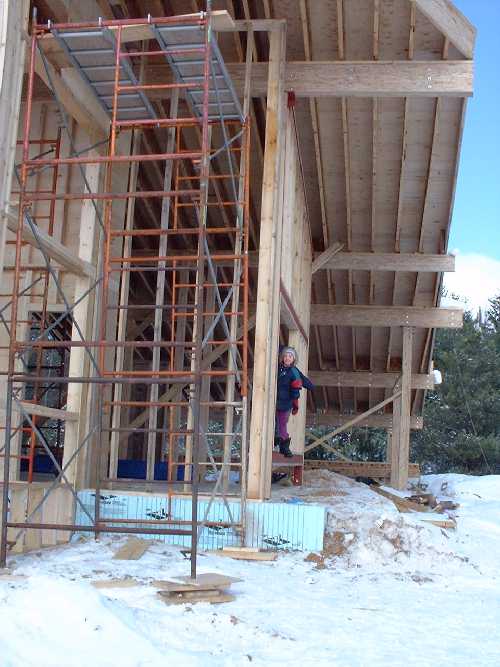
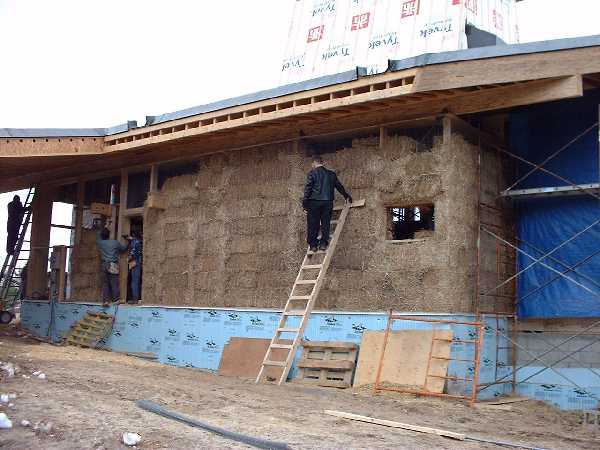
April 13, 2001 — Straw Bale Walls Steel Reinforcement
The steel cross bars have been secured in the straw bale walls on the north wall in preparation for laying the straw bales.
April 13, 2001 - The north wall has been prepared for the straw bale walls with play wood on top and bottom at a width of about 18 inches. At the far end, in the wall are the steel cross bars designed to reinforce the straw bale walls.
April 13, 2001 - Near a corner the steel cross bars provide extra strength for the high walls on the north wall. A windows frame can also be seen at the far left.
April 13, 2001 - The steel bars are secured at the top and bottom of the wall.
April 13, 2001 - The steel bars are secured at the top and bottom of the wall.
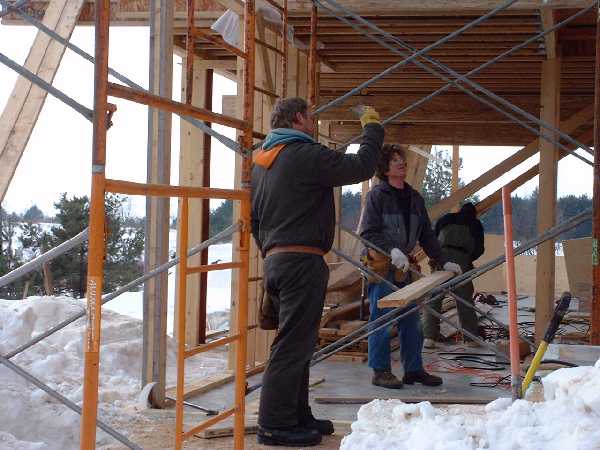
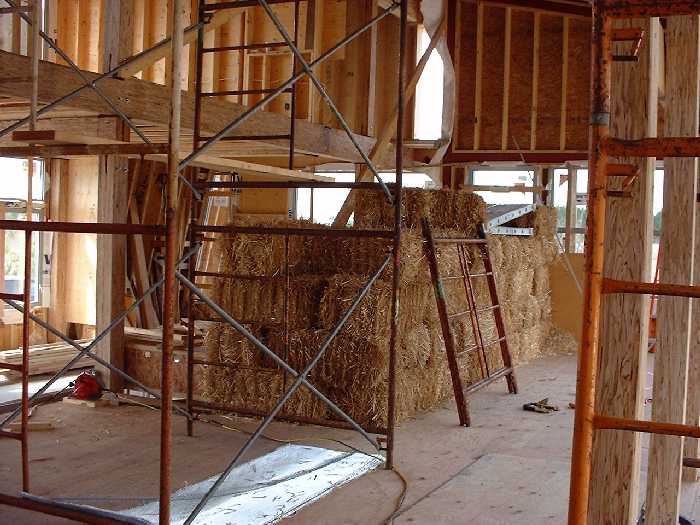
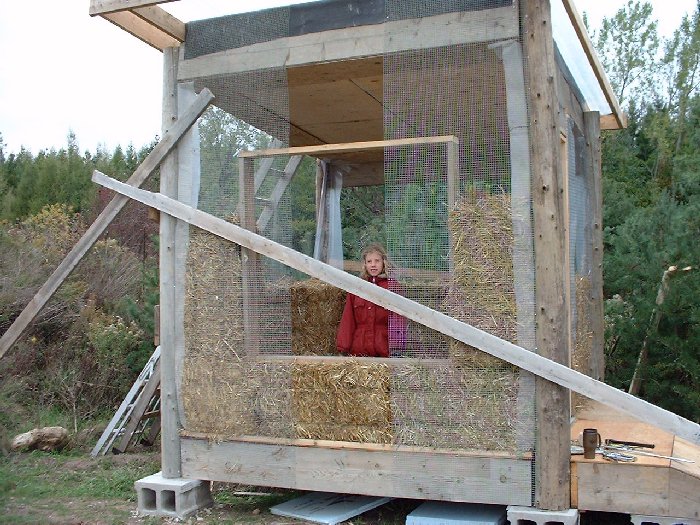
April 13, 2001 — Straw Bales
The 275 straw bales were delivered from a local farm. They have been stacked inside the house to keep the dry.
April 13, 2001 - Martin and Colin discuss details of the design and construction on site.

April 13, 2001 - The bales of straw have been stacked in the master bedroom to keep them dry before being placed in the north wall. The kids have enjoyed climbing up to be king of the castle.
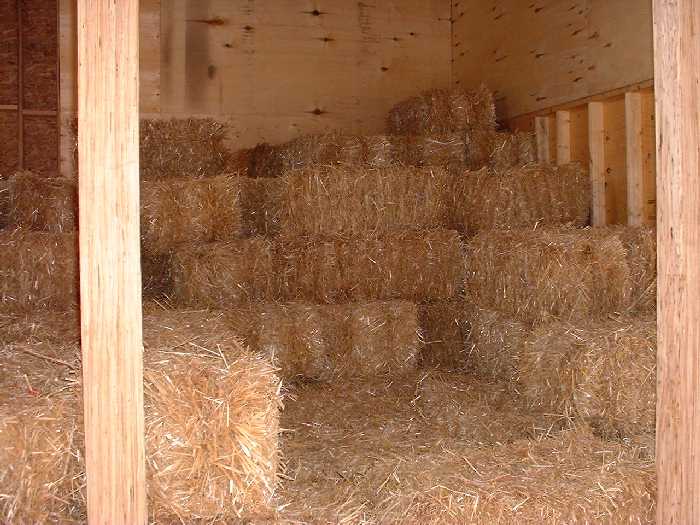
April 13, 2001 - The remainder of of the straw bales stand ready near the kitchen area.
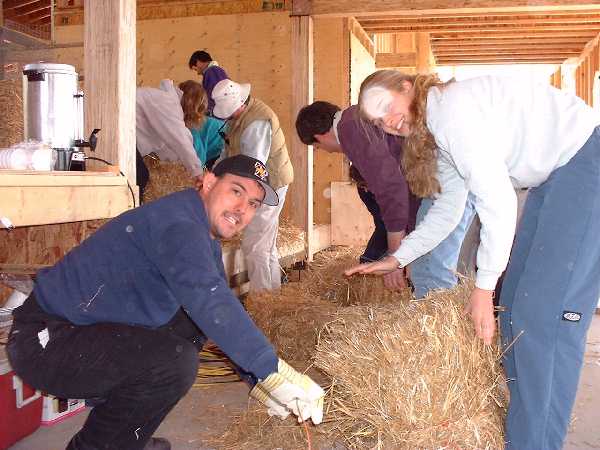
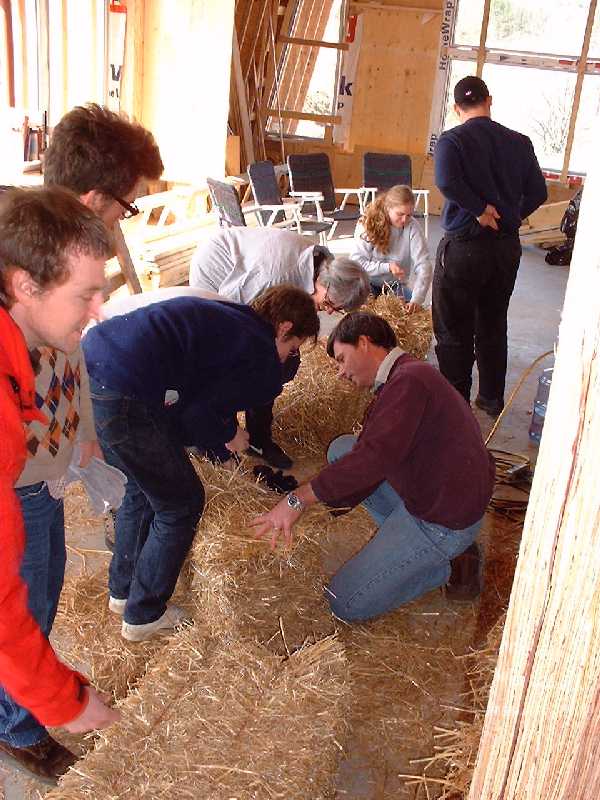
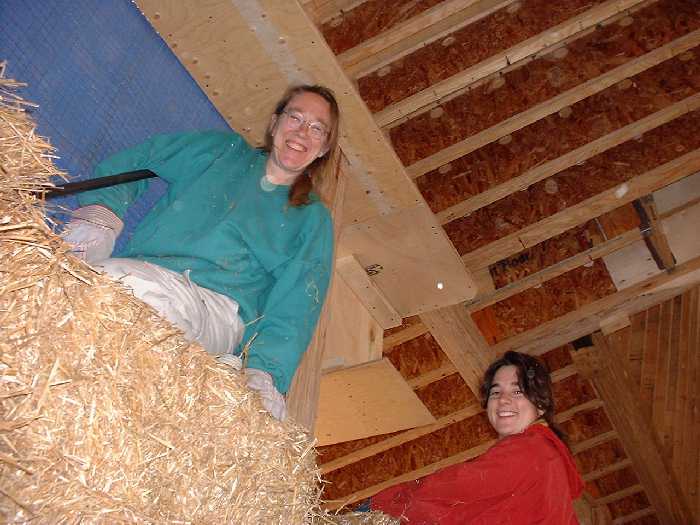
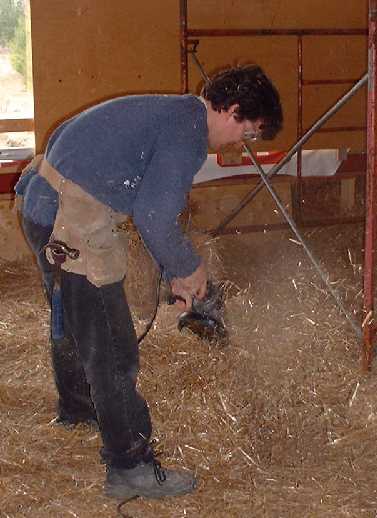
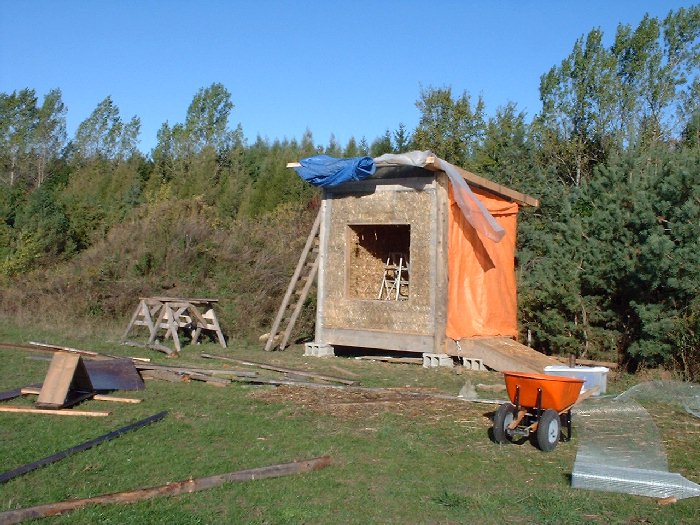
April 14, 2001 — Straw Bale Happening: Like an Old Fashioned Barn Raising
Straw Bale Happening: Like a Good Old Fashioned Barn Raising Great people make great things happen. Thanks to everyone for a great job. April 14-15, 2001

April 14, 2001 - Dan and Alison create 1/2, 1/3, and 2/3 size bales for around doors and windows.
April 14, 2001 - Learning to tie up a 1/2 bale.
April 14, 2001 - Bernie, Pete and Chris exchange ideas on the best ways to use tools.
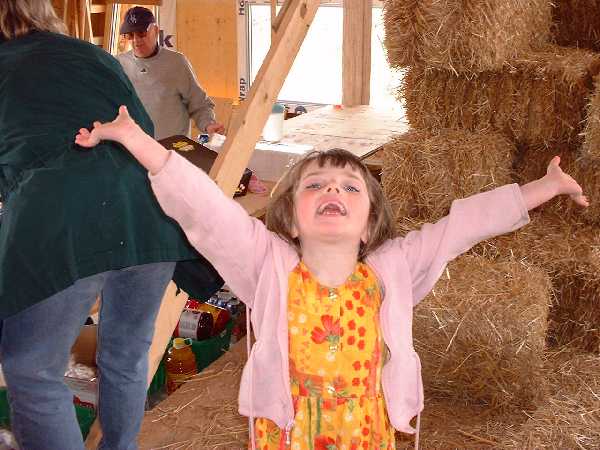
April 14, 2001 - Young helpers express their joy.
April 14, 2001 - Compressing the bales as they are stacked is aided by body weight. From these bale top positions, expert balers stuff cracks with loose straw.
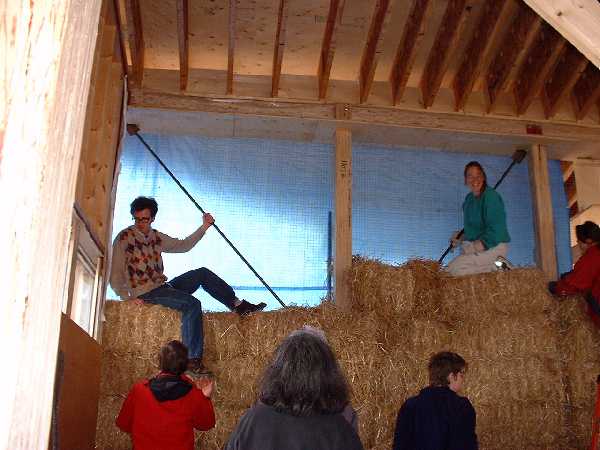
April 14, 2001 - On top of the world.
April 14, 2001 - Sewing the bales together. These guys are enjoying the work.
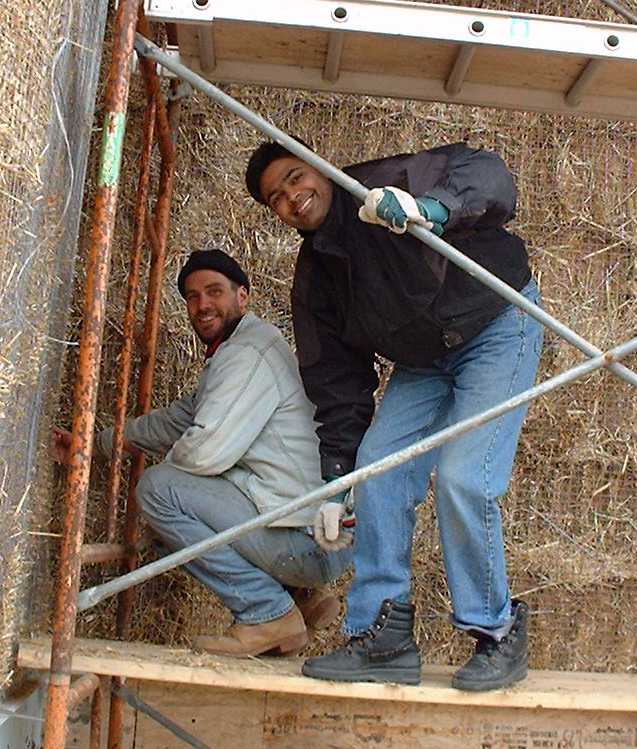
April 14, 2001 - Teamwork!
April 14, 2001 - Stacking bales with almost 25 people goes quickly..
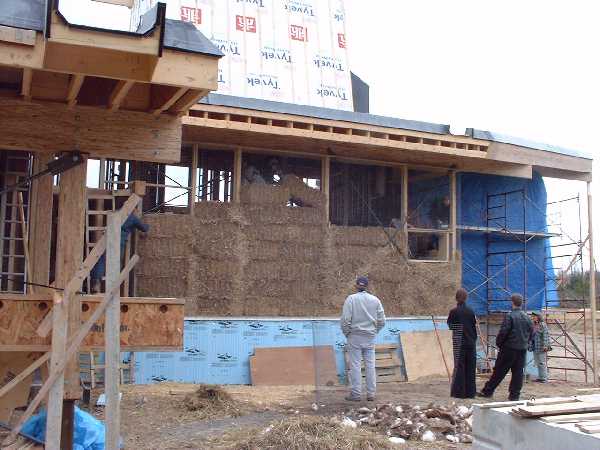
April 14, 2001 - Stacking bales in the corner with a window.
April 14, 2001 - Chris sculps the bale to allow for a close fit around the steel cross beams.
April 14, 2001 - Almost done.
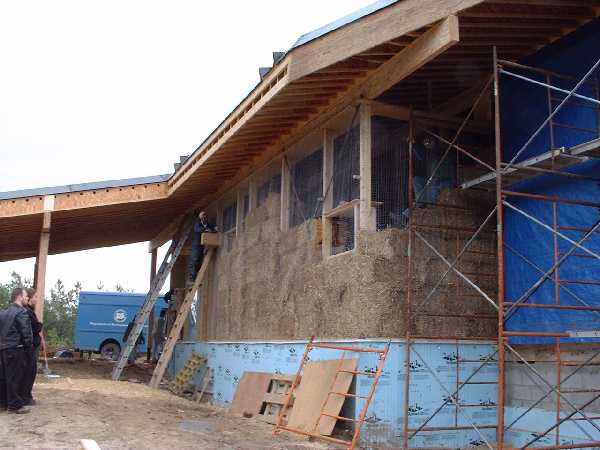
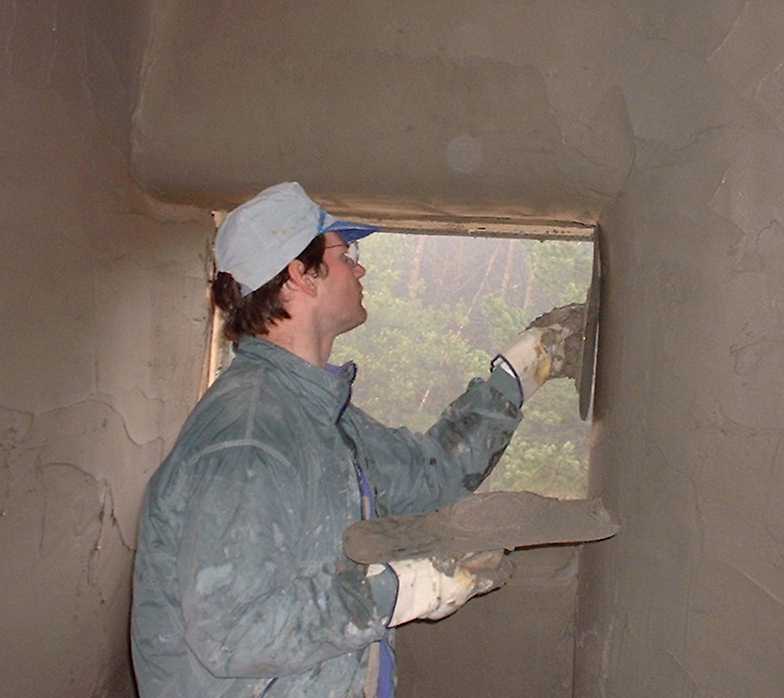
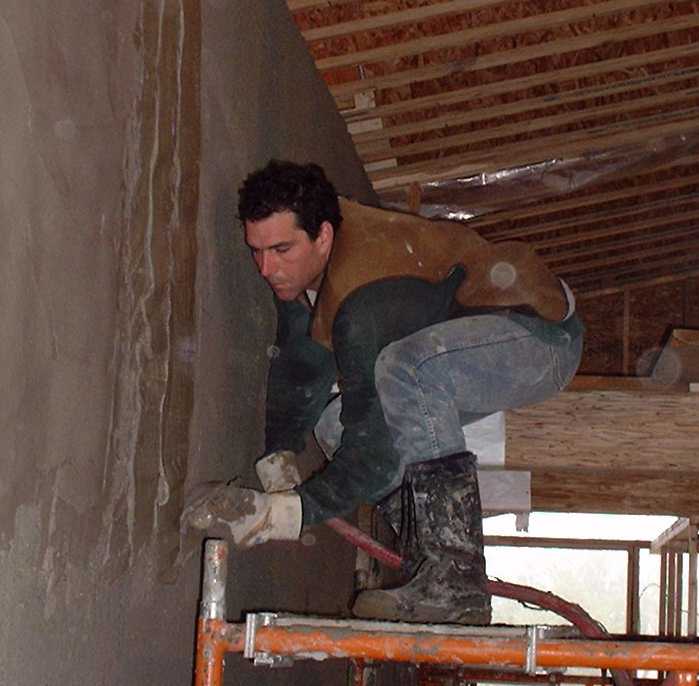
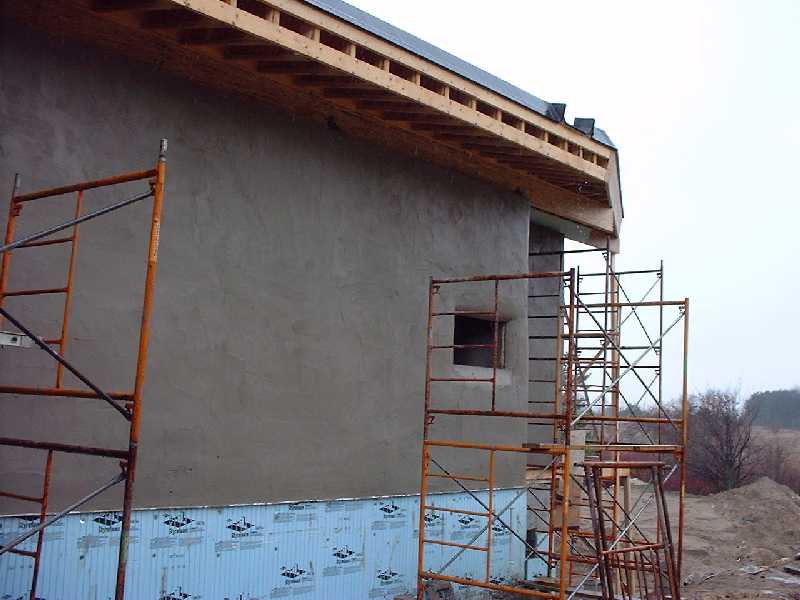
April 21, 2001 — Plastering Straw Bale Walls
The first coat of plastered was applied the day before by Pete, Tina and the crew. Today the second coat was applied and then "sponged".
April 21, 2001 - Pete trowels the only windows on the north side of the house..
April 21, 2001 - The inside walls get a second coat..
April 21, 2001 - Richard sets up scaffolding to do the second coat on the outside walls.
April 21, 2001 - Bill demonstrates a new invention, created by Peter Mack, a trowel that supplies a continuous stream of plaster pumped through a large hose attached. This new device worked very well at keeping the mess down as compared to the usual gun plastering technique..
April 21, 2001 - James picks out a few pieces of straw with pliers and fingers in order to prepare the outside wall for the second coat of plaster.
April 21, 2001 - Pete and Bill apply the second coat of plaster to the high part of the wall.

April 21, 2001 - Richard and Tina prepare the plaster in a mixer and pump combination..

April 21, 2001 - Brothers, Thomas and James, use a weed wacker to trim off the last few bits of straw.
April 21, 2001 - Close-up of Bill working hard with the new automatic plaster trowel.
April 21, 2001 - The newly plastered wall complete with sponge smoothing completed.
April 21, 2001 - Time to pack up the tools and reminisce about another straw bale project completed.
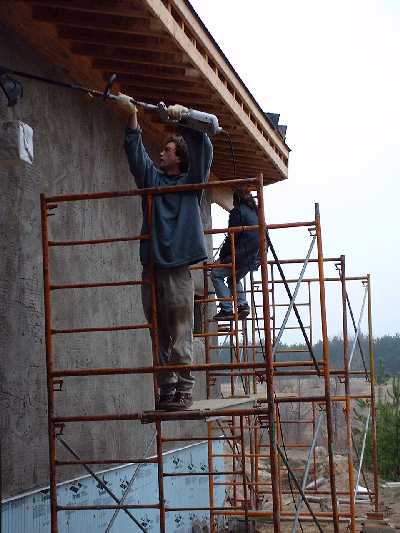
April 21, 2001 — Zinc Roofing Started
Jonathan Wolfe and company have started the Zinc roofing on the main south facing roof. Jonathan is working with Jack on weekends. During the week Jonathan is working on buildings with copper roofing in Ottawa.
April 21, 2001 - After heating the Zinc to prevent cracking, Jonathan uses special tools to secure the Zinc.
April 21, 2001 - Working through the rain Jonathan and Jack make good progress moving up the south face of the roof. They constructed special harnesses with soft styrafoam padding to allow them to move up as they work without damaging the Zinc..
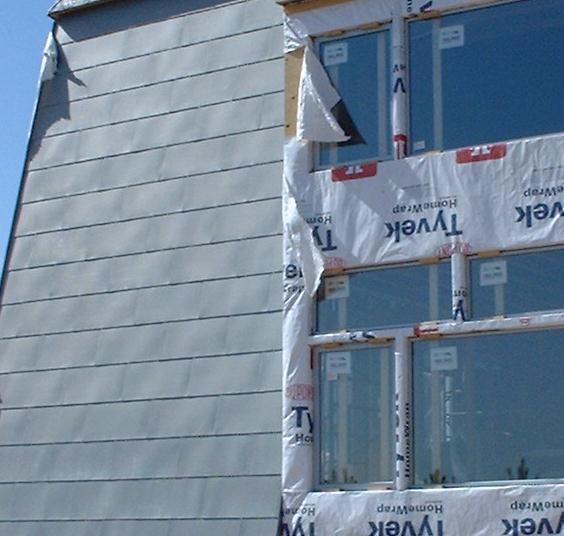
April 22, 2001 — Completing the Zinc Siding
The largest part of the zinc siding has been completed.
April 22, 2001 - The zinc siding begins to reflect the sky.
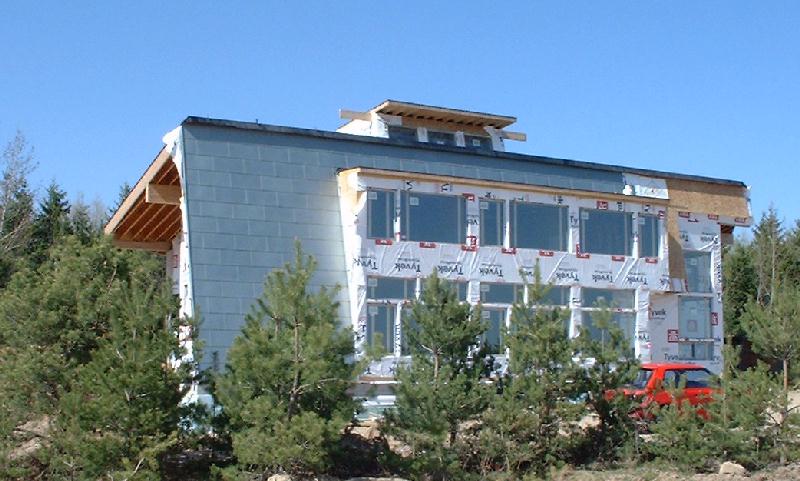
April 22, 2001 - Close-up of the hand crafted zinc.
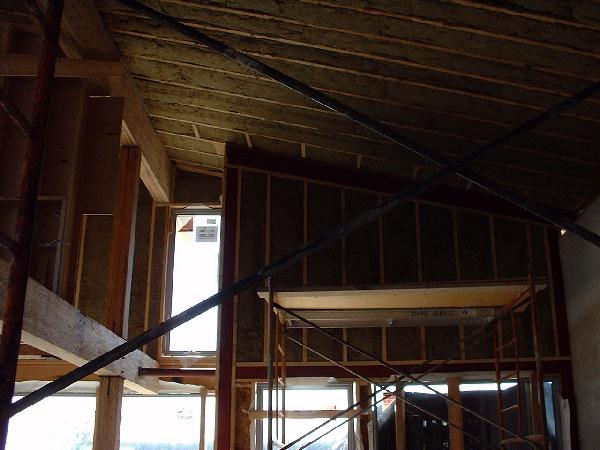
April 22, 2001 - A double layer Roxul insulation with a combined value of R44 fills the roof and walls in most places. Roxul is a combination of steel slag and volcanic rock.
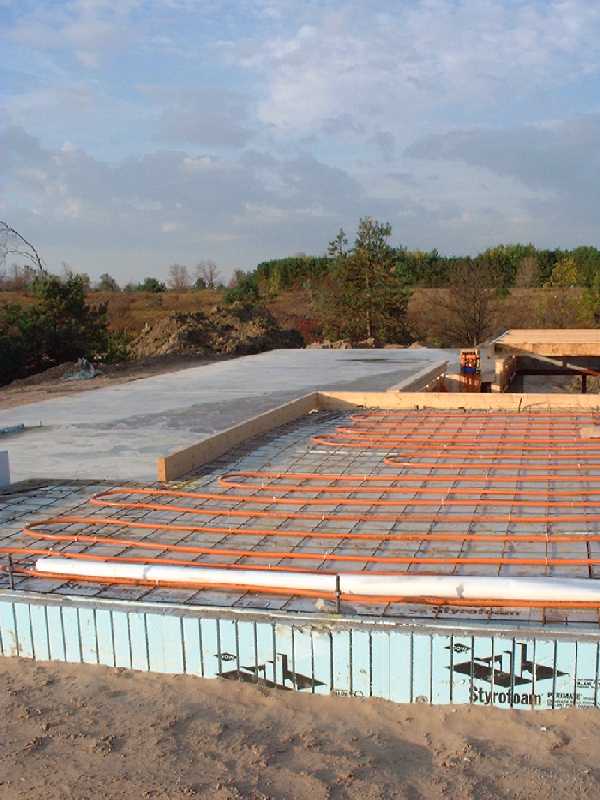
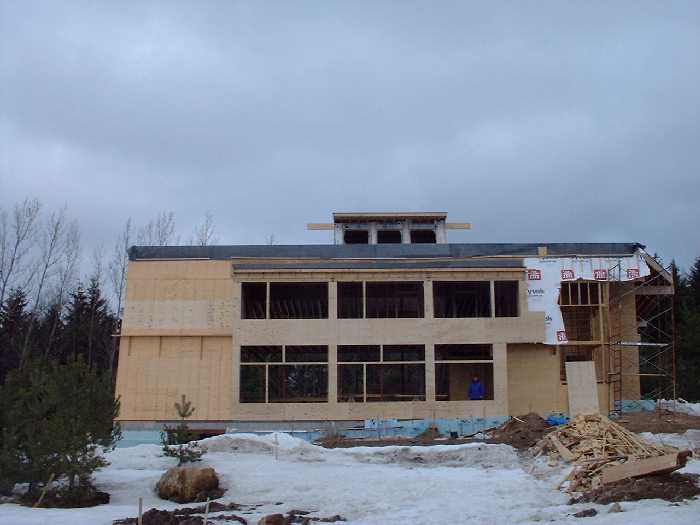
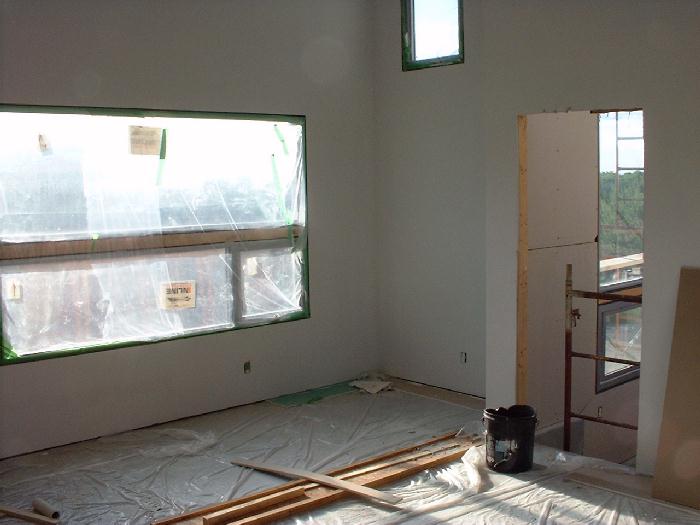
May 17, 2001 — North Side Radian Floor Heating
North Side Radiant Floor Heating Lyle Jory of Alternative Combined Energy Systems, the same company that did the original in floor heating on the south side of the house before the winter now completes the system. For more information on the in-floor heating system you can contact Lyle at (416) 463-5835 or (888) 773-6893.
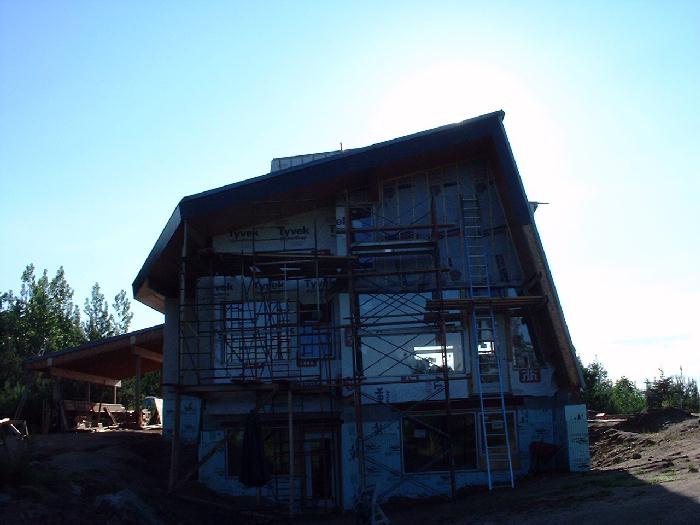
May 17, 2001 - Most of the insulation and drywalling has been completed. The north part of the in-floor heating system is now being installed on the ground floor and will also be installed on the 2nd floor on the south side. The tubing is installed on top of the plywood and then concrete is poured over the tubing. Finally the finished flooring will be installed.
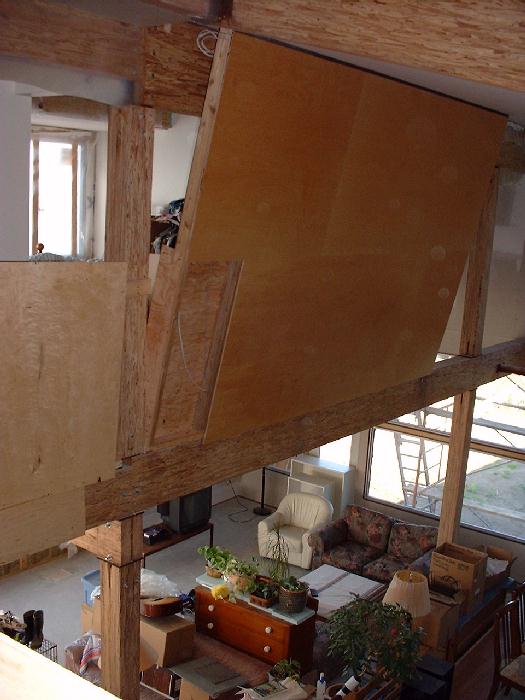
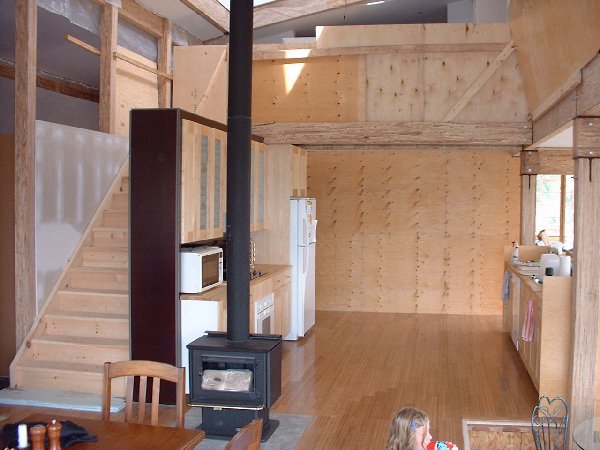
May 17, 2001 - The stairs to the second floor arrived and the framing for the kitchen cabinets has been prepared. The bridge over the kitchen can be seen although the railing has not yet been built.
April 21, 2001 - The radian floor heating here has been covered by a 1.5 inch thick layer of concrete.

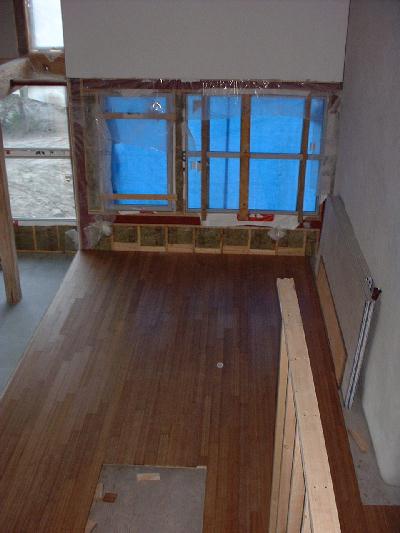
May 23, 2001 — Painting and Banboo Flooring
Painting and Bamboo Flooring The drywall has been completed. Leigh and John do the painting. The bamboo flooring has been installed in the kitchen/dining room on the ground floor.
May 23, 2001 - John paints the ceiling on the ground floor. The newly install banboo floor is ready for the kitchen to be assembled and installed..
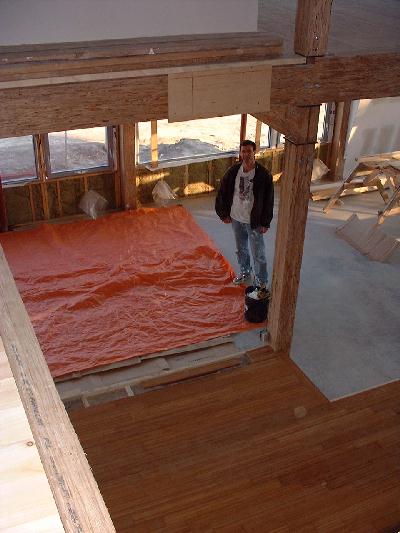
May 23, 2001 - Kitchen is ready for installation. Stairs to the second floor have been put in place. The bridge is ready. The concrete pad for the wood stove has been prepared between the kitchen and dining room.
May 23, 2001 - Bamboo flooring in the dining room with a concrete pad prepared for the wood stove.
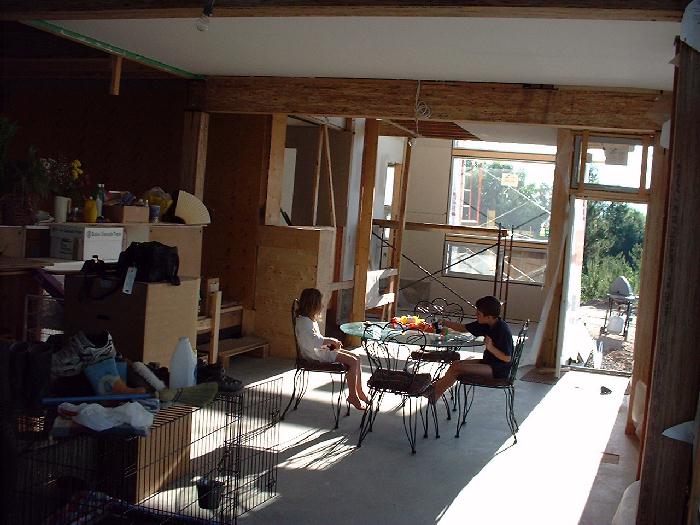
June 17, 2001 — Moved In
The house is ready enough to live in. While still partially under construction all the essentials are ready. We moved into the house on May 26, 2001.
June 17, 2001 - The main doors have been installed. A morning sun warms up the east side of the house.
June 17, 2001 - The breakfast table provides a sunny place for the kids to play teddy bear football. The greenhouse windows, newly finished with a reveal, drywall and blonde visa plywood separators allows the morning sun to stream through the south side of the house.
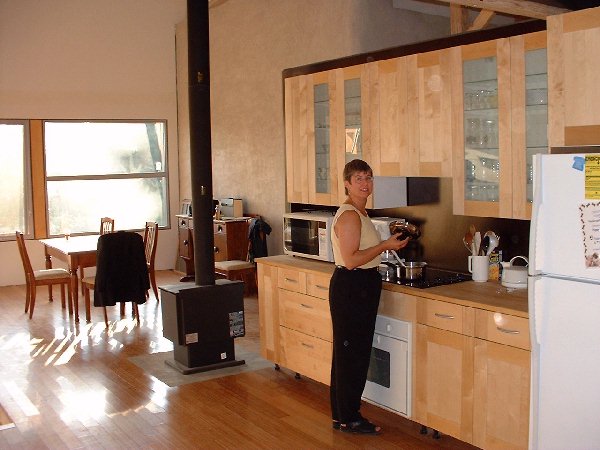
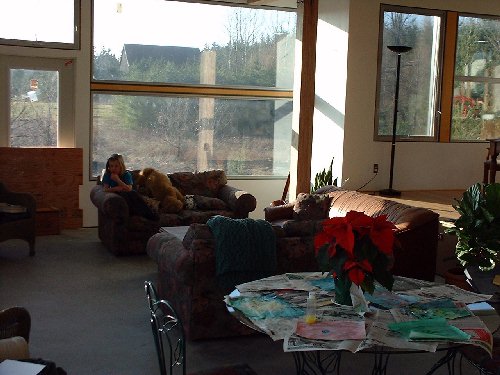
June 17, 2001 - Leigh prepares breakfast in our kitchen which has been partially constructed. The kitchen cabinets are Ikea. They do not use formeldihyde. The final cabinetry will be birch. For now the kitchen and living room also act as a warehouse as we finish the windows.
June 17, 2001 - Leigh and John have painted the master bedroom. The door on the right leads into the greenhouse.
June 17, 2001 - The wall in the spare bedroom meets the ceiling at a right angle providing wall that leans into the dining room. The living room downstairs has been temporarily set up for guests but for now is mainly under plastic during the day as construction continues.
June 17, 2001 — Warm and Cozy
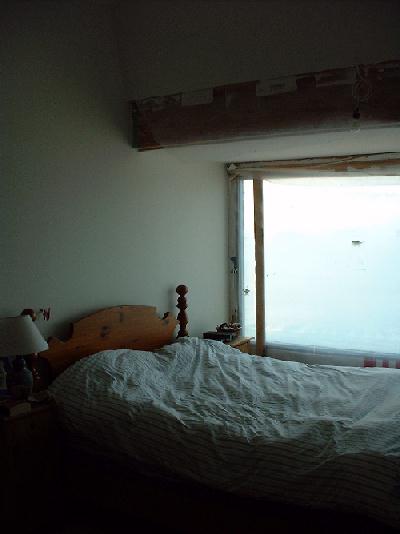
The spare bedroom provides a cozy place for Leigh and John while the master bedroom is still under construction.
June 17, 2001 - The spare bedroom on the second floor. Windows are still covered with poly plastic sheets to keep the rain out until the windows is set in it's final place.
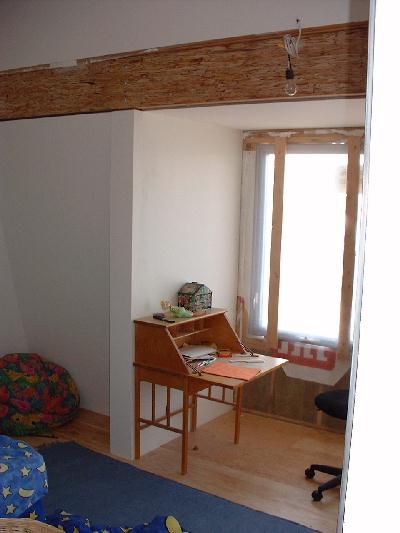
June 17, 2001 - The kids bedrooms have had the final flooring installed. In order to keep costs down and provide a warm and comfortable floor we've used standard plywood with a water based verathane. Under the floor is a concrete pad with the in-floor water tubing system which will provide heating in the winter.
June 17, 2001 — Morning in Spring
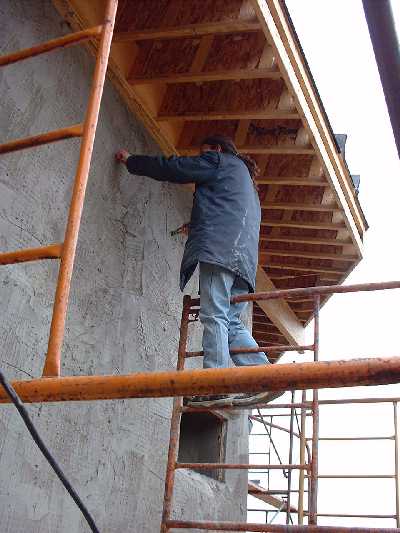
The early morning sun quickly warms the house. Final window finishing and flashing continues.
June 17, 2001 - Doors and windows are all in place. Colin maticulously adjusts and finishes each windows ensuring a tight seal and good insulation.
June 17, 2001 - The bright morning sun lights up the south face of the house.
June 17, 2001 — Solar Powered!
The power of the sun is reflected in every aspect of house throughout the day and night.
May 17, 2001 - The sun shines through.
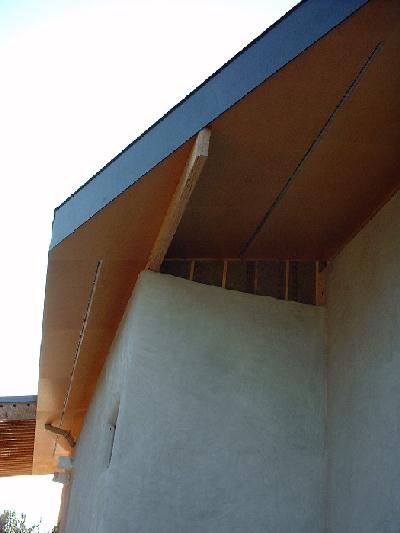
May 17, 2001 - The straw bale walls are finished with extra insulation. Birch ply wood is used for the soffit. Dark lines the roof and the blond is used underneath.
April 21, 2001 - Can you just imagine the grass starting to peak over he top of the roof?
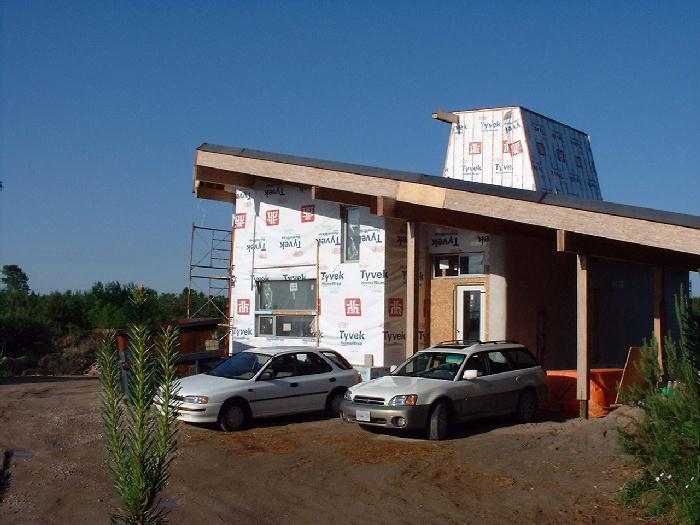
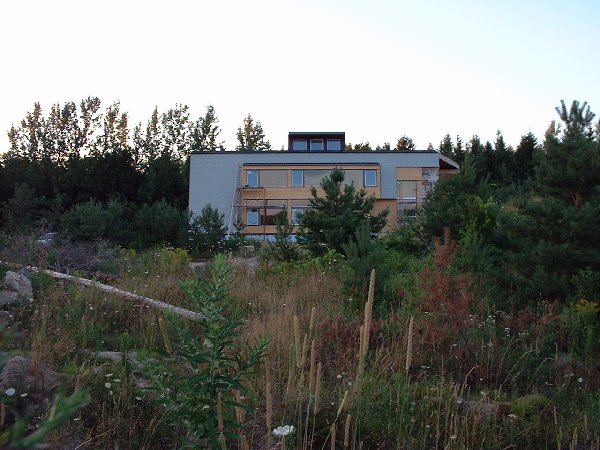
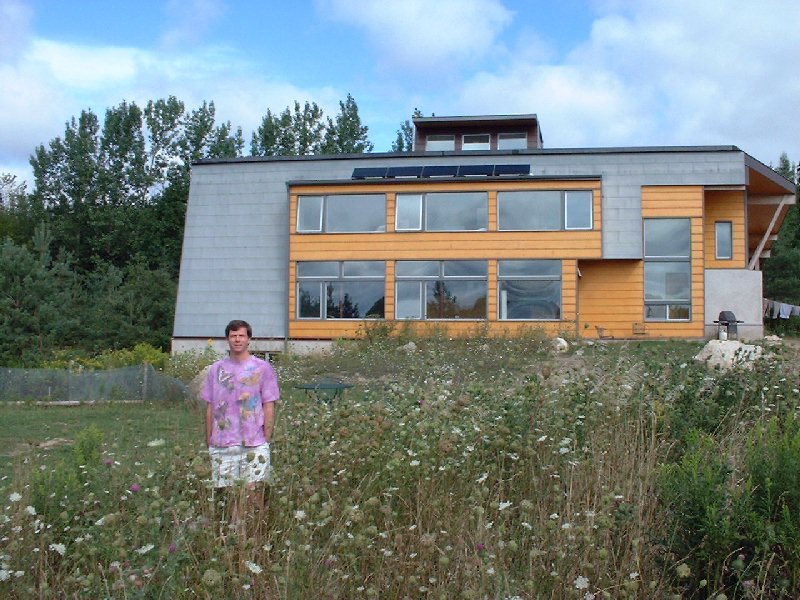
August 14, 2001 — Summer
Most of the outside siding has been completed. Only the east wall remains to be done.
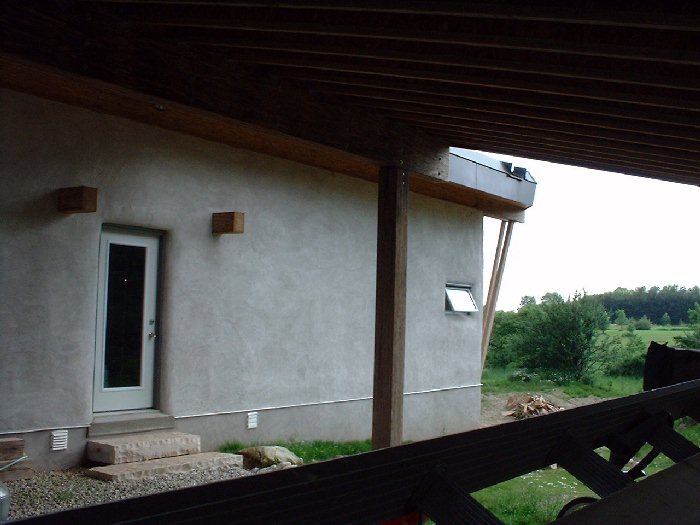
August 14, 2001 - The south face has almost been completed. The only other finishing is a pergola with sun shades on the south side to be mounted on tree logs that we saved when we put the driveway through the forest on the north side.
August 17, 2001 - Leigh enjoys our new kitchen although many finishing touches remain to be completed.
August 14, 2001 - Back from our summer vacation we check out all of the progress since we left two weeks earlier.

June 17, 2001 - John Wilson places a hand on the now completed exterior insulation which is now almost 4 inches thick right to the bottom of the basement around the walk out area on the west side.
August 31, 2001 — Exterior Finishing Touches
The west side is now partially completed. The interior is now livable although there is a great deal of dust.
August 31, 2001 - The siding has been completed on the greenhouse on the east side. The extended windows that span both floors on both sides of the corner provide light and ventilation for the greenhouse.
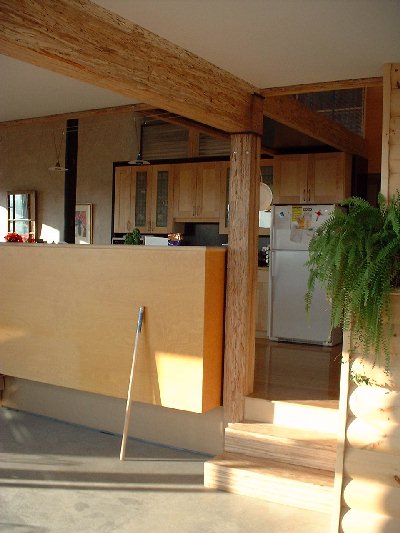
August 31, 2001 - The kitchen is central to the house. The wood burning stove is also centrally located in order to provide extra heat during the coldest days of winter.
August 31, 2001 - The temporary living room setup.

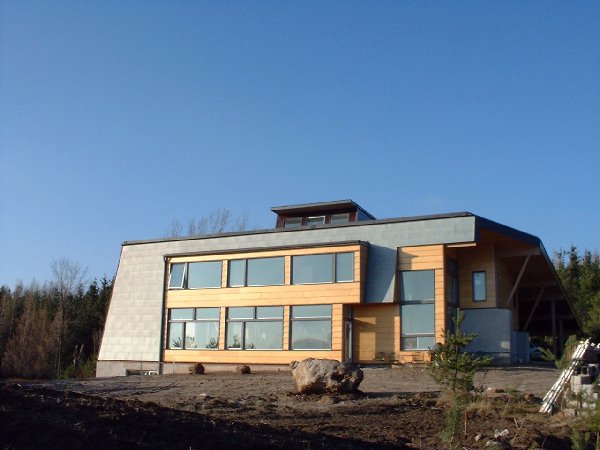
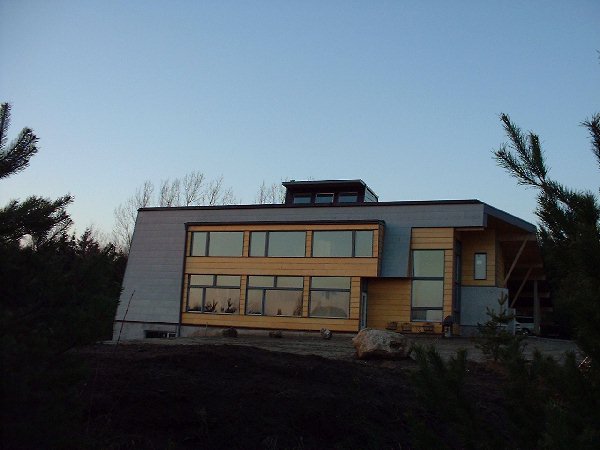
September 30, 2001 — Sun Sets on Exterior Work
The final grading is completed as fall sets in. The interior finishing at this point should be done within a month and that will be it for this year. We'll start the landscaping, greenroof, solar panels and fine tuning next year in the spring.
September 30, 2001 - The clear fall day leaves a lasting impression on the windows of the south side of the house.
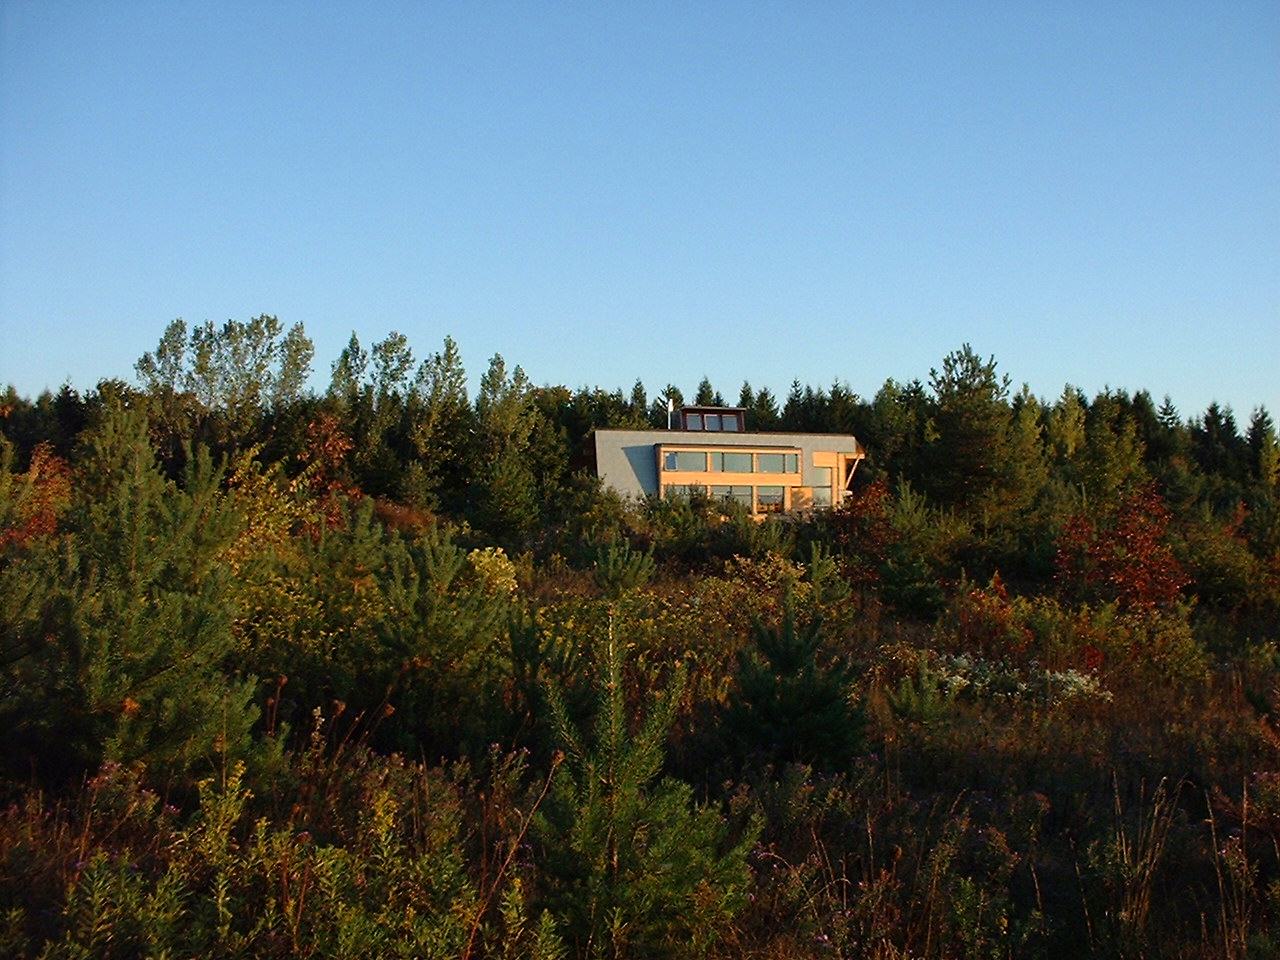
September 30, 2001 - Fall colours brighten the property making for wonderful walks.

September 30, 2001 - The grading has been completed and the exterior finishing done for the most part.
September 30, 2001 - Extensive grading last Friday has opened up some space around the house. The natural flow of water away from the house is seen here on the west side. The walk out from the basement provides lots of light and warmth during the later part of the day.
December 2, 2001 — The In-Floor Radiant Heating System
The small water heating on demand system provides the main heating system. This "Microtherm" water heater supplies heated water to the substantial tubing laced throughout the flooring system on all levels of the house. Each room or zone has a thermostat so that temperature can be mainainted at different levels in different areas of the house. The Seisco Microtherm water heating device is electrically powered and designed to be ultra-efficient. For the most part the device is rarely on due to the thermal capacity of the concrete floors. When heated water is required it is only distributed to the zone in which it is required. Finally, the ultra-efficient design ensure the least amount of energy is used to heat the water and no energy is expended in storing the heated water. The main heating system was completed last week. The wood burning stove has provided sufficient heat to keep us warm until this point which suggest we have a well insulated home. This winter will test this relatively new type of heating system configuration.
December 2, 2001 - The square white unit with the Seisco label is the main "furnace" for the entire house. This ultra-efficient water heating device uses electricity to heat water on demand to be supplied to zones in the house. Each zone in the house has it's own thermostatic control. The Seisco Microtherm device requires to electrical fees as shown in the upper left. The green Taco device provides a relay control system for the valves for the piping into the floor. This controller is initiatted by the smaller controler below which gets all of the signals through the red wiring from each thermostat. The in-floor tubing in this picture are only for the 2nd floor rooms. The others are on the wall to the left (not visible in this picture).
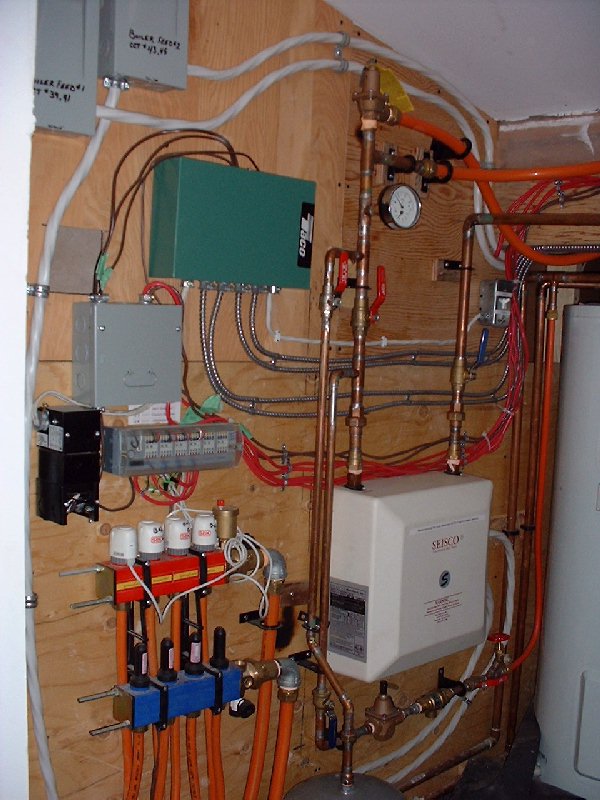
December 2, 2001 - The flow of heated water into the tubing is provided by pumps for each zone. Each pump has a main shut off switch at the top of the picture. To the left side, with the black foam pipe insulation, is the future in-take for the solar water heater which will be mounted on the roof on the south face. The solar water heater will minimize the electrical energy required to heat the water. On the far left in the backgroun is an electric hot water tank used for the bath, shower and sinks. This system is separated from the in-floor water heating system.
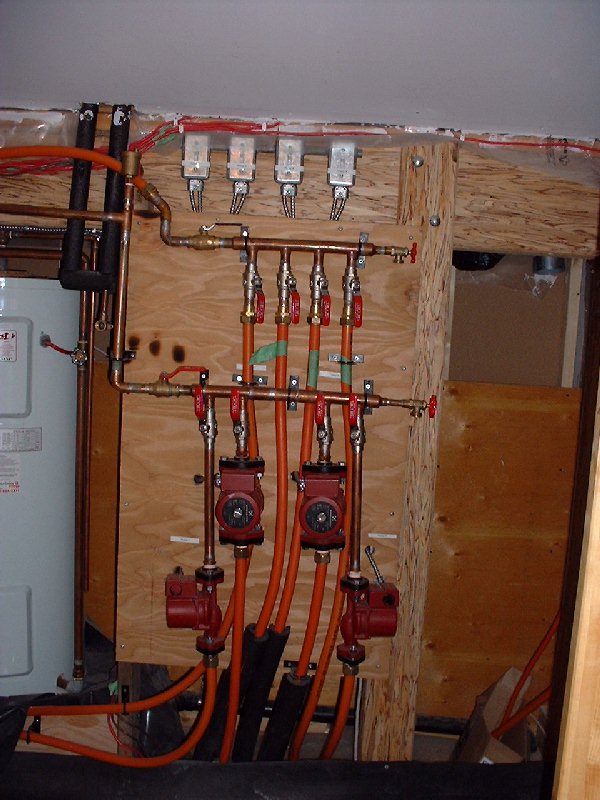
December 2, 2001 - The utility room for the entire homes heating system is located on the 2nd floor north of the bathroom. This picture shows the entire mechanical room.

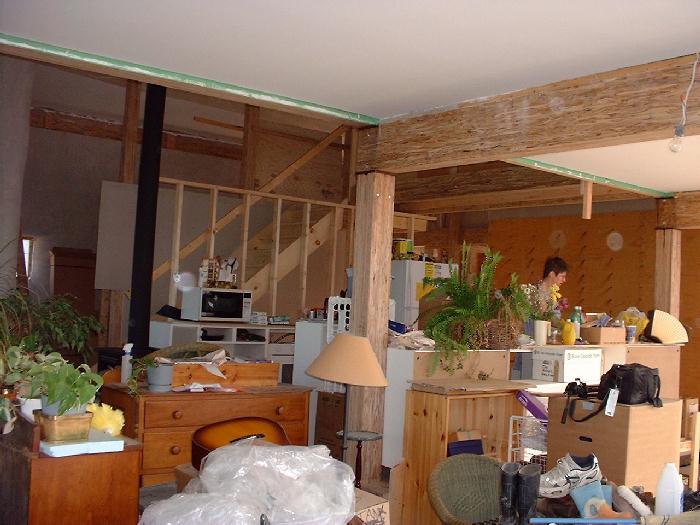
December 2, 2001 — Interior Final Touches
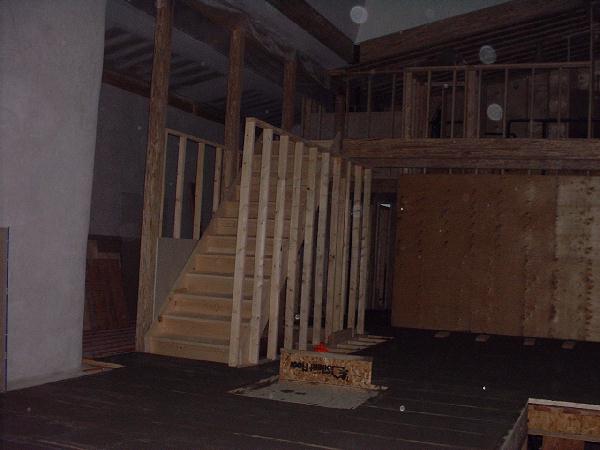
The interior finishing has nearly been completed and we've bug to decorate. The railing for the bridge now has the steel wire fencing install and the opaque barrier has been installed above the cupboards on the north side providing a unique and yet simple finish. The wood stove had been our only supply of heat until recently. The stairs were installed from the kitchen down into the living area recently using left-over pieces of the glulam beams.
December 2, 2001 - The kichen, stairs, bridge and cupboards are finished. Only minor doweling remains for the railing. Light from later afternoon sun warms the centre core of the house on this sunny cold day.
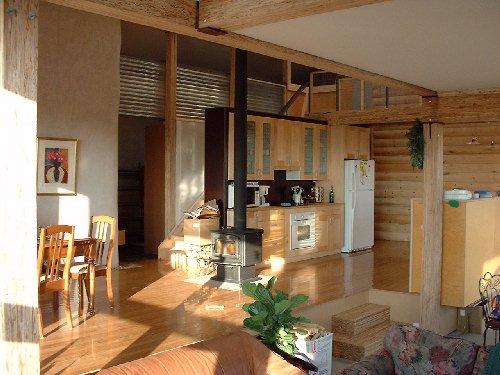
December 2, 2001 - The bridge is made simply using a steel fencing material and steel brackets. The log wall in the background provides a visual divide between the core of the house and the master bedroom area. The first set of low voltage lights have been installed over the kitchen counter on the far right providing excellent task lighting with low power requirements.
December 2, 2001 - Claire relaxes after and afternoon of painting with here Dad.
December 2, 2001 - The new log cabin wall surrounds the master bedroom area. The glass sloped window on the right looks like a spaceship within the house looking out into the greenhouse on the south side from the master bedroom bathroom. Very exciting.
December 2, 2001 - The new stairs are made from left-over material from the post and beam construction.
December 2, 2001 — Exterior Done, Grading Completed
The exterior has been completed for this year, ready for the winter. Next spring we will begin the process of landscaping and growing our own vegetables.
December 2, 2001 - The house soaks up the sun on a cool December afternoon. The boulders are the remains of ancient glacial activity in this heavenly hilltop location.
December 2, 2001 - The west end of the house soaks up the late afternoon sun on a cool sunny day. Inside the house has collected the heat in the concrete floors. In fact it was so hot that I had to open some windows to let the lovely cool fresh air in.
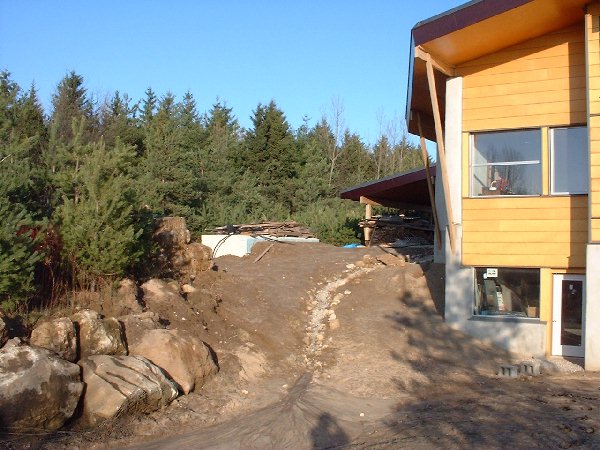
December 2, 2001 - The rock drainage path directs the large amount of water which currently flows off of the large EPDM covered roof. Once the soil and grasses are established on the roof we expect the flow to be significantly reduced. In time we expect to grow native wild flowers and grasses in this area to maintain the slope and minimize erosion.
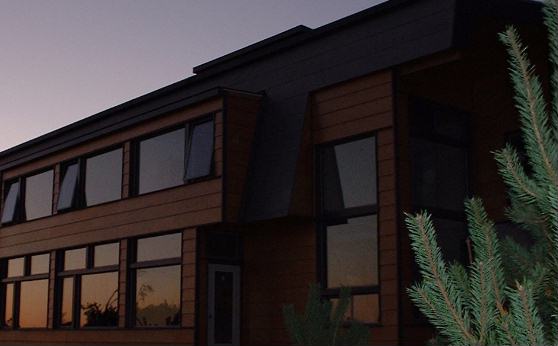
December 2, 2001 - The sun sets slowly casting a dark orange glow on the windows.
June 24, 2002 — Summer 2002
The new organic vegetable garden is off to a roaring start. So far we've been able to get lettuce, onions, potatoes, tomatoes, peppers, and some pumpkins growing. We are also working on getting our wild and purchased raspberries and strawberries growing so that we can get them before the animals do.
June 24 , 2002 - The sun sets to the west. We've been able to eat outside several times this year as the native grasses start to grow in. In the foreground you can see the end of our new organic vegetable garden.
June 28 , 2002 - The vegetables are coming up in our organic garden. Leigh has worked hard to keep the "weeds" down and we've already enjoyed some of the lettuce. The beans, tomatoes, onions, peas, potatoes, peppers are all coming up nicely. We did bring in some top soil as the compost wasn't ready nor was their enough.

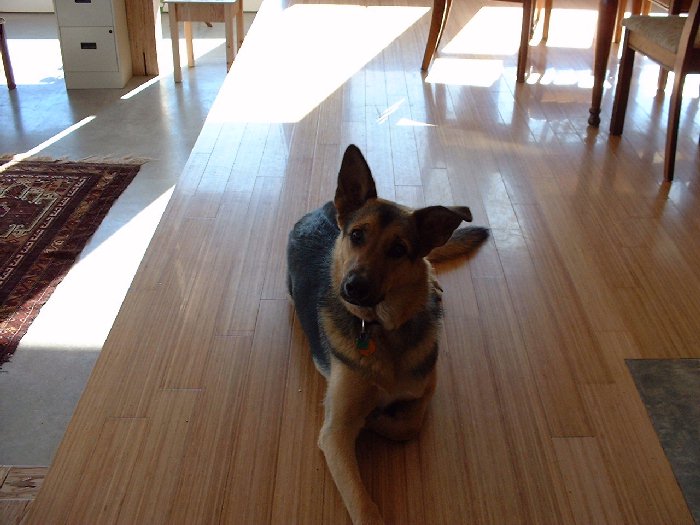
June 28 , 2002 - Niko enjoys the cool bamboo flooring in the kitchen and dining room in the late afternoon. The concrete floors on the lower level can be seen on the far left.
June 28, 2002 — Summer Sun, Glorious Days
The exterior has been completed for this year, ready for the winter. Next spring we will begin the process of landscaping and growing our own vegetables.
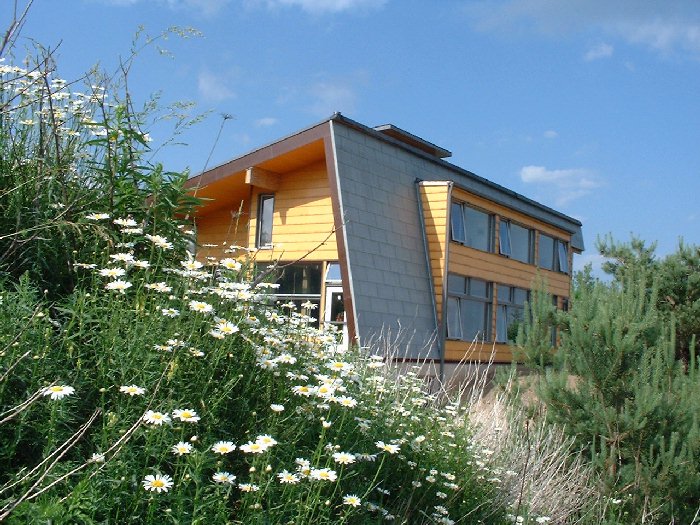
June 28, 2002 - The daisies have come back all around the house. In the next two months the external sun shades will be constructed in front of this, the south face of the house. Also, the wind turbine and solar photo voltaic (PV) panels will be installed on this, the south side of the house.
June 28 , 2002 - The north side of the house from inside the car port. You can see the glulam posts both holding up the roof but also protruding on each side of the front door.
June 28 , 2002 - The north wall of the house has stucco on strawbales for the walls. The left over straw bales have come in very handy in the vegetable garden, for landscaping and for creating paths. The kids have also had a blast playing on them all winter long. We love strawbales.
June 28 , 2002 - Okay, it looks good so here it is again.

June 28, 2002 — Fall/Winter 2002
The new straw bale shed is well under way.
Nov 8, 2002 - The sun rises from the east casting a brilliant pink reflection on everything.
October 30, 2002 - The kids and I create what I call a shed and they are calling a playhouse. The roof has already got the straw bales laid in the rafters. Claire and Ian help me prepare the chicken wire around the perimeter of the structure, stapling it in on the top and then the bottom.
October 30, 2002 - Claire peeks through the future window of her playhouse. Staw bale walls are half completed.
October 30, 2002 - The straw bale walls have been layed and stiched.
November 9, 2002 - Mixing one part portland cement, one part lime and five parts sand for the stucco on the shed.
November 16, 2002 - Three of the four outside walls have their first coat of stucco applied. The weather got too cold to complete the rest. We will wait for a lucky break this winter or complete in the spring.
June 28, 2002 — Photo Voltaic Solar Panels
After several false starts we finally got the photo voltaic solar array purchased, installed and running this past December. The modules we selected are made by Siemens in the United States. The inverter system in our electrical room is designed to support both this photo voltaic (PV) solar panel system and a wind turbine that should arrive next week. The inverter converts DC current from the solar panels to AC. The electrical power generated by the solar array and future wind turbine is being pumped into the utility electrical grid. On sunny and windy days our electricity meter runs backwards.For more information on the solar power and wind turbine systems contact Solera at www.soleraenergies.com . .
December 17, 2002 - The photo voltaic solar panels which convert sunlight into electricity can be seen just above the windows on the second floor. The modules are a dark black colour. Ten individual modules have been integrated onto the roof. These panels are just the start of what will be a several sets of these panels..
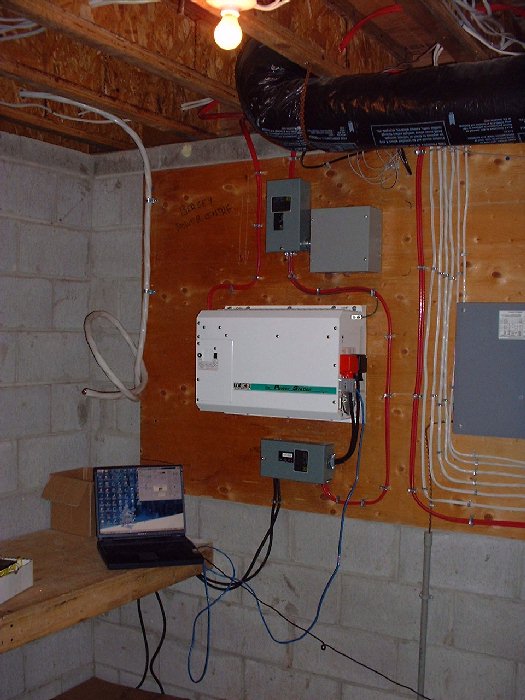
December 17, 2002 - The photo voltaic solar panels and the future wind turbine cables terminate in our electrical room. They are connected into the inverter (the white box on the wall in the middle of the picture). The white cable to the left is the future wind turbine cable from the outside of the house coming into the intervert. The switch box above the inverter connects and disconnects the inverters AC power output with the electrical grid coming in from the street. This particular configuration also requires some batteries be connected...in our case since we are grid connected it is a minimum of four batteries. The other connection form the inverter is into our electrical panel. On the bench is some software running that monitors the power input/output from the various connections..
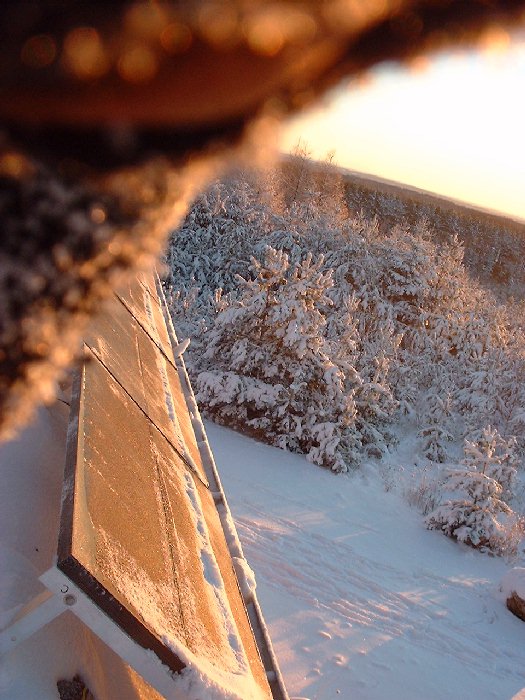
December 17 , 2002 - Up on the roof you can see a close-up of the solar panels. This was a cold, frosty, but fortunately sunny day. It is nice to know that the output from solar panels increases the lower the operating temperature. Still we don't get too much sun in the winter. We do get lots of wind though. The wind turbine should be installed next week.
January 8, 2003 — Wind Turbine Installation
The Bergey wind turbine is being installed today by Ben Rodgers and Leondard Allen of Solera. They worked through a bit of a snow storm to get things up and operational. It has been painful watching day after day of wind go by without the wind turbine installed. For more information on the solar power and wind turbine systems contact Solwera at www.soleraenergies.com .
January 8, 2003 - Ben prepares the base of the tower for the wind turbine. The tower is 60 feet high. The electrical wiring is being installed before raising the tower.
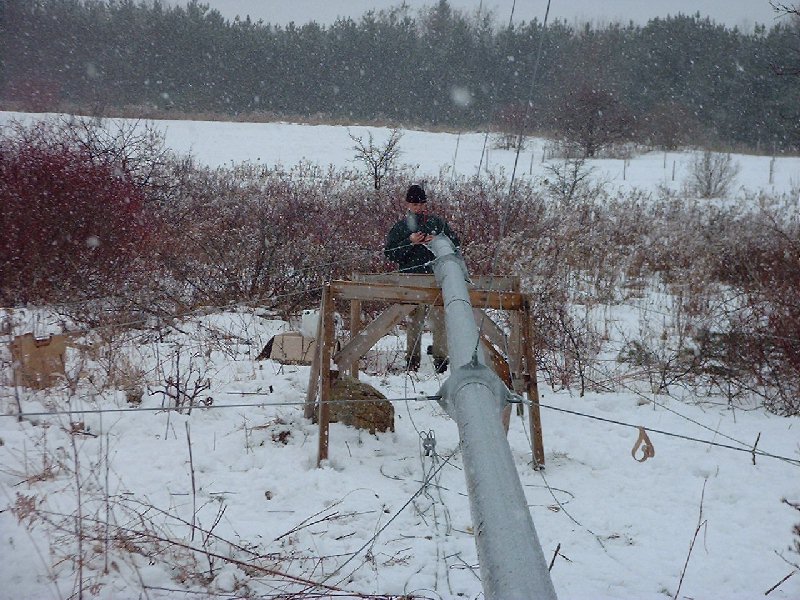
January 8, 2003 - The guide wires are installed along four corners at the base of the tower.

January 8, 2003 - Ben holds the core turbine that will be mounted at the top of the tower. The three blades three feet each will be attached to the yellow nose of the turbine.

January 8, 2003 - The truck pulls up the main portion of the tower while the guide wires are used to keep it in the middle.

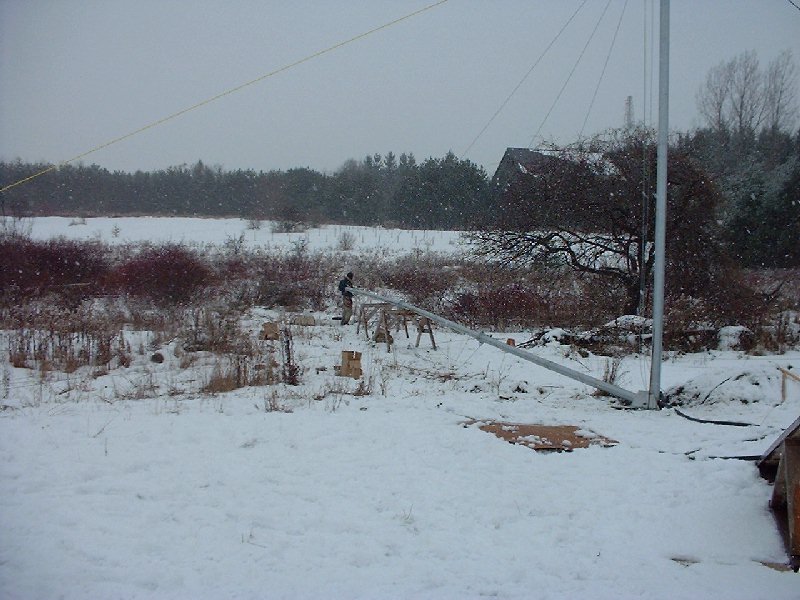
January 8, 2003 - The tower is partially up.
January 9, 2003 — Wind Power!
The wind turbine is starting to generate clean power in combination with the solar panels today. We'll let you know how much power we get with these units as we continue to monitor them.
January 9, 2003 - The Bergey wind turbine has been installed by Phantom Electron Corporation.
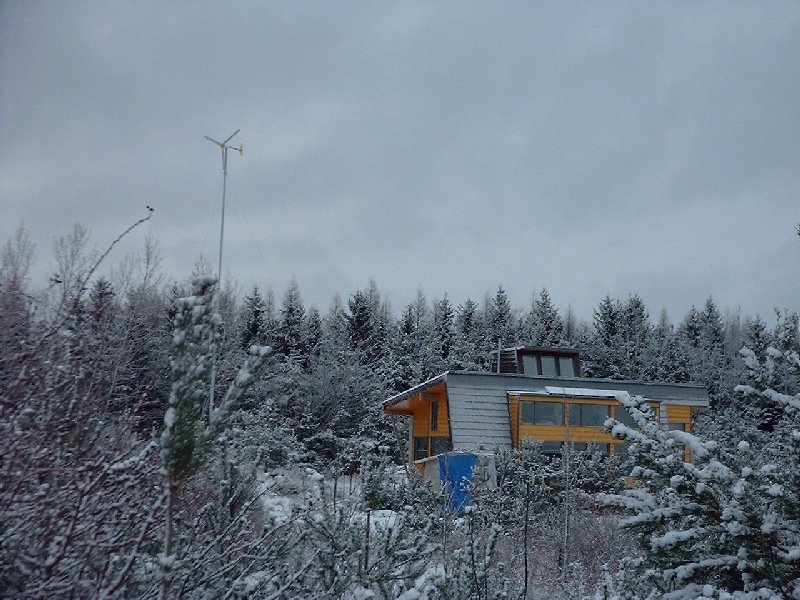
January 9, 2003 - The new wind turbine system fits in with surrounding trees.

August 30, 2003 — Wind and Solar Power
The wind and solar power system was installed by by Ben Rodgers and Leondard Allen of Phantom Electron Corporation. For more information on the solar power and wind turbine systems contact Phantom Electron Corporation at (905) 430-6512 or check out their web site at www.phantomelectron.com .
August 30, 2003 - Wind and solar power system combine with passive solar to create a comfortable home all year.
August 30, 2003 - All systems are working well through this first summer. We appear to be saving about $500 per year on our electrical bills despite the current fixed rate that does not reflect the true cost of the electricity.
August 30, 2003 - Leigh hangs our laundry out for a quick dry on this breezy sunny day.
September 20, 2003 — Fall Winds Power Colourful Change
The wind and solar power system was installed by by Ben Rodgers and Leondard Allen of Solera. For more information on the solar power and wind turbine systems contact Solera at www.soleraenergies.com .
September 20, 2003 - This beautiful fall day has the electricity meter running backwards most of the day.
September 20, 2003 - Wind and solar power are abundant on this gorgeous day.
September 20, 2003 - The sun reflects off the the zinc while the solar photo voltaic panels convert sunlight into electricity.
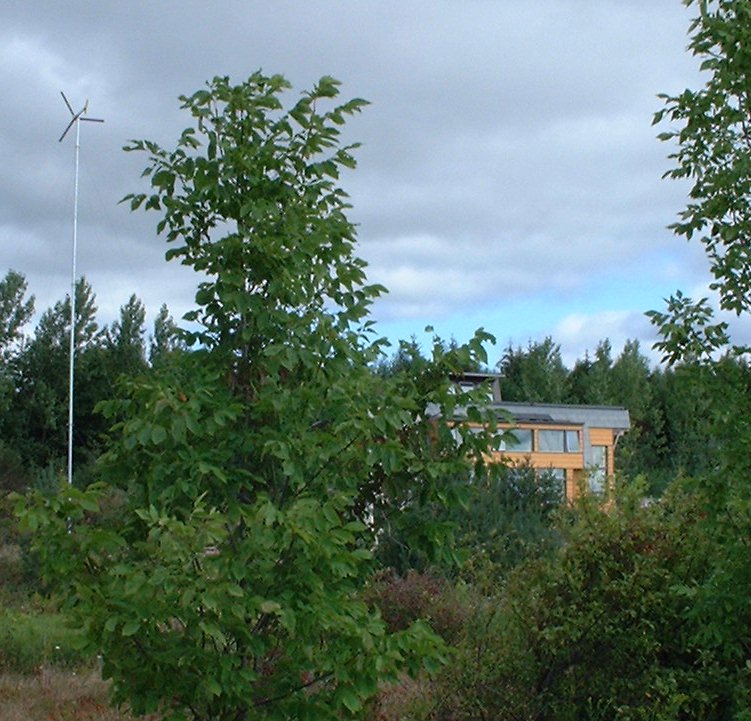
September 20, 2003 - Leigh walks back to the house. The wind turbine is visible to the left.
September 20, 2003 - Close-up on the solar panels.
September 20, 2003 - The windows provide passive solar heating.
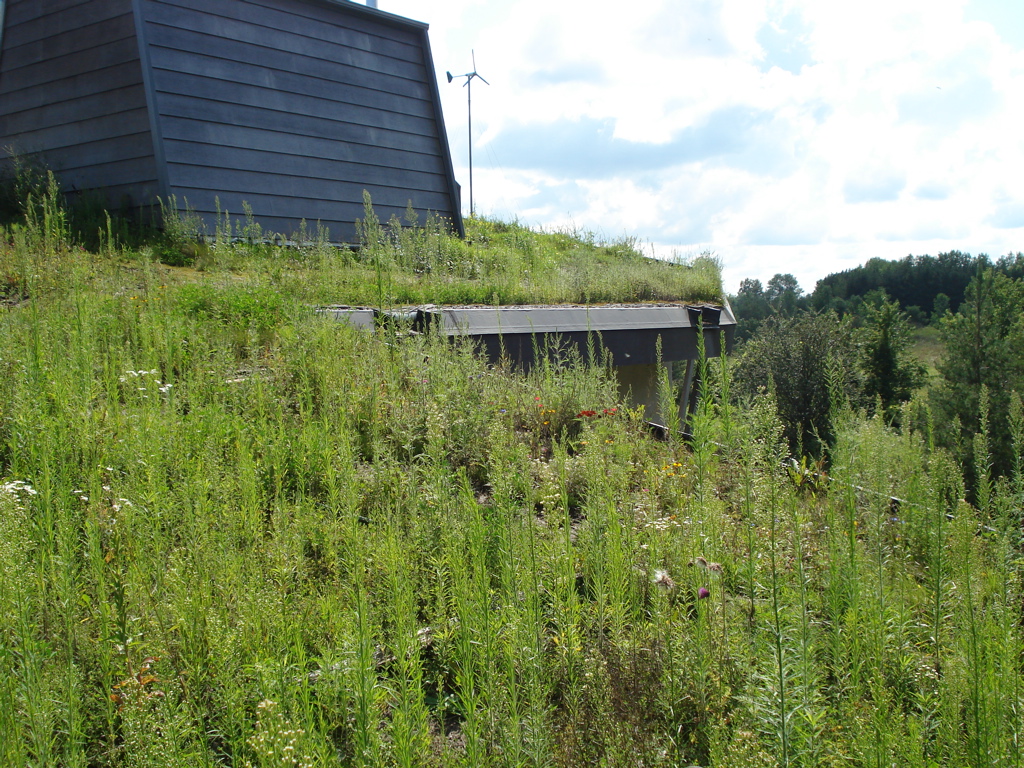
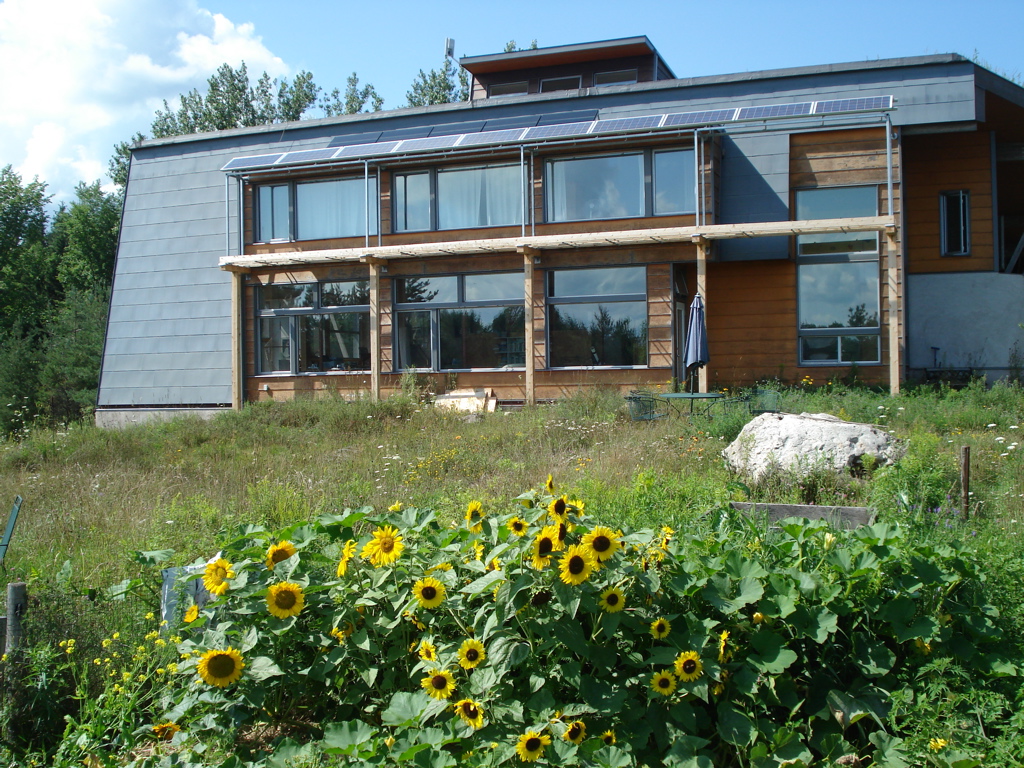
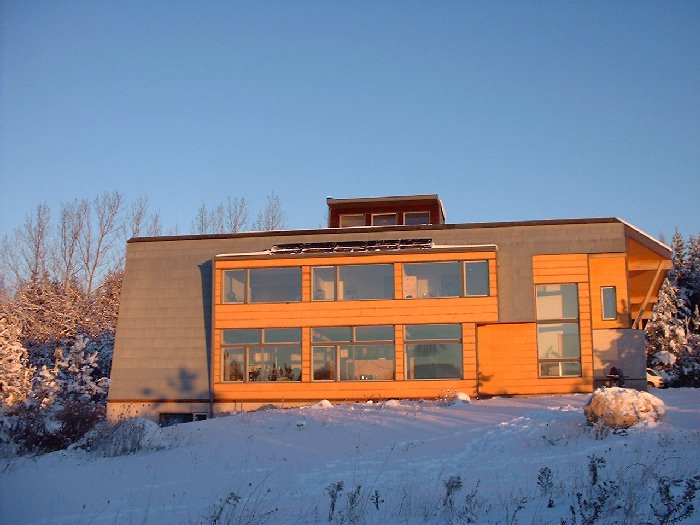
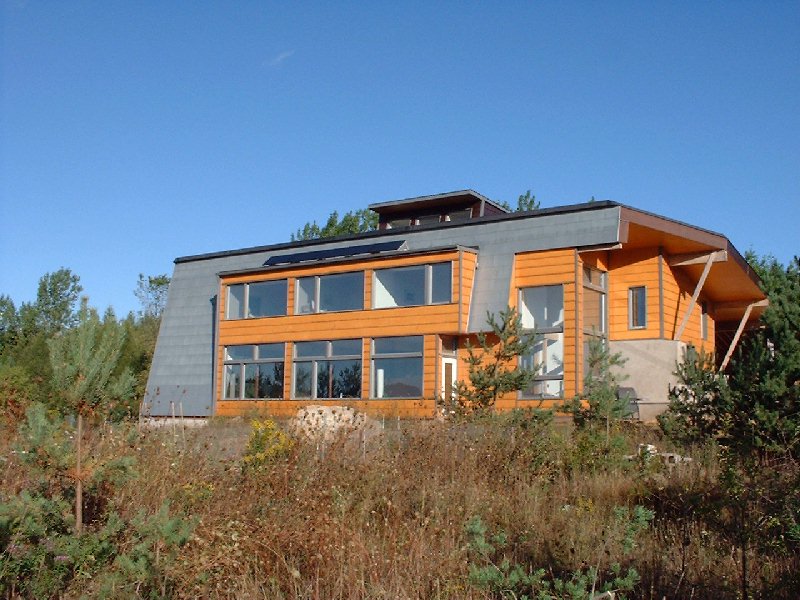
August 16, 2008 — New Solar Panels: Summer Sun Flowers Brighten Organic Vegetable Garden
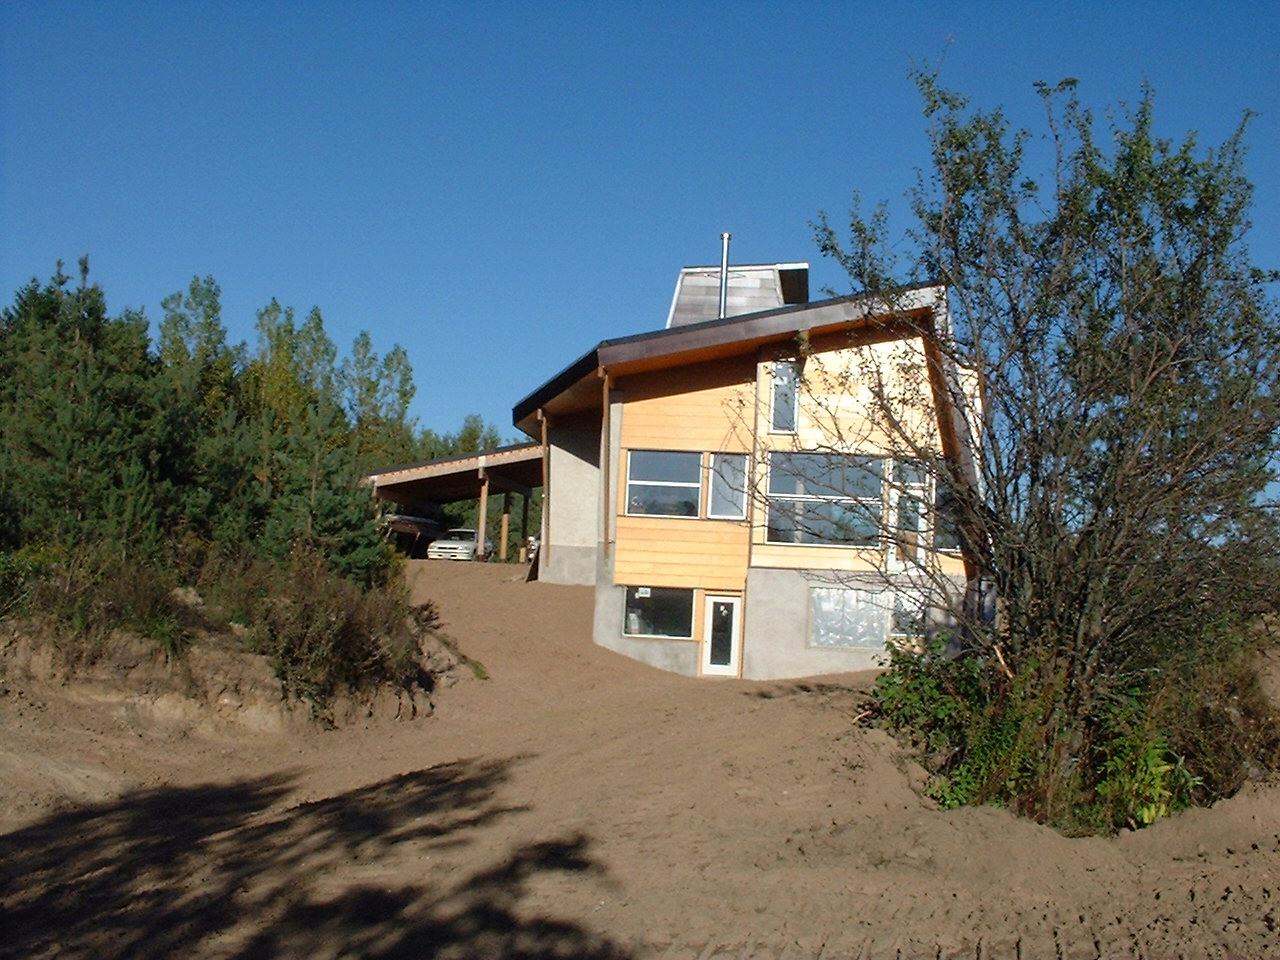
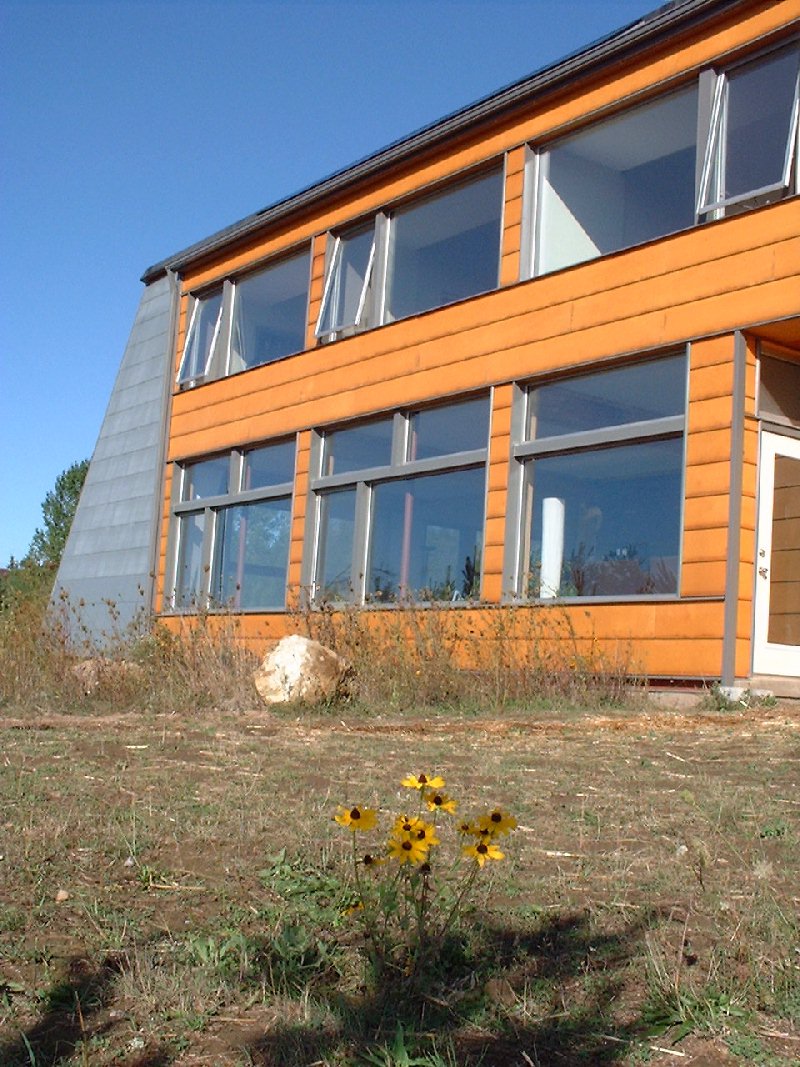
New solar panel doubles as an awning. Always planned for the south face of the house is now protected from sun in the summer and wind/rain all year long. Without the awning the south facing birch plywood has taken a much harder beating than the east and west side which are shaded by the roof. The awning will also reduce the driving rains pounding the windows in a storm as much.
August 16, 2008 - New solar awning is finally up and ready to produced electricity on the Ontario RESOP (renewable energy standard offer program). This program pays us 42 cents/kW for every kW these panels produce. The new Ontario FIT (feed-in tariff) soon to be law, through the Green Energy Act, will pay 80 cents/kW.

August 16, 2008 - Green roof is starting to grow in with native grasses, sedum and wild flowers.